We know that controlling Stable Diffusion lighting in generated images is crucial as it directly influences the appearance of objects, allowing for the desired level of realism or specific moods in the visuals.
But, capturing all nuances can be tricky, and achieving perfect control of lighting can be challenging due to the complexity of the concept of light.
That’s why, in this guide, I am sharing 4 possible ways to control lighting in Stable diffusion.
1. Use Keywords in Prompts
Each of the Stable Diffusion lighting keywords I provide below has a specific effect on the generated image.
To explain the power of lighting keywords, let me first consider some basic things:
Base Prompt: A beautiful woman, photography, realistic
Negative Prompt: Unrealistic, cropped, blurry, low quality, bad anatomy, cartoon, anime, 3D, painting, NSFW.
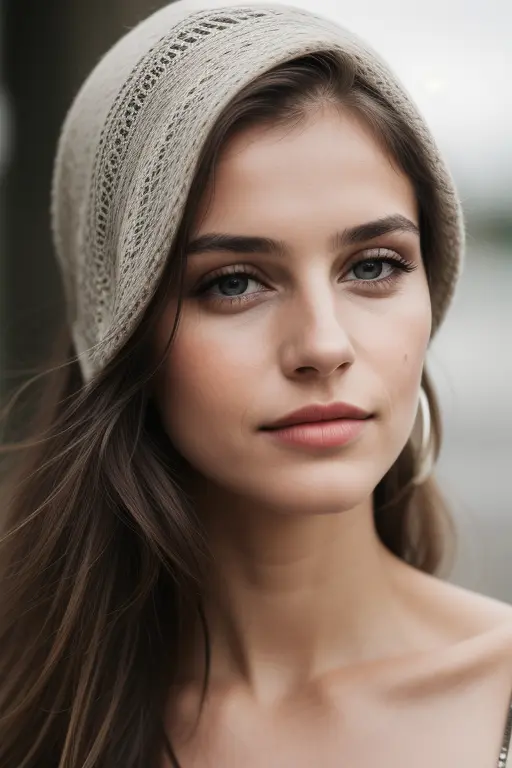
Model: AbsoluteReality
CFG scale = 7.5
Steps = 25
Sampler = Euler a
Seed = 2760683419
Width: 576
Height: 864
Now let’s explore the images’s lighting and discuss how each keyword can influence.
Volumetric: This refers to the presence of visible rays or beams of light in a space. Now let’s add the word ‘volumetric’ in the base prompt.
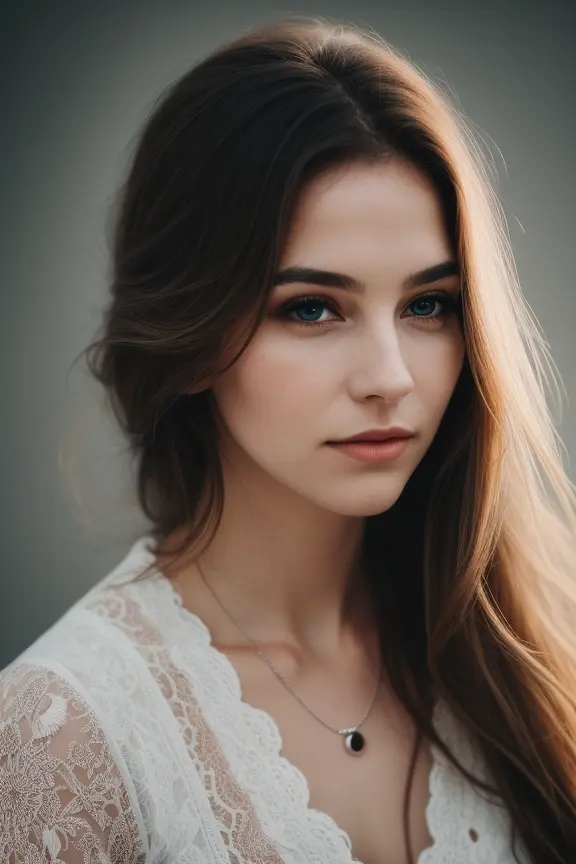
In the image, the enchantment of the light source is evident as it casts rays onto the hair, evoking a sense of magic.
Rim lighting: It is a technique where the subject is illuminated from behind, creating a bright outline around the edges of the subject.
Adding the word…
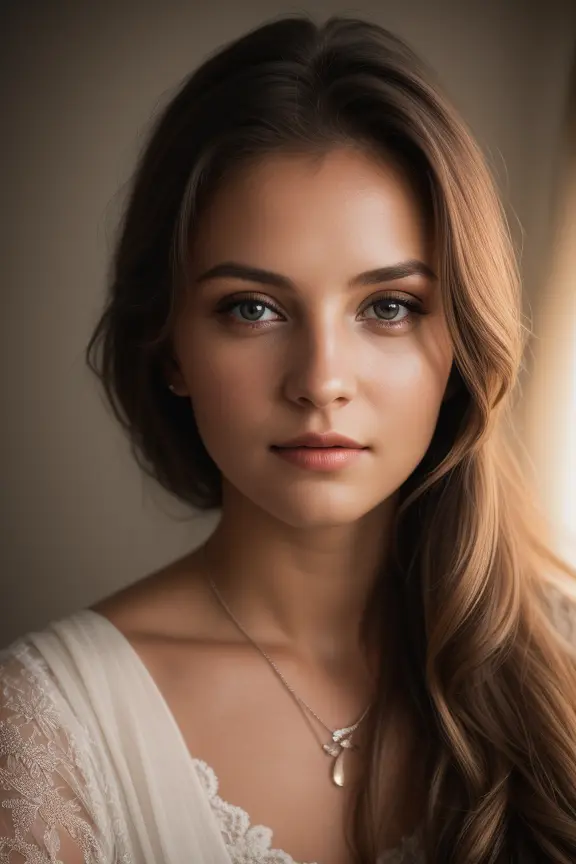
Actually, it can help separate the subject from the background and add a sense of depth.
Golden hour: It is the period shortly after sunrise or before sunset when the sunlight is softer, warmer, and diffused.
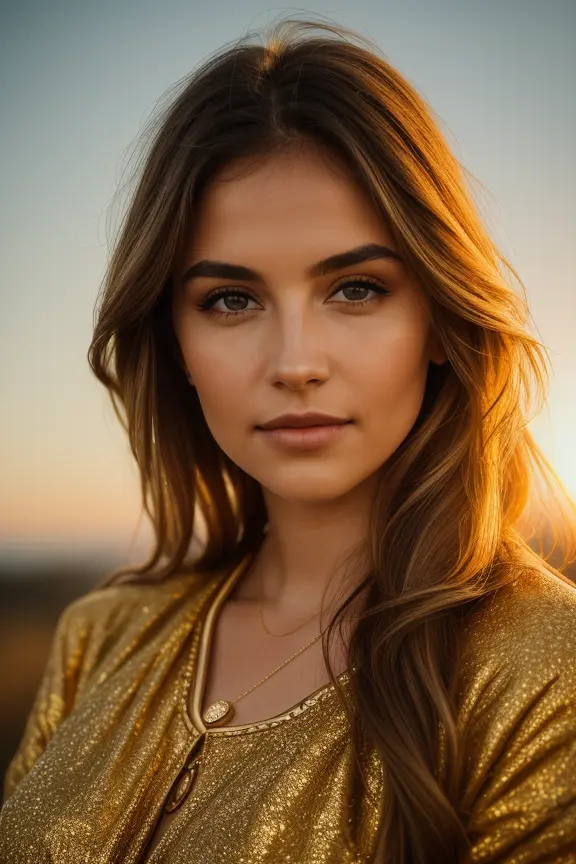
Adding the word gives a warm, golden tone to the scene and creates long, soft shadows.
Blue hour: It is the period just before sunrise or after sunset when the sky has a deep blue hue.
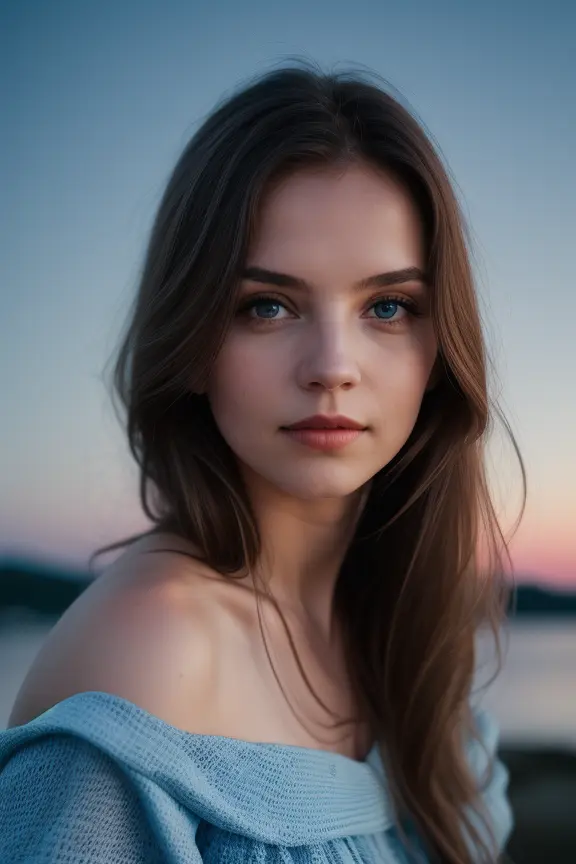
Yes, the word creates a unique, cool-toned atmosphere in the image.
Sunlight: It helps to direct light emitted by the sun.
Let’s see…
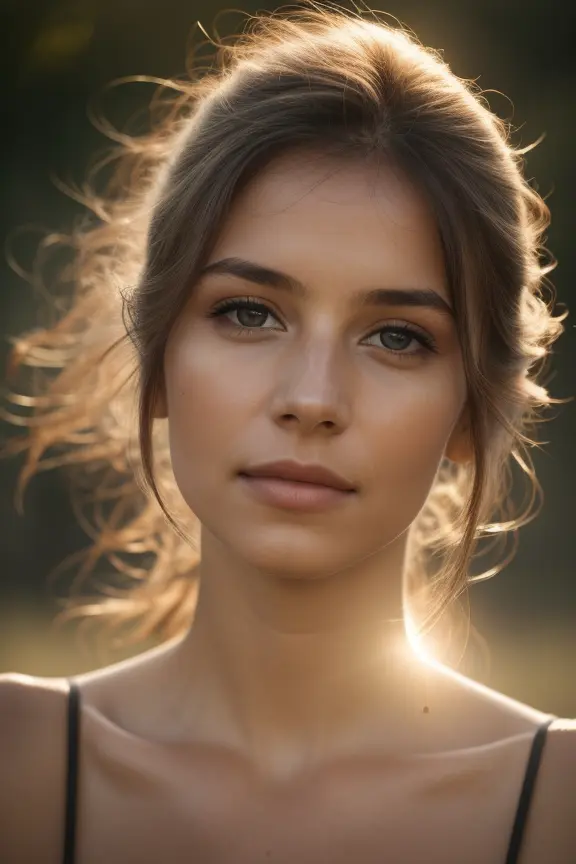
It produces pronounced highlights, revealing the sun positioned just behind the object.
Dimly light: The word helps you to create a moody or mysterious atmosphere.
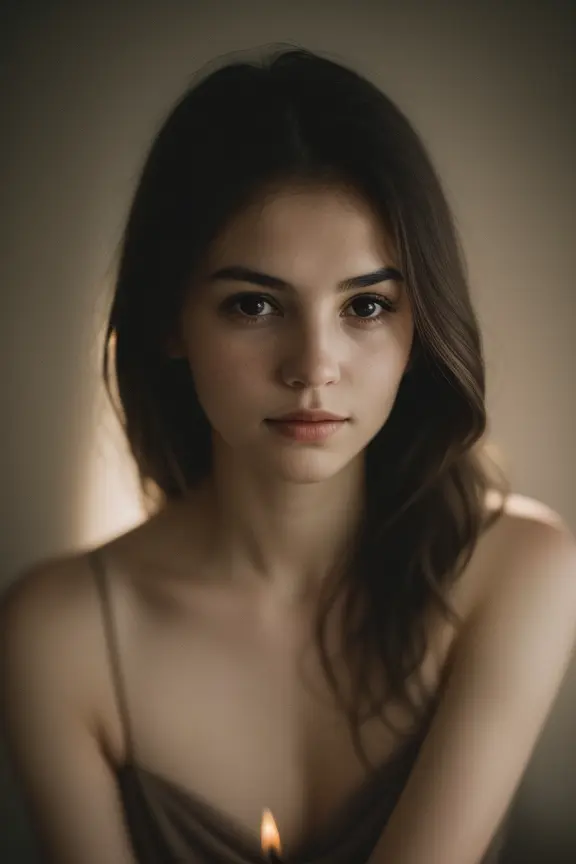
So, it is evident that the scene is not well-lit, so the overall lighting in the image will be low to use the word.
I hope by using these keywords in your prompts, you will able to guide the SD model toward specific lighting scenarios or effects and can control the scene’s mood, atmosphere, and overall feel.
Stable Diffusion Lighting Prompts:
Now, let’s delve into different stable diffusion lighting types using various prompts.
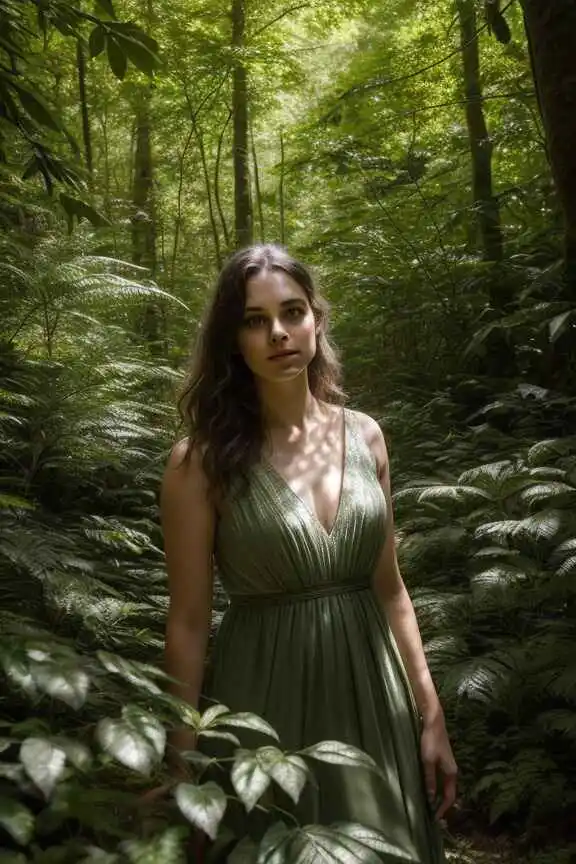
Background Location Prompt:
This refers to the setting or environment in which the scene takes place. Different locations have different natural lighting conditions.
So, let’s incorporate this in the base prompt.
Example Prompt: “A beautiful woman in a dense forest, dappled sunlight filtering through the leaves, photography, realistic.”
For Faces:
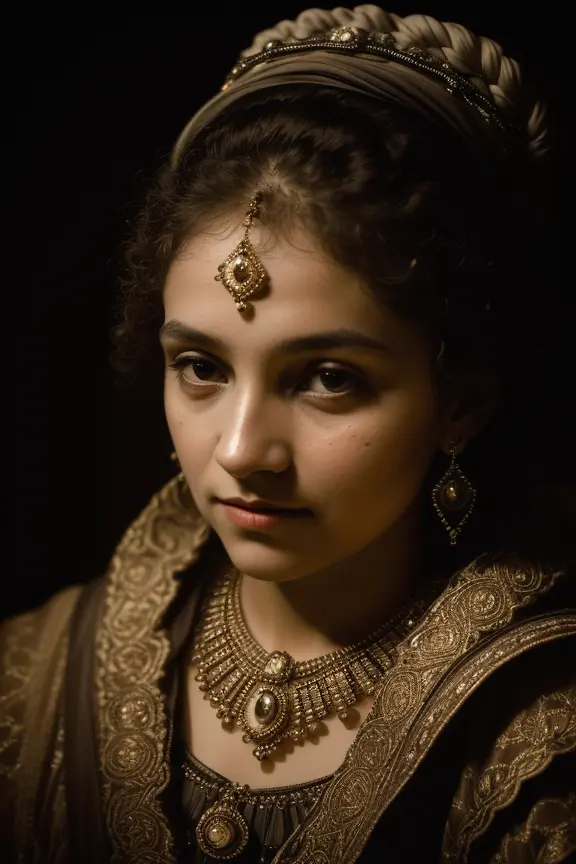
Broad Lighting: Illuminates the side of the face that is turned towards the camera, making it appear broader.
Loop Lighting: Creates a small shadow of the nose on the cheek, forming a loop-like shape on the shadowed side of the face.
Rembrandt Lighting: Named after the famous painter, this technique creates a small triangle of light on the shadowed side of the face, below the eye.
Butterfly Lighting: Produces a small, butterfly-shaped shadow just below the nose.
Adding one of the above concepts:
Example Prompt: “Rembrandt Lighting on a beautiful woman’s face, dramatic effect, photography, realistic”
Time of Day + Light:
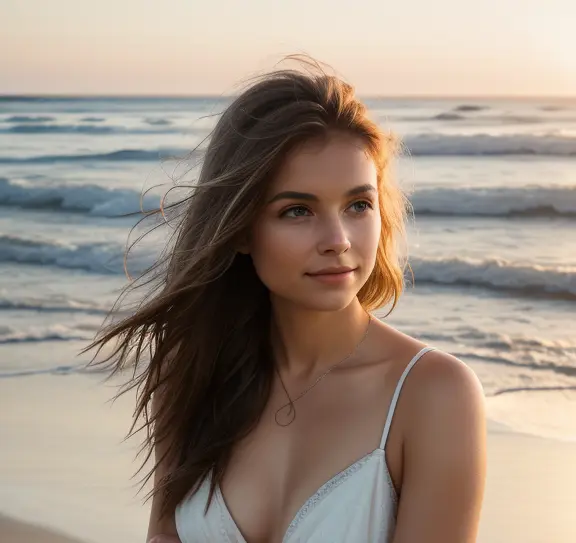
Different times of day offer varying qualities and angles of natural light, such as morning light, noon light, evening light, moonlight, starlight, dusk, and dawn.
Example Prompt: “A beautiful woman at a beach, soft, early morning light, photography, realistic.”
Shadow Descriptors:
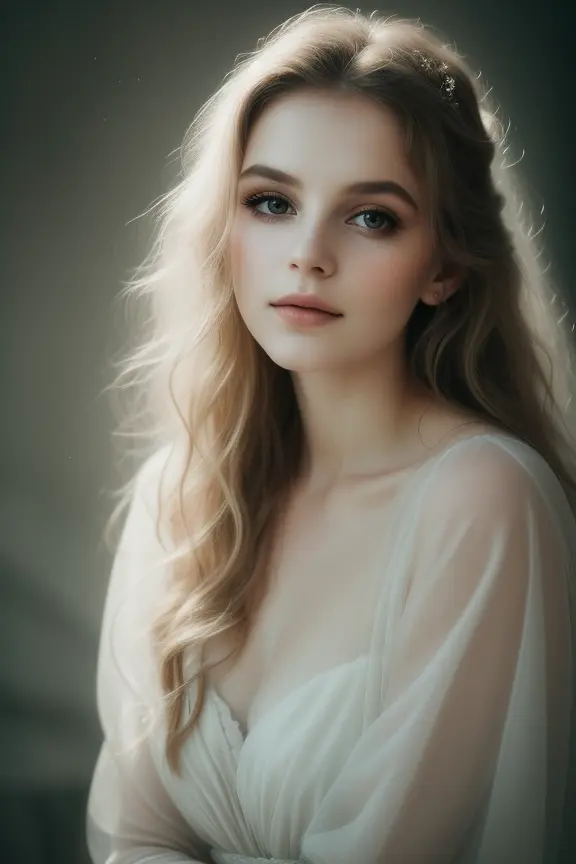
Soft Shadows: Shadows with gradual transitions from light to dark, creating a subtle, gentle contrast are called soft shadows.
Harsh Shadows: Shadows with sharp, abrupt edges, resulting in high contrast between light and dark areas are harsh shadows.
Example Prompt: “A beautiful woman, soft shadows, dreamy, ethereal atmosphere, photography, realistic.”
Stable Diffusion Lighting Styles:
High Key Lighting: It emphasizes bright, well-lit scenes with minimal shadows, often used in cheerful or upbeat settings.
Low Key Lighting: Utilizes a predominance of dark tones and shadows, creating a moody, dramatic effect.
Chiaroscuro: It is a dramatic lighting technique that emphasizes strong contrasts between light and dark areas.
Noir Lighting: A style often associated with film noir, characterized by stark contrasts and deep shadows, creating a sense of mystery and tension.
Example Prompt*: “A beautiful woman, chiaroscuro lighting to create a dramatic, high-contrast portrait, photography, realistic.”
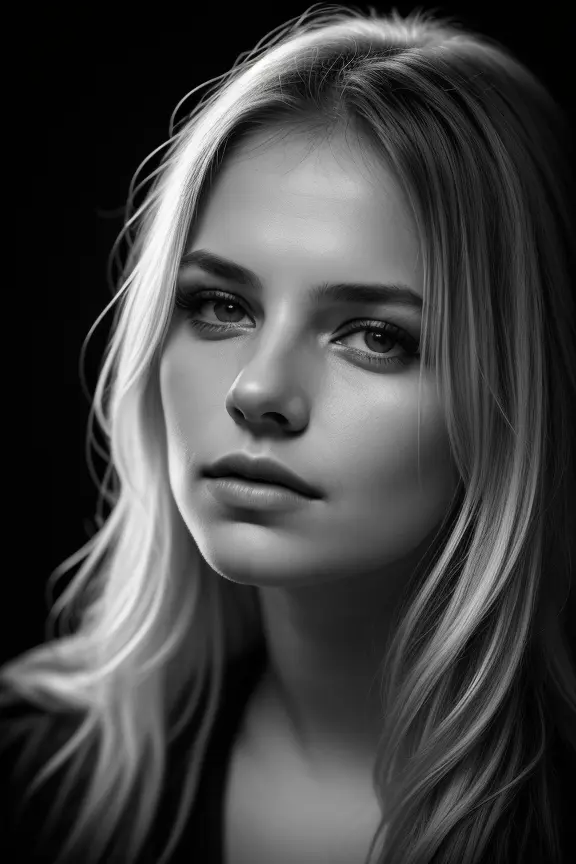
Now that we’ve gained some insight into lighting keywords, let’s explore 10 lighting prompts to assist you in setting up a scene.
Stable Diffusion Lighting Prompts Examples
| Style | Prompt |
|---|---|
| Backlighting with Silhouettes | At the edge of a serene lake, a lone figure stands on a grassy knoll, their silhouette etched against the fiery hues of the setting sun, casting long, dramatic shadows on the water’s surface. |
| High Key Lighting | Inside a contemporary art gallery, the white walls and minimalist sculptures are bathed in a flood of brilliant, even light, creating a serene and ethereal ambiance. |
| Low Key Lighting with Dramatic Shadows | In a narrow, rain-slicked alley, the cold, harsh glow of a solitary streetlamp casts long, mysterious shadows, revealing a trench-coated detective lurking in the darkness. |
| Rim Lighting on a Portrait | In a weathered, industrial loft, a passionate dancer pirouettes in front of a floor-to-ceiling window, the late afternoon sun creating a mesmerizing halo of light around their flowing form. |
| Soft, Diffused Lighting | In a quaint countryside cottage, sheer lace curtains gently diffuse the warm afternoon sunlight, casting a soft, golden glow on the worn, wooden floors and the faces of an elderly couple sitting by the window. |
| Candlelight or Firelight | Deep in a secluded forest clearing, a group of friends gathers around a crackling campfire, the dancing flames casting a warm, flickering light that paints their faces with a cozy, amber glow. |
| Neon Lights in Urban Environment | In the heart of a bustling metropolis, a street performer dons a costume adorned with neon tubes, their vibrant glow echoing off the rain-slicked pavement, juxtaposed against the cool, electric blue of the cityscape. |
| Light Painting with Long Exposure | In a moss-covered ancient forest, under a canopy of towering trees, a photographer wields a flashlight like a paintbrush, illuminating the gnarled roots and twisted branches with intricate strokes of light, capturing a surreal, enchanted world. |
| Sunset or Golden Hour Lighting | On a remote, windswept beach, a lone surfer catches the crest of a wave, backlit by the warm, golden rays of the setting sun, casting long, dreamlike reflections on the shimmering, iridescent sea. |
| Underwater Lighting with Bioluminescence | Within a hidden underwater cave, a school of fish with bioluminescent scales swims through the dark, silent depths, leaving a mesmerizing trail of soft, ethereal light, illuminating the ancient, rocky walls with an otherworldly beauty. |
Also read: Best Stable Diffusion Portrait Prompts
Depending on the specific context and your creative vision, feel free to modify the prompts or combine elements to achieve the desired effect.
And I hope these detailed prompts help you create some truly captivating images!
Now we explore some techniques to increase and decrease the model’s attention to specific words.
2. Use () and [] Modifiers:
Now we’ll show you how to control lightning using a simple technique involving () and [] modifiers.
Actually, these modifiers allow you to emphasize or de-emphasize specific words in your instructions, ensuring that your message gets across clearly.
So, let’s see in detail…
Using () Modifiers:
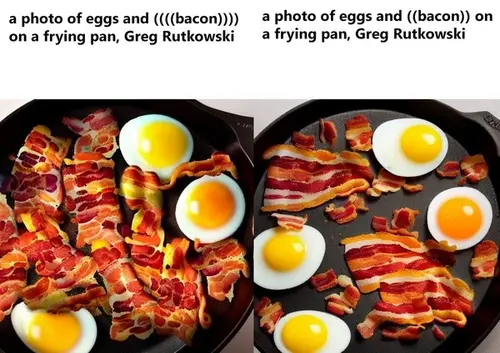
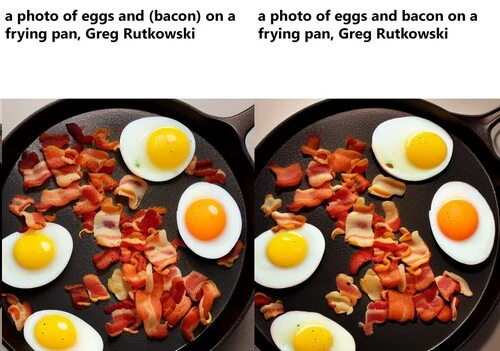
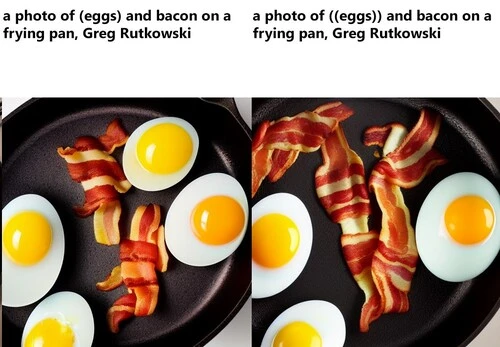
If you closely observe these three pairs of images, it’s easy to understand that the () modifiers function as a tool to draw attention to the enclosed words.
Think of it as a spotlight, shining a brighter light on the words you enclose.
For example:
(power) increases attention to “power” by a factor of 1.1.
((intense)) raises attention to “intense” even further, with a factor of 1.21.
Using [] Modifiers:
On the other hand, the [] modifiers do the opposite.
They decrease attention to the enclosed words. It’s like dimming the spotlight, making those words less prominent in your instruction.
For example:
[gentle] decreases attention to “gentle” by a factor of 1.1.
[[subtle]] decreases it even further, with a factor of 0.907.
Combining Modifiers:
You can also combine these modifiers to fine-tune your instructions. This allows for precise control over how the SD model interprets your input.
For example:
a (power:1.5) increases attention to “power” by a factor of 1.5.
a [gentle:0.5] decreases attention to “gentle” by a factor of 0.5.
Escaping Characters:
If you want to use ()[] characters in your prompt without them being interpreted as modifiers, simply use a backslash to escape them.
For example, if you want to mention a term like “anime_(character)”, use the backslash to ensure it’s understood correctly.
Finally, for this case, by mastering the use of () and [] modifiers, you gain the ability to precisely control lightning and any other instructions you give.
3. Use Regional Prompter Extension
Do you want to take your image lighting to the next level?
With the Regional Prompter extension, you can have precise control over the lighting in specific areas of your images.
No more one-size-fits-all approach!
Let me guide you through the simple steps to make it happen.
1. Getting Started:
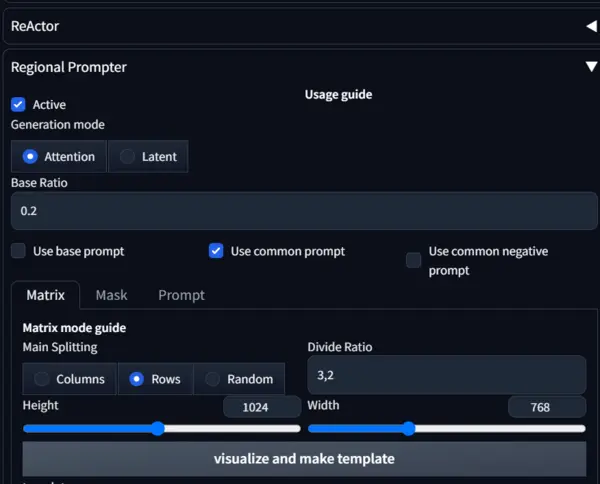
- Open the txt2img page and find the Regional Prompter section.
- Activate the Regional Prompter.
2. Setting Up the Regions: Choose the following options
- Active: Yes
- Generation Mode: Attention
- Use common prompt: Yes
- Split mode: Vertical
- Divide Ratio: 3, 2
- Click “visualize and make template”.
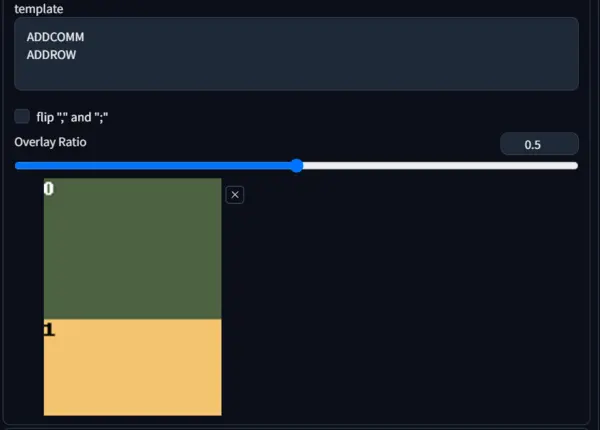
3. Creating Your Prompt:
Keep in mind that prompts should be separated by the keyword BREAK.
Actually, adding a BREAK keyword (must be uppercase) fills the current chunks with padding characters. Adding more text after BREAK text will start a new chunk.
Prompt:
A beautiful woman, photography, realistic
BREAK
(bright light:1.2), (volumetric:1.2),
BREAK
(soft light:1.4)
Where,
- Common prompt: A beautiful woman, photography, realistic,
- Prompt for region 0: (god rays: 1.2), (volumetric lighting: 1.2)
- Prompt for Region 1: (dimly lit: 1.4)
Now, see the magic happen:
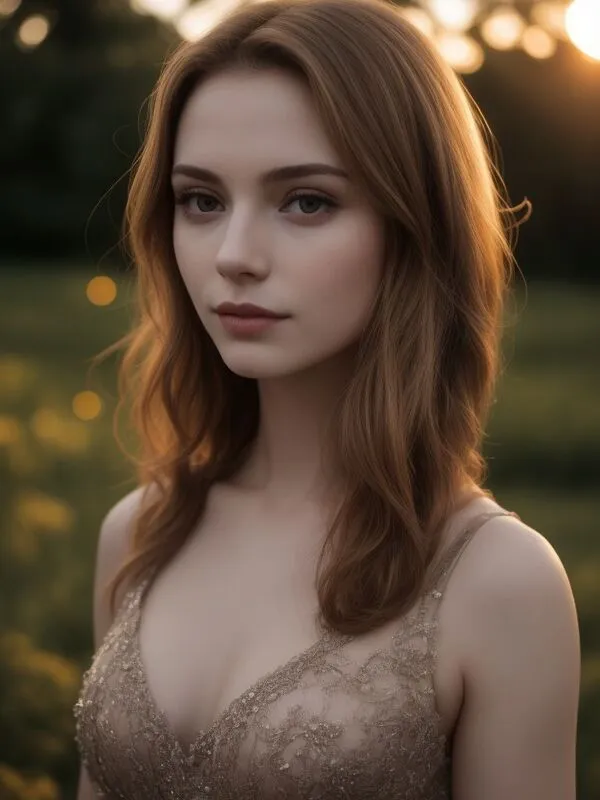
If you need more dark on the lower portion try to use dark instead of soft.
With the Regional Prompter extension, you now have the power to craft distinct visual and lighting effects in different parts of your image.
4. SD Lighting Control with CnotronlNet
If you’ve perused the article, I hope you’ve grasped that, up until now, we’ve explored different techniques for lighting control related to prompts.
Now, let’s delve into the concluding segment of the content, where we employ ControlNet to manage lighting.
Believe me, it’s a cool way to tweak the lighting in your pictures.
Here’s how:
First of all, make sure you have installed the ControlNet extension.
Methode 1:
Now, use Txt2img to create an image using the same base prompt and negative rompt and save it to your device.
After generating the image, hit ‘Send to img2img, and on img2img, go to ControlNet and upload your light source image.
Methode 2: For my case, I am using this method, i,e; uploading the generated image in the PNG File section as shown below.
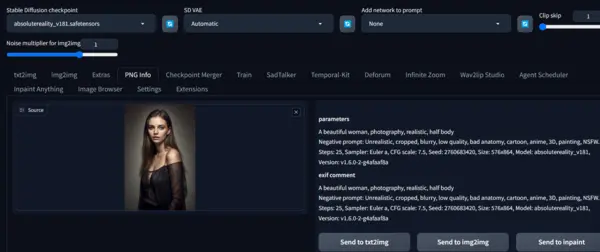
Now hit imgtoimg and go to ControlNet for setting up.
Use these settings:
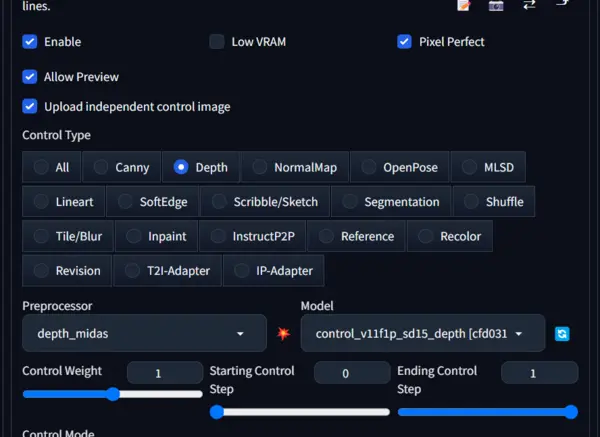
- Enable: Yes
- Pixel Perfect: Yes
- Allow preview: Yes
- Control Type: Depth
- Preprocessor: depth_midas
- Model: control_v11f1p_depth
- Control Weight: 1
Now remove the image from img2img canvas and upload an image that defines the lighting you want. In my case, the image is:
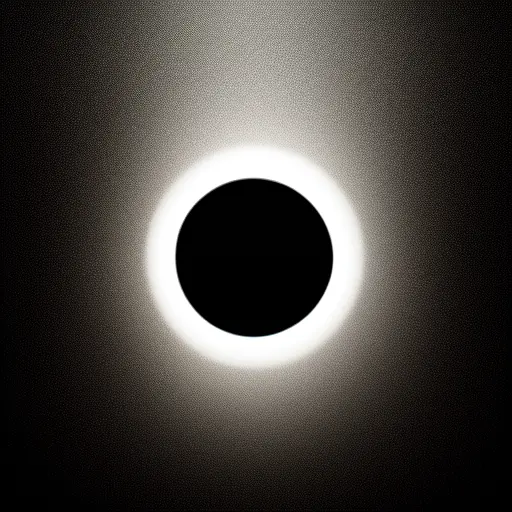
Now set resize mode to Just Resize, denoising strength to 0.91, and click Generate, and voila!
Your images now have cool lighting effects.
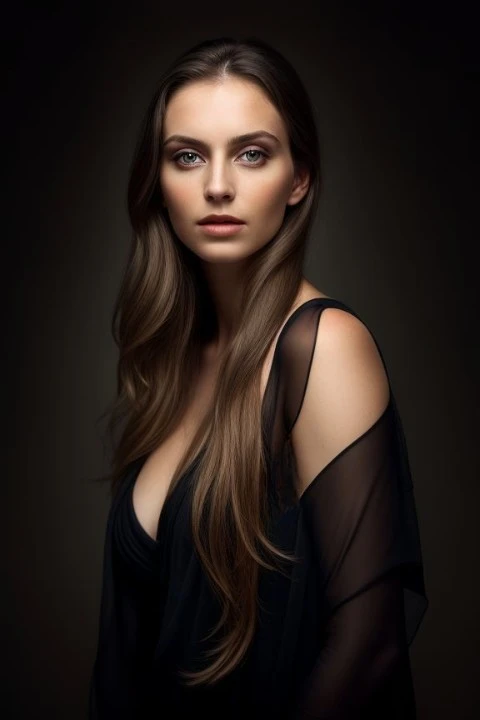
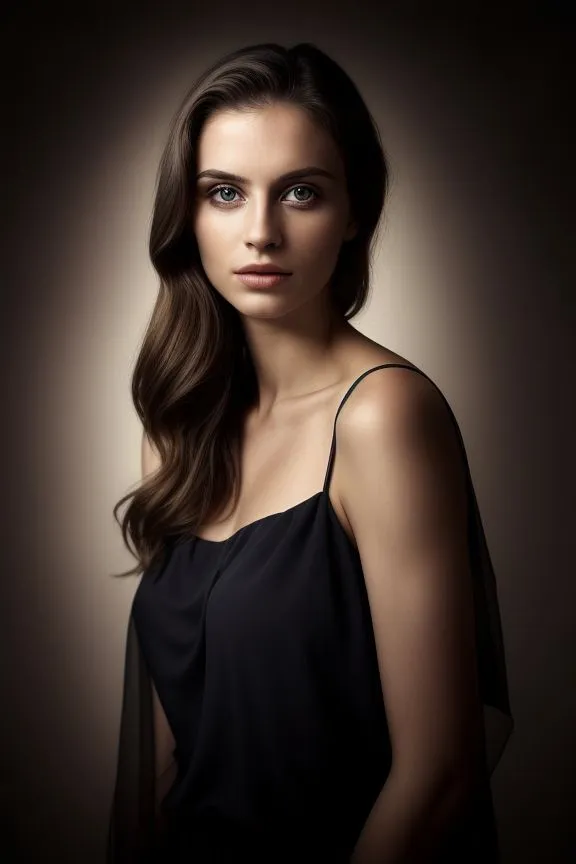
In the imgtoimg canvas, you can also edit the light image using the pencil icon.
So, now, let’s utilize the brighter area of my light source image and click generate.
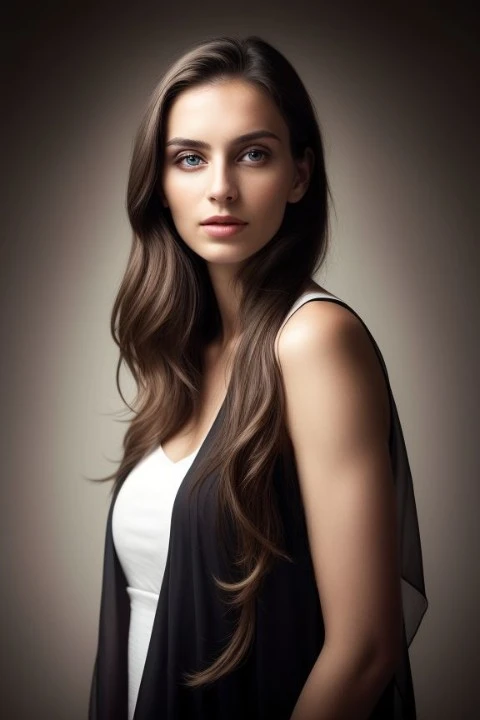
If you closely observe you can see that the image is now brighter than the previous one.
In this way, you can edit the light image or use different light images for your experiment.
Now, if you need a visual tutorial may watch the YouTube video, in this video, you also find 8 more light images that you can download easily.
Final verdict:
You know every perfection depends on experiment and practice. Therefore, explore various ControlNet models and preprocessors.
Adjust the Control Weight if the colors appear odd, and experiment with denoising strength for different effects.
Finally, in my experience, these are the ultimate methods for controlling lighting in Stable Diffusion.
If there’s anything I’ve overlooked, please feel free to let me know by commenting below.

Hi there! I’m Zaro, the passionate mind behind aienthusiastic.com. With a background in Electronics Science, I’ve had the privilege of delving deep into AI and ML. And this blog is my platform to share my enthusiasm with you.
