I hope you’re considering Google Colab alternatives for stable diffusion, driven by dissatisfaction with changes in Colab’s offerings, including pricing and potential service limitations.
Because we all know the need for cost-effective and powerful computing resources to execute Stable Diffusion tasks. Right!

Worry not, my friend, for you are not alone; I too have pondered this.
And after a lot of research and testing, I’ve compiled a list of alternatives to Google Colab to use stable diffusion.
These options include the use of Automatic1111 and other stable diffusion WebUI, just as you desire.
So, without further ado, let’s discover them.
Best Google Colab Alternatives for Stable Diffusion
As Automatic1111 is quite popular, let’s start with alternatives that work well with A1111. But you can also try out other WebUI options.
We not only give you alternatives but also guide you on how to use them, highlighting the pros and whether coding knowledge is needed.
1. Amazon Sagemaker Studio Lab (Free)
SageMaker Studio Lab is a free, cloud-based environment for learning and experimenting with machine learning (ML).
It provides all the essentials, including a 4-hour GPU and 8-hour CPU per day, to jumpstart your ML journey, eliminating the need for any setup or configuration.
So, it can serve as your top-notch Automatic1111 Colab alternative. Right!

How to Get Started:
Getting started with SageMaker Studio Lab is as easy as 1-2-3:
- Request a Studio Lab account,
- Create your Studio Lab account,
- Sign in to Studio Lab and start your creativity.
1. Request a Studio Lab account:
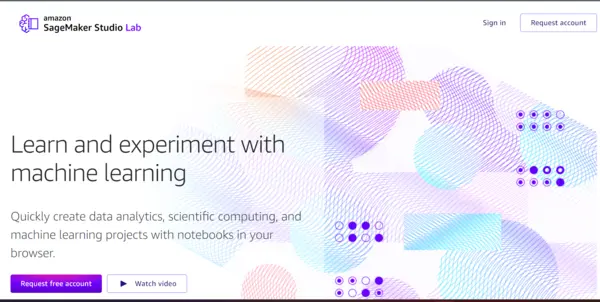
- Navigate to the Studio Lab landing page.
- Select “Request account.”
- Fill in the required information in the form.
- Click “Submit request.”
Shortly after, the SageMaker Studio Lab Team will email you a confirmation stating,
” We will email you a link to create your account once your request is approved. No further action is needed on your part at this time.”
So, it is confirmed that now it’s time to wait.
But fear not within 5 business days, you will get an approved email from Studio Lab, in my case I got it within 2 days.
I hope you also get approved.
In the approved email you will get instructions and a link to create your SageMaker Studio Lab account.
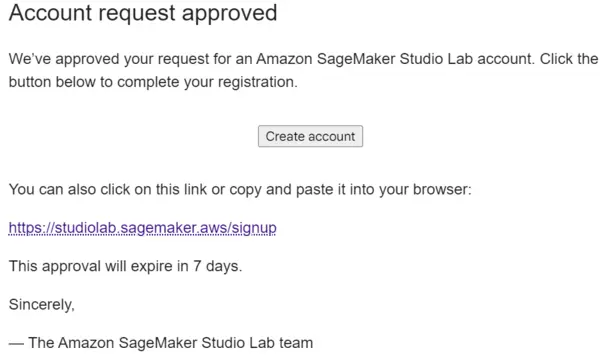
2. Create a Studio Lab account:
- After approval, open the account request approval email and select “Create an account.”
- Provide your Email, mobile no, Password, and Username on the new page.
- Solve any CAPTCHA puzzle if prompted.
- Click “Create account.”
Now,
3. Sign in to Studio Lab:
- Go to the Studio Lab landing page.
- Select “Sign in.”
- Enter your Email or Username and Password.
- Solve the CAPTCHA puzzle which will be prompted.
- Click “Sign in” to access your project.
Note: Account requests are subject to approval, and the process may take up to five business days. Your request will be denied if your email is associated with activity violating terms of service.
If your account is approved and you need a notebook to kickstart your usage, try the notebook created with SageMaker Studio Lab.
Remember, I didn’t create this notebook, but I’m using it, and it truly works. You also get a tutorial link with it that guides you in using the notebook.
Now, before using SageMaker Studio Lab, let’s explore some pros and cons, based on my prior experience using it.
Pro & Cons:
| Pros | Cons |
|---|---|
| Free and accessible: You don’t need an AWS account or credit card to use Studio Lab. | As it is free, starting with GPU can sometimes be challenging. |
| Jupyter Notebooks based: It uses the familiar and open-source JupyterLab IDE, allowing you to create and execute code notebooks. | While the GPU is beneficial, the CPU may not be as useful for SD users. |
| Preconfigured environment: You don’t need to worry about setting up virtual machines or installing libraries. | The speed of image generation is not fast enough. |
Our Verdict: In my view, Sagemaker Studio Lab stands out as the best choice to use stable diffusion-free, offering a robust 4-hour GPU per day, provided you can overlook the cons mentioned in the table above.
However, if you find yourself uncertain about your approval and require a user-friendly platform, consider exploring the alternative below.
2. ThinkDiffusion (Paid)
For those seeking the full range of Stable Diffusion’s offerings, Think Diffusion is your platform to create stunning visual assets.
Here you can utilise your private and personal art lab in the cloud through any WebUI of Stable Diffusion.

How to Get Started:
Getting started with ThinkDiffusion is pretty simple.
So, simply visit ThinkDiffusion and log in using your email and password – that’s all.
You are ready to use ThinkDiffusion free of cost but for a limited time, 2 hours. After satisfying the service you may purchase more runtime.
Pricing Details:

ThinkDiffusion’s pricing details are pretty simple and easy to understand for everyone as you see in the above image.
If you opt for the TD-Pro plan, it costs $419.99 per month but offers you the freedom to enjoy a 20% discount for using any GPU.
Alternatively, you can choose the Pay-as-You-Go plan, starting from $0.59 per hour.
Pro & Cons:
| Pros | Cons |
|---|---|
| You can upload any model with 1-click for free from Civitai. | Very Costly compared to other platforms. |
| Numerous extensions come preloaded, and you are also free to install any additional extensions as you wish. | At times, the GPU may not function correctly and could potentially waste your runtime. |
Our Verdict: As you know, managing all the elements of stable diffusion is quite challenging, and if you’re looking for a platform that frees you from all the hassles, you can give ThinkDiffusion a try, especially for the free 2-hour usage.
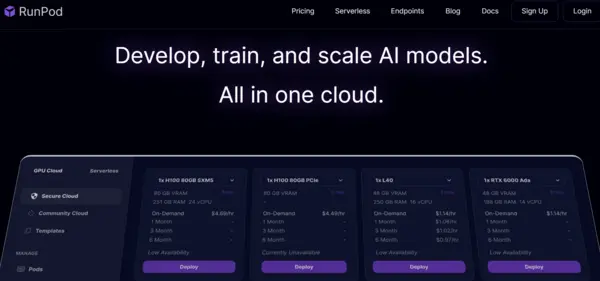
3. RunPod.io (paid)
RunPod.io is a cloud platform made to help you easily use and afford AI and machine learning.
How to Get Started:
So, if you want to try it, follow the below steps:
1. Firstly, visit Runpod.io to sign up and connect to Jupyter Lab.
2. Now, choose the corresponding notebook based on your objective:
- Select RNPD-A1111 if you want to run the A1111 UI.
- Choose one of the DreamBooth notebooks if you wish to train your own model.
3. You can also use the Official Stable Diffusion Template; just ensure you use the template provided by Runpod.
The template includes features like an easy ControlNet installer, offset_noise for DreamBooth, tight integrations with HuggingFace, and more.
For a detailed tutorial, you may watch the following YouTube video to use Runpod effectively.
Pricing Details:
Runpod’s pricing is genuinely economical and swifter than other platforms.
And there are a lot of pricing details for various GPU units in Runpod.
But You can commence your journey with the platform’s on-demand server cloud service at $0.19 per hour, featuring RTX A4000 with 16 GB VRAM, 23 GB RAM, and 4 vCPU.
Pro & Cons:
| Pros | Cons |
|---|---|
| Ready-made templates for stable diffusion make our work so easy. | Running costs are high for fast generation. |
| You can deploy stable diffusion within 260 ms. | A few mistakes may result in extra dollars. |
| There are plenty of options to choose from, such as GPU and WebUIs. | While templates are ready, some experience is still needed for effective use. |
Our Verdict: If you need a fast GPU at the most affordable price compared to Google Colab Pro, Runpod is the best option.
However, when it comes to handling all elements of stable diffusion, it is easier in Google Colab.
As we already know some alternatives that allow you to use any WebUI for stable diffusion, now I am going to explore some additional WebUIs you may want to check out as well.
4. InvokeAI for Stable Diffusion (Free & Paid)
It is a robust creative engine built on top of the open-source Stable Diffusion model. This unquestionably empowers professionals, artists, and enthusiasts like you to generate and create stunning visual media.
How to get Started:
Here, I’ll quickly guide you on installing InvokeAI and running it locally on your computer to access its core features.
- Visit the InvokeAI Github page: https://github.com/invoke-ai/InvokeAI.
- Under “Quick Start,” select your operating system and follow the installation guide.
- Once installed, open the WebUI by navigating to http://localhost:9090.
- Now you can experiment with text prompts, explore image-to-image features, and customize your creations using various settings.
If the process isn’t clear in this brief explanation, don’t worry.
An in-depth tutorial on InvokeAI will be posted in a few days. Meanwhile, assess the pros and cons to make an informed decision.
Pricing Details:
You can download, install, and run the core Invoke AI image generation toolkit for stable diffusion locally on your machine at no cost.
However, if you wish to utilize the platform’s Cloud generation feature, there is a monthly fee of $14.99.
Pro & Cons:
| Pros | Cons |
|---|---|
| Easy to understand interface compared to Automatic1111. | Limited customizable options, unlike A1111. |
| The best part that makes it unique is Unified Canvas. | Limited tutorials are available on the internet. |
Our Verdict: As it is open source, you can opt for it if you have the technical know-how to navigate stable diffusion.
However, keep in mind to employ a detailed prompt while using it, as its NSFW filter does not work most of the time.
5. FooocusAI for SD (Free)
This is user-friendly software based on the Stable Diffusion model that gives you Midjourney-like experiences for generating images from text prompts or modifying existing images.
How to Get Started:
To get started with FooocusAI, follow these general steps:
1. Download Fooocus:
Visit the official Fooocus repository on GitHub:
Search for download and Click on the “Download” button, or use the provided link for direct download.
2. System Requirements:
Now, ensure that your system meets the minimal requirements mentioned in the readme for the operating system, GPU, GPU memory, system memory, and system swap.
3. Installation:
After downloading, unzip the file.
Run the “run.bat” file to launch the software.
During the first launch, Fooocus will automatically download models.
You also can download them manually if needed.
4. Usage Instructions:
After installation, you can explore the different features and functionalities, such as text-to-image generation, prompt processing, and various advanced options.
5. Advanced Features (Optional):
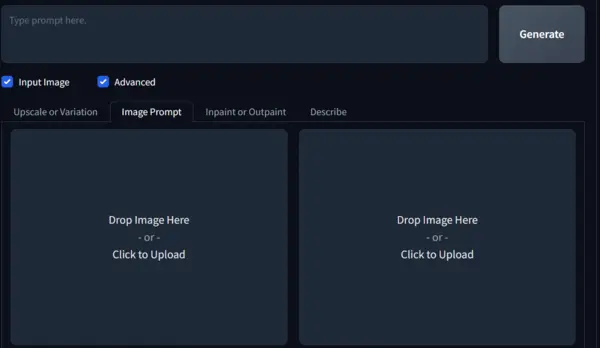
If you’re an advanced user, there are specific features like the image prompt designed for you. You can browse the advanced features by clicking on ‘Advanced’ like below.
Pros & Cons:
| Pros | Cons |
|---|---|
| Open-source nature: Free to use and modify by anyone. | It takes a significant amount of time to generate images. |
| Ease of use: Requires minimal technical knowledge and installation is simple. | There are limited models available for testing. |
| Powerful functionalities: Supports text-to-image, image-to-image, inpainting, outpainting, and more. | Few options are provided to enhance creativity, unlike Automatic1111. |
Final Verdict:
This is our list for using stable diffusion as an alternative to Google Colab Pro.
I hope you grasp all the essential points to decide whether to stick with or switch from Google Colab Pro.
In our view, you might consider giving SageMaker Studio Lab a try as it is free and provides a high-power GPU for 4 hours each day.
However, the final decision is yours. If you have any questions or need further information, please feel free to comment below.

Hi there! I’m Zaro, the passionate mind behind aienthusiastic.com. With a background in Electronics Science, I’ve had the privilege of delving deep into AI and ML. And this blog is my platform to share my enthusiasm with you.