We all know that Stable Diffusion AI is an outstanding for generating images.
But in our experience, the key to generating an awesome image in Stable Diffusion AI lies in prompts.
However, writing a good Stable Diffusion prompt is the challenging part of producing a perfect image.
That’s why today we walk through the process and techniques to build a perfect prompt.
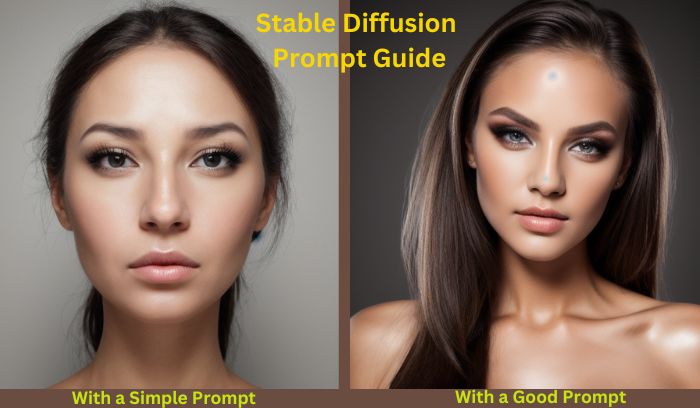
This guide is developed through numerous experiments and user input gathered from Reddit discussions.
So, without delay, let’s start with prompt components.
Components of an Effective Stable Diffusion Prompt
The text prompt should be detailed and specific to generate your desired image.
You don’t need to write an excessively long prompt because very long prompts can confuse Stable Diffusion AI to generate your desired output.
You just need to input some specific keyword categories that indicate to the platform what you want.
The keyword categories are:
- Subject
- Medium
- Resolution
- Lighting
- Color
- Camera Angle/Focus
- Art Style
Remember, you don’t need to include all the keyword categories in your prompt. Choose wisely, as failure to do so may result in the inability to produce the desired image.
To help you understand the importance of these keywords, here, I provide a detailed image example for each category.
To test all of the prompts I am using Automatic1111 WebUI and Absolute Reality v1.8 model.
So, let’s review each category and generate some images by adding keywords.
Subject
The subject in a text prompt for generating images using Stable diffusion AI is the primary focus of what you want the image to depict.
It can be a single object, a person, a scene, or even an abstract concept.
Your prompt should begin with a clear and concise description of the main subject.
For example, if you desire a picture of a beautiful woman, simply state “woman.”
But for this, the main subject keyword lacks sufficient details in this category.
So, we need to include additional things as our subject category keyword.
This could include appearance, attire, location, background scene, standing or sitting position, facial features, etc.
As a demonstration, below are two images:
one utilizes only the main subject, which is “A beautiful Ukrainian Girl,” and the other incorporates all the necessary subject keywords.
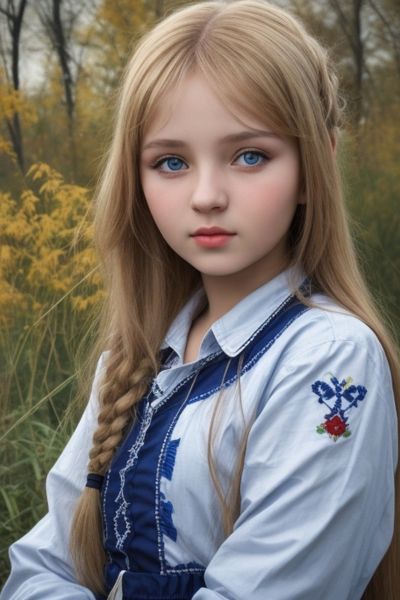
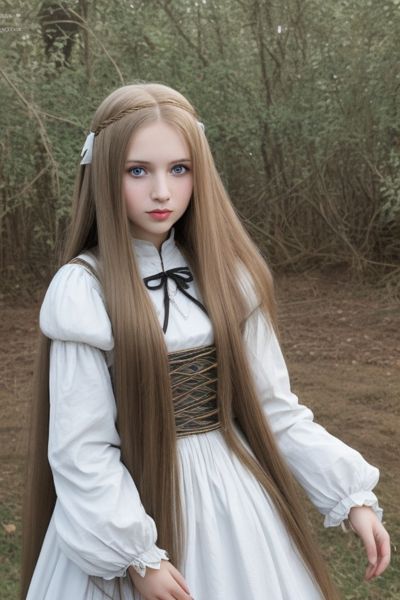
Prompt with Subject Keywords:
A beautiful ((Ukrainian Girl)) with very long straight hair, full lips, a gentle look, and very light white skin. She wears a medieval dress.Medium
The medium in Stable Diffusion refers to the materials and techniques used to create a masterpiece. This can be anything from paint and canvas to digital manipulation or even found objects.
Stable Diffusion takes the medium you specify in your prompt as a guide for the artistic style of the generated image.
For example, using “oil painting” will likely result in a different style than “3D rendering”.
Even more subtle differences, like choosing “digital art” instead of just “illustration”, can influence the final output.
Here in our prompt, I used “3D Rendering” as my medium.
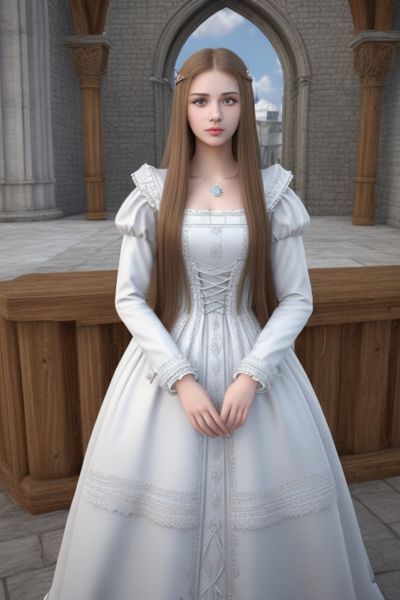
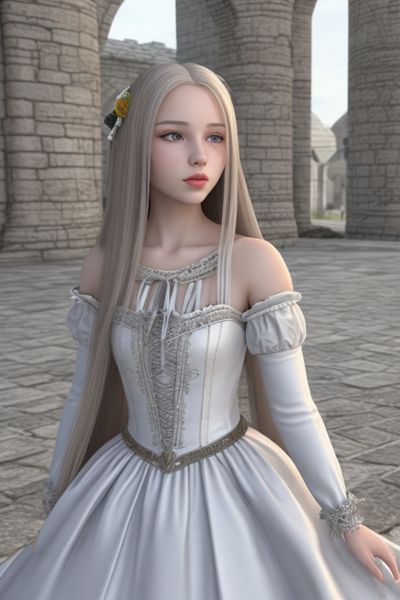
Prompt:
A beautiful ((Ukrainian Girl)) with very long straight hair, full lips, a gentle look, and very light white skin. She wears a medieval dress. 3D renderingThis highlights how even a single keyword related to the medium can have a significant impact on the resulting image.
This shows the importance of being specific and intentional when crafting your prompts to achieve the desired style.
Here is a list of different keywords you can use in your prompt as a medium:
- Oil Painting: For rich and textured brushstrokes.
- Watercolor: For soft, ethereal tones and washes.
- Acrylic Paint: For vibrant, bold colors and smooth textures.
- Pen and Ink: For detailed lines and expressive hatches.
- Pencil Sketch: For sharp lines and subtle shading.
- Charcoal: For dramatic contrasts and rough textures.
- Sculpture: For a 3D form with varying levels of detail.
- Digital Painting: Traditional painting techniques with digital tools.
- Pixel Art: For a retro, blocky aesthetic.
- Vector Graphics: For clean, sharp lines and shapes.
- Digital Collage: Blends various digital elements for a unique look.
- 3D Rendering: Creates realistic or stylized 3D models.
- Digital Photography: Captures realistic imagery with specific effects.
- Cartoon: For exaggerated features and bold colors.
- Anime: For specific anime stylistic elements.
- Manga: For black and white illustrations with specific shading techniques.
- Art Deco: For geometric patterns and stylized elements.
- Impressionism: For loose brushstrokes and focus on light and color.
- Abstract: For non-representational forms and colors.
Resolution
When crafting the perfect prompt for Stable diffusion AI, resolution keywords act as the brushstrokes defining the sharpness and clarity of your desired image.
By specifying resolution terms like “4K,” “8K,” “highly detailed”, or even “64K,” you instruct the AI to focus on creating a high-quality image with crisp details.
Let’s add keywords highly detailed, 8k, and realistic to our above prompt.
A beautiful ((Ukrainian Girl)) with very long straight hair, full lips, a gentle look, and very light white skin. She wears a medieval dress. 3D rendering, highly detailed, 8k, and realistic image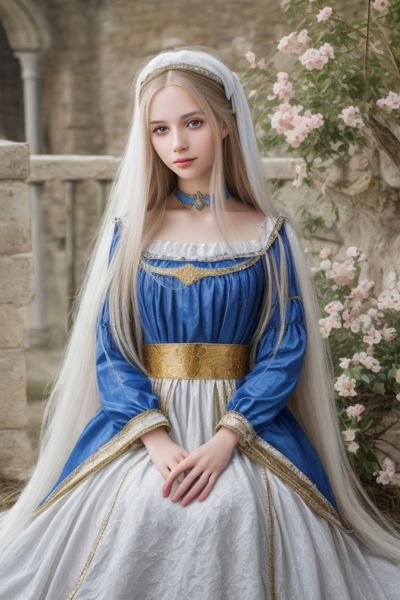
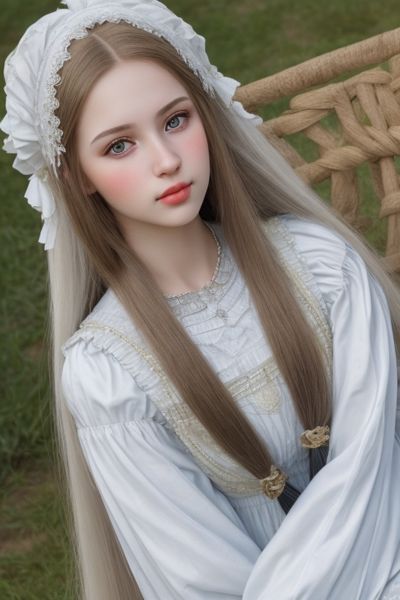
It is obvious that these two images are more realistic and detailed than previous images.
Below is a list of important resolution keywords you can add to your prompt.
- 4K
- 8K
- 16K
- 32K
- 64K
- High resolution
- Ultra-high resolution
- Super high resolution
- Professional quality
- Polished
- Crisp
- Sharp
- Clear
- Detailed
- Highly detailed
- Hyper-detailed
- Meticulous
- HDR
- UHD
- Photorealistic
- Photography realistic
- Hyperrealistic
- Detailed cartoon
- Smooth cartoon
- Sketched
- Line art
- Minimalistic
- Golden ratio
- Close-up
- Panoramic
- Zoom in
If you are confused about image size, refer to our post on the best image size for stable diffusion.
Okay, now let’s move to lighting.
Lighting
Lighting is the magic dust that brings your imagination to life.
Stable diffusion AI understands this magic well, and that’s why lighting keywords are crucial tools for producing mind-blowing images.
Just by tweaking the lighting description, you can completely change the emotional impact of your image.
With lighting keywords, you can evoke feelings of drama, tranquility, mystery, or any other ambiance you desire.
So, let’s include the keyword “sunset” in the prompt.
A beautiful ((Ukrainian Girl)) with very long straight hair, full lips, a gentle look, and very light white skin. She wears a medieval dress. highly detailed, 8k, and realistic image, sunset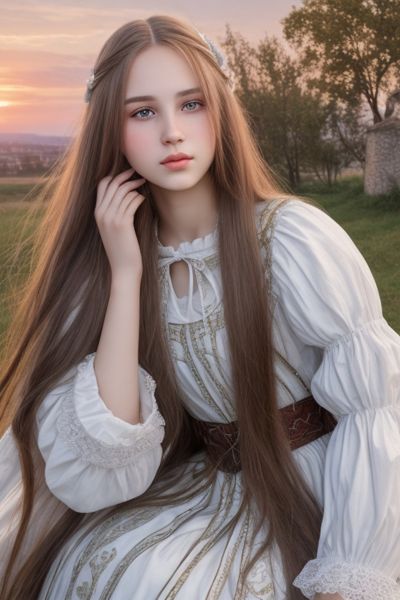
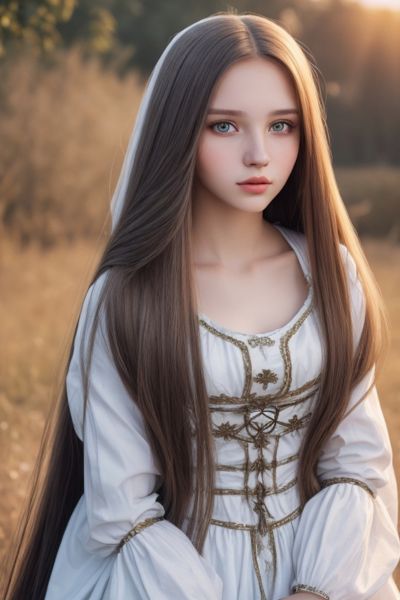
Did you see the magic of only one keyword in the prompt?
Here is a list of some lighting keywords, you can use them depending on your specific prompt.
- Illumination
- Shadows
- Studio light
- Glare
- Sunset
- Ambient light
- Natural light
- Artificial light
- Mood lighting
- Spotlight
- Dimming
- Brightness
- Soft light
- Dramatic light
- Harsh light
- Color temperature
- Highlight
- Backlighting
- Front-lighting
- Candlelight
- Fluorescent light
- Incandescent light
- LED lighting
- Chiaroscuro
- Reflection
- Refraction
- Ray tracing
- Gobo lighting
- Strobe lighting
- Accent lighting
- Task lighting
- Up-lighting
- Down-lighting
But you can’t control lighting with these simple keywords. You should know the ways to control lighting in stable diffusion.
Color
Color keywords can be an incredibly powerful tool for impacting the final artwork’s mood, atmosphere, and overall feel.
For example, colors like “emerald green” or “burnt orange” give the AI a clear direction, leading to more accurate results compared to generic terms like “bright” or “dark.”
Let’s include the term burnt orange in the prompt.
A beautiful ((Ukrainian Girl)) with very long straight hair, full lips, a gentle look, and very light white skin. She wears a medieval dress. highly detailed, 8k, and realistic image, sunset, burnt orange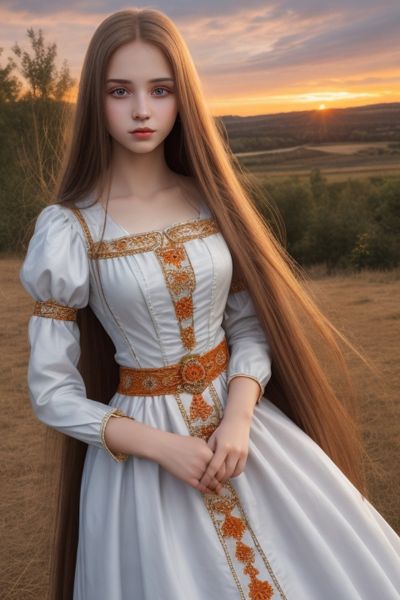
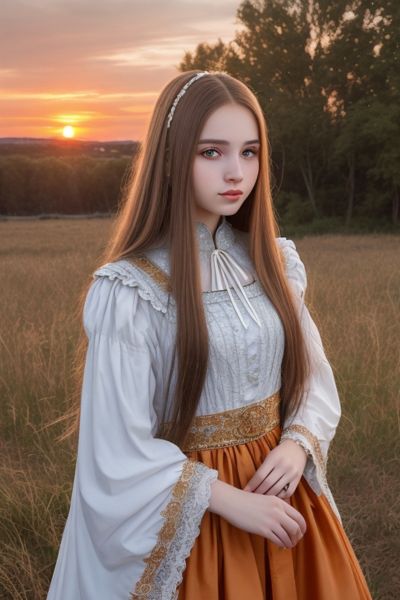
You have seen that by including the keyword “burnt orange,” the platform generates this color tone or object. This is the beauty of stable diffusion AI.
Here is the list of some color keywords you can use according to your image.
Best of all
- Lightness: Bright, pale, pastel, luminous, ethereal, airy, light
- Darkness: Deep, dark, rich, somber, shadowy, muted, obscure
- Intensity: Vibrant, vivid, bold, saturated, muted, subtle, delicate
- Shade: Dusky, dusty, smoky, rusty, earthy, ashy, sun-bleached
Mood and Emotion
- Happiness: Yellow, orange, pink, bright green
- Sadness: Blue, gray, purple
- Anger: Red, orange, black
- Peace: Blue, green, white
- Energy: Red, orange, yellow
- Calmness: Blue, green, purple
- Luxury: Gold, silver, black, purple
Additional Keywords
- Metallic: Gold, silver, bronze, copper
- Fluorescent: Neon, bright, luminous
- Iridescent: Shimmering, pearlescent, opalescent
- Transparent: Translucent, see-through, glass-like
- Matte: Dull, flat, non-reflective
Camera Angle/Focus
Camera angles and focus keywords let you manipulate the artwork’s perspective and composition.
Specifying the perspective and focal points in your textual description gives you more control and creativity.
For example, using a camera angle like “bird’s-eye view” or “ground-level perspective” instantly alters how the viewer experiences the scene you’re envisioning.
Meanwhile, focus keywords like “highlight the fruit” and “blur the background” guide attention. You can spotlight subjects or downplay peripheral elements.
So, to give you a real-life example of this type of keyword, I am using the “blurred background” keyword in my prompt.
A beautiful ((Ukrainian Girl)) with very long straight hair, full lips, a gentle look, and very light white skin. She wears a medieval dress. highly detailed, 8k, and realistic image, sunset, burnt orange, blurred background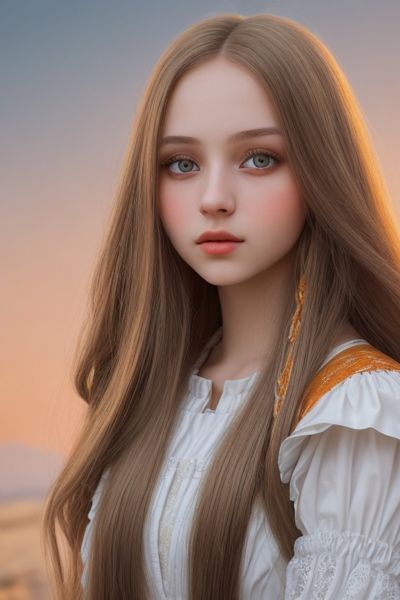
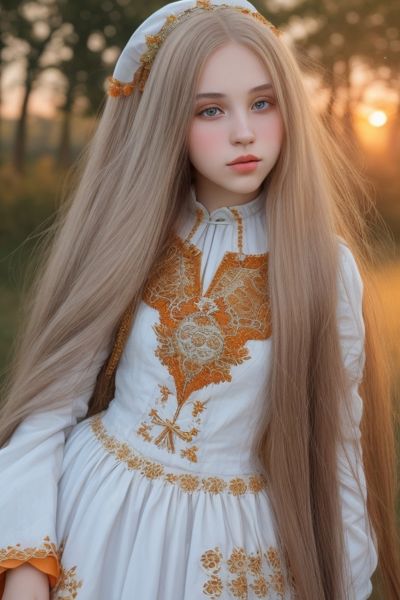
Below is a list of some commonly used camera angle and focus keywords you can use when your image needs them.
Camera angle keywords
- Bird’s-eye view
- Worm’s-eye view
- Aerial shot
- Ground-level perspective
- Panoramic
- Dutch angle
- POV (point of view)
- Long shot
- Medium shot
- Close-up
- Extreme close-up
- Tracking shot
- Tilt shot
- Pan shot
- Establishing shot
- Over-the-shoulder shot
- Rule of thirds
Focus keywords
- Focus on [object/person]
- Blur background
- Shallow depth of field
- Large depth of field
- Soft focus
- Sharp focus
- Focus on eyes
- Focus on hands
- Focus on details
- Blur foreground
- Blur specific object
To know more details about this you may read our post on stable diffusion camera prompts.
Art Style
Another powerful way to guide the AI’s artistic style is by specifying the influence of renowned creators in your prompts.
You can use “Artist Name” keywords like “Van Gogh style” or “in the manner of Monet” to tap into iconic painterly techniques within the text prompt.
This channels elements of composition, color palette, brushwork, and more reflective of these artistic innovators into the AI’s generated images.
For example, here I use Gustav Klimt’s art style in my above prompt and see the magic below.
A beautiful ((Ukrainian Girl)) with very long straight hair, full lips, a gentle look, and very light white skin. She wears a medieval dress. highly detailed, 8k, and realistic image, sunset, burnt orange, blur background, Gustav Klimt art style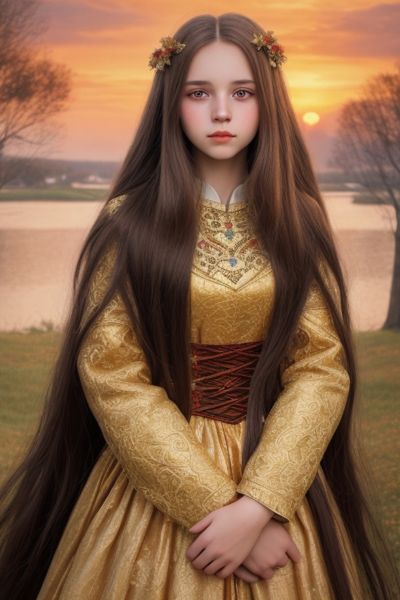
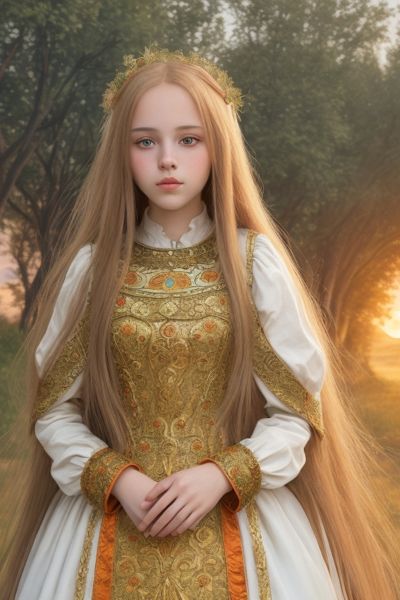
Here is a list of some popular artist names for inspiration.
- Vincent Van Gogh
- Claude Monet
- Pablo Picasso
- Andy Warhol
- Frida Kahlo
- Salvador Dali
- Leonardo da Vinci
- Gustav Klimt
- Edgar Degas
- Georges Seurat
- Mary Cassatt
- Edvard Munch
- Rembrandt
- Johannes Vermeer
- Rene Magritte
- Sandro Botticelli
If you want to explore more styles, you can opt for the SDXL style selector.
Okay, based on our experience these are the main components of a prompt to generate images.
By incorporating these keywords, you can generate the desired artistic style.
Now, let’s move on to negative prompts to fine-tune our images.
Use of Negative Prompt
Stable diffusion AI offers a powerful tool called the Negative Prompt.
This might seem counterintuitive, but it’s crucial for fine-tuning your creations and achieving the exact visual you desire.
It’s a way to specify elements you don’t want in your generated image.
This could be anything from specific objects (like extra limbs) to broader themes (like violence or gore).
By telling the AI what to avoid, you guide it towards generating an image that adheres to your vision.
For example, below I have given two images, one is without a negative prompt and another is using the below negative prompt.
Horns, multiple pairs of ears. Long things coming out of head. No blue skin tone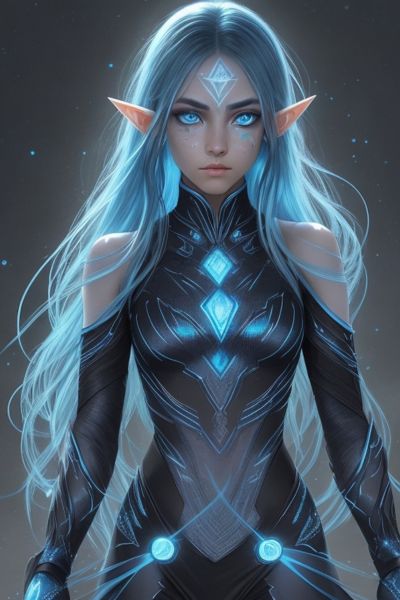
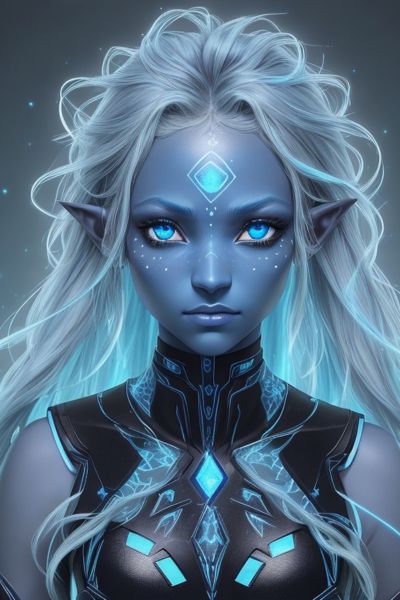
From these two images, I hope you understand the importance of negative prompts.
Here are some commonly used negative prompt keywords:
- Mutilated
- disfigured
- Mutated
- nude
- zombified
- blood
- gore
- veins
- guts
- insides visible
- injury
- wounds
- brutality
- maimed
- deformity
- gruesome
- macabre
- horrid
- atrocious
- appalling
- grotesque
- hideous
- disgusting
- repulsive
- disturbing
- NSFW
- pornographic
- obscene
- vulgar
- inappropriate
- racist
- sexist
- unethical
- Illegal
You can use these keywords for any type of image. If you are using SDXL model you may read our SDXL negative prompt guide.
Okay, from now we have learned about prompt elements and negative prompts. Now let’s see how we can write a perfect prompt.
How to Write a Perfect Prompt: Process
So, let’s walk through the step-by-step process to help you craft a good prompt using the above elements.
You just need to understand each point and act accordingly.
Be As Specific as You Can
Specifying the subject in your prompt is crucial for Stable Diffusion because it acts like a compass for the AI to understand what you want it to focus on in the generated image.
For example, if you want to generate an image of a dog, you can simply write “cute dog” but the problem is:
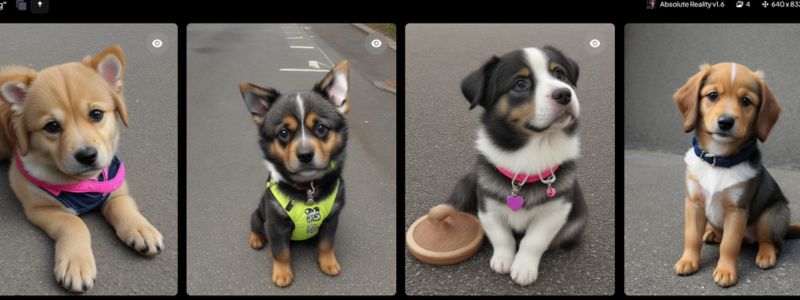
By using this simple subject, the model generates different types and colored images of dogs as you can see above.
What if you want an image of a white-colored dog or a dog with long ears?
That’s why in this case, you need to be more specific, and you can write the prompt like “a cute white-colored dog”.
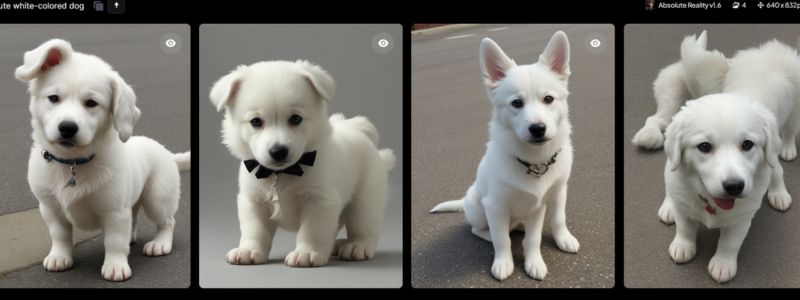
Here you can see that after entering the keyword “white,” Stable Diffusion instantly changes its output and gives me all the images of white dogs.
Similarly, you can specify more details about your subject to get exactly what you want. You can specify any dog breed name or eye color, etc.
For example, here I use the dog breed name “Chihuahua,” and the result is below.
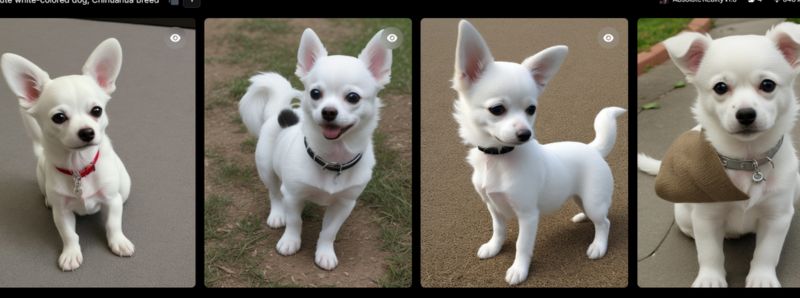
This is how you can add anything to describe your subject properly.
A detailed subject gives the Stable Diffusion of a specific object or concept to concentrate on.
This helps to generate a more accurate and detailed representation of that subject.
Mention Specific Art Styles
Ever dreamed of creating stunning imagery inspired by your favorite artistic styles?
With Stable Diffusion, you can!
But beyond simply describing what you want to see, a secret weapon awaits – artistic style keywords.
These magical words act as paintbrushes for Stable Diffusion, guiding it to transform your prompt into a breathtaking work of art.
For example, I add the “Pop art” keyword in my previous dog prompt. And the prompt reads like this: “A cute white-colored dog, Chihuahua breed, pop art”.
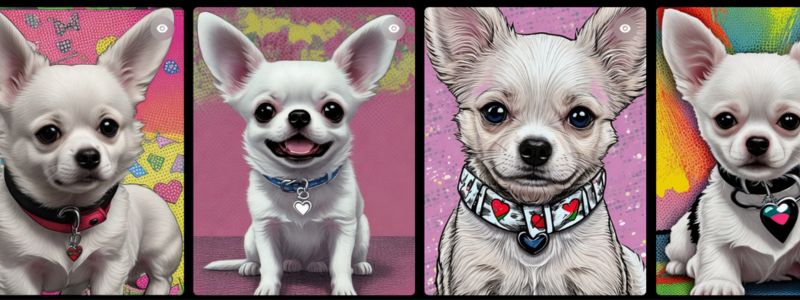
After giving the keyword “pop art,” Stable Diffusion produces images of pop art style.
It can recognize lots of art styles from oil painting to abstract art.
So, don’t be afraid to experiment!
Combine keywords, explore different mediums like “painting” or “sketch,” and fine-tune the level of detail with “rough,” “smooth,” or “abstract.”
But wait, there’s more! Model selection matters.
Different Stable Diffusion models have varying strengths. Choosing the right one can significantly enhance the effect of your artistic keyword.
So, explore and see which model brings your artistic vision to life!
For example, I chose DreamShaper (known for fantasy images) and 3D rendering style (known for 3D anime images) models, and I used the same prompt in these two models.
Now see the difference:
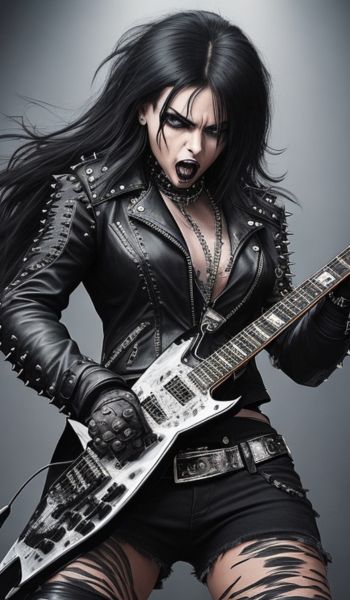
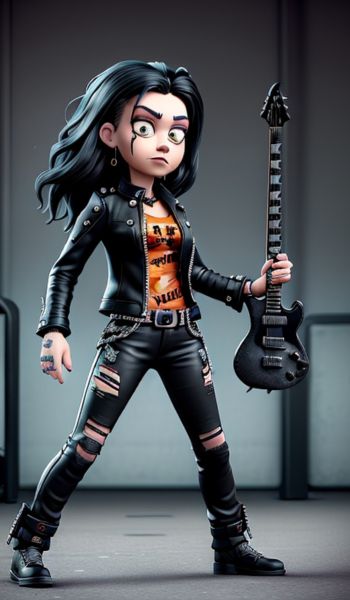
You can see the difference between two images generated using the same prompt but different models.
That’s why I told you before to choose the model wisely. If you want to work with realistic images you can use the stable cascade model.
Specify Ay Artist’s Name in Your prompt
You know, I’ve been playing around with Stable Diffusion prompts that reference specific artists, and it’s pretty cool to see what the AI comes up with.
One of my favorites is “a Frida Kahlo painting in the style of Andy Warhol.” The AI did this pop art take on Kahlo’s self-portraits with bright colors and commercial flair.
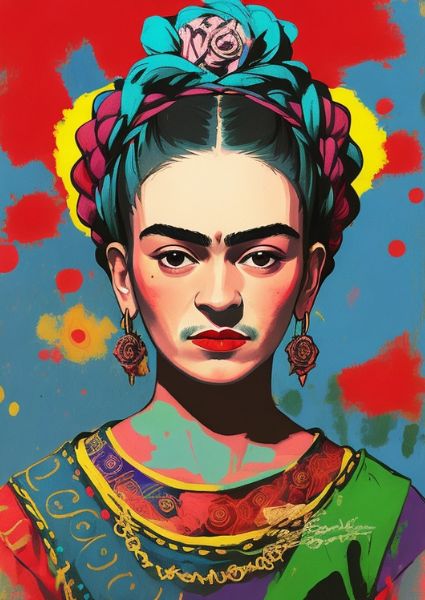
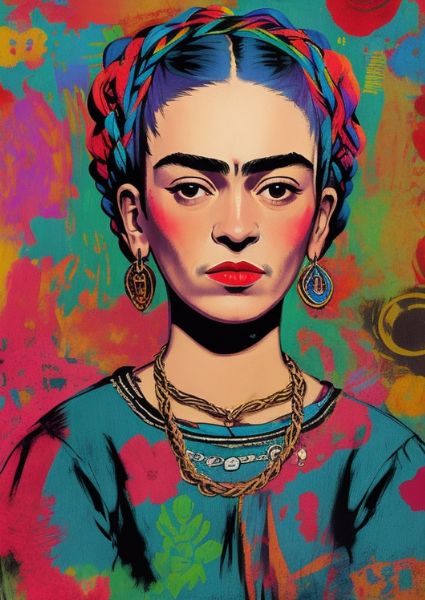
Not sure either artist would love it, but the clash of genres was fascinating!
You could also try mashing up other creative luminaries like “Matisse’s take on Picasso’s blue period paintings.”
It’s fun to see what aesthetic combinations the AI can conjure up.
Anyway, I highly recommend name-checking distinctive artists in your Stable Diffusion prompts.
Weight any Keyword
Fine-tuning images in Stable Diffusion is akin to fine-tuning a recipe.
Just as seasoning enhances flavors in cooking, using double parentheses emphasizes keywords, making them more prominent.
For example, “((grey cat)) playing with yarn” draws attention to the grey cat.
Conversely, square brackets reduce the emphasis on keywords, as in “A cute Siamese ((cat)) is eating ((fish)) on a [table],” where Cat and fish are highlighted.
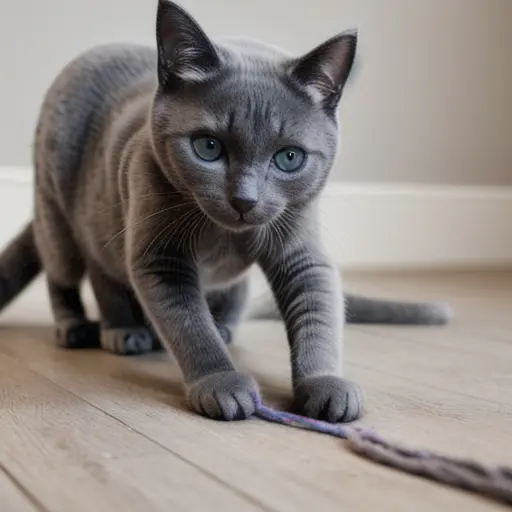
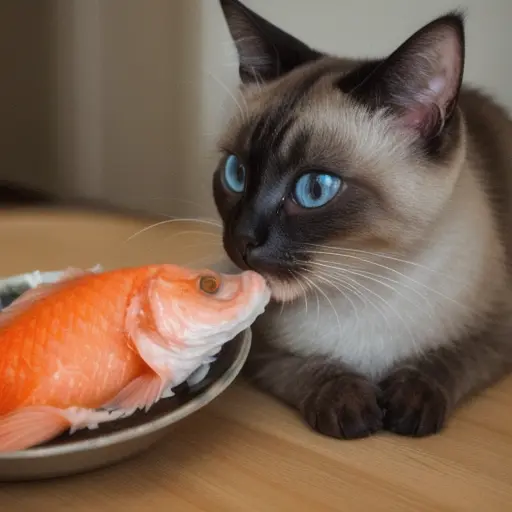
Here, you have the option to manually adjust keyword percentages for precise control over flavor intensity, but often, simply highlighting and downplaying terms as needed suffices.
The goal is to achieve the perfect seasoning balance, amplifying key flavors with double parenthesis and subtly toning down others with brackets.
With this approach, you’ll create Stable Diffusion images tailored perfectly to your preferences!
To know more details read our post on stable diffusion prompt grammar.
Stable Diffusion Settings
Stable Diffusion offers a variety of settings to fine-tune your image generation process, significantly impacting the final output.
Here are some key settings and how they can enhance your images:
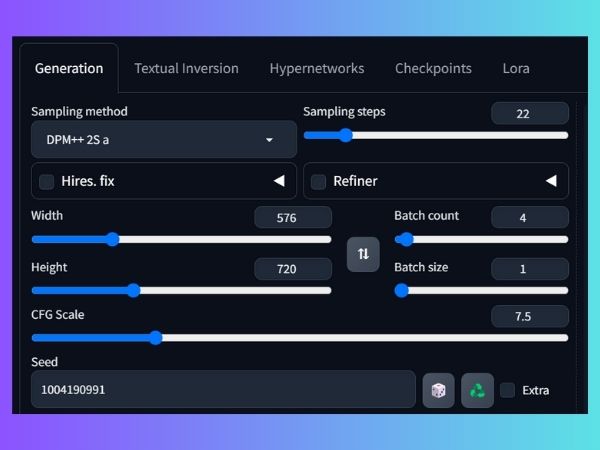
Width & Height: While 512×512 is optimal, increasing resolution can lead to sharper images with more detail. Be aware of increased processing time and memory usage.
Steps: Higher steps (25-50) refine the image with details emerging gradually. However, too many can cause artifacts. Test with lower steps (10-15) for faster iterations while tweaking your prompt.
CFG Scale: This controls how closely the image adheres to your prompt. A higher scale (7-11) prioritizes the prompt, while a lower scale (4-6) allows more artistic freedom.
Denoising Strength: This upscales the image after generation. Starting lower (0.3-0.5) helps retain details, while higher values (default 0.7) might smooth details excessively.
Seed: Each seed generates a unique image. Change the seed to explore variations of the same prompt. You can use the “Recycle” button to keep the seed while tweaking parameters for more control.
Temperature: Higher temperatures (0.7-1.0) encourage more artistic freedom and variations, while lower temperatures (0.5-0.6) favor a closer match to the prompt.
Sampler: While generating images, try to experiment with different samplers like “DDPM Sampler” or “KLMS Sampler” for subtle stylistic differences.
Extra Networks: Utilize additional networks like “RealESRGAN” for upscaling or “CLIP Interpolate” for smoother transitions between iterations.
By understanding and adjusting these settings, you can unlock the full potential of Stable Diffusion and create stunning, unique images.
Blending Known Faces for a New Face
One of the best tricks for generating consistent and realistic face images in Stable Diffusion is to use multiple celebrity references in your prompts.
Here you need to provide 3-4 celebrity names in your text prompt that have similar facial features like face shape, eyes, nose, bone structure, etc.
So that Stable Diffusion can blend them into a consistent new face.
On the other side, if you choose celebrities with vastly different features, the resulting face will likely look surreal or distorted rather than cohesive.
For example, I am using Angelina Jolie, Emma Watson, and Scarlett Johansson as references. You can try with other actresses also.
By using the above techniques to write a prompt, I build this prompt for a consistent face.
A portrait of a woman with the ((deep, expressive eyes)) of Angelina Jolie (0.8), the ((delicate nose)) of Emma Watson (0.6), and the ((full lips)) of Scarlett Johansson (0.5). Studio lighting, DSLR image, ultra quality, sharp focus, looking at the camera, crystal clear, 16K UHD, highly detailed glossy eyes, highly detailed skin.Here are images with the same prompt:
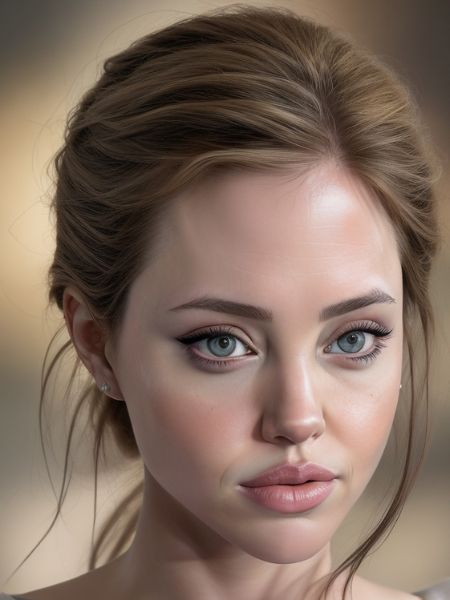
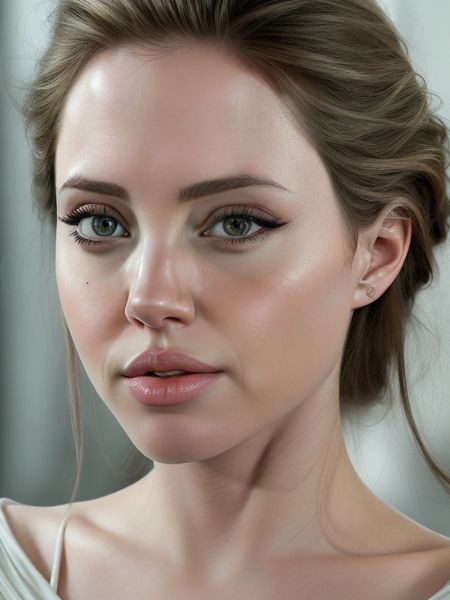
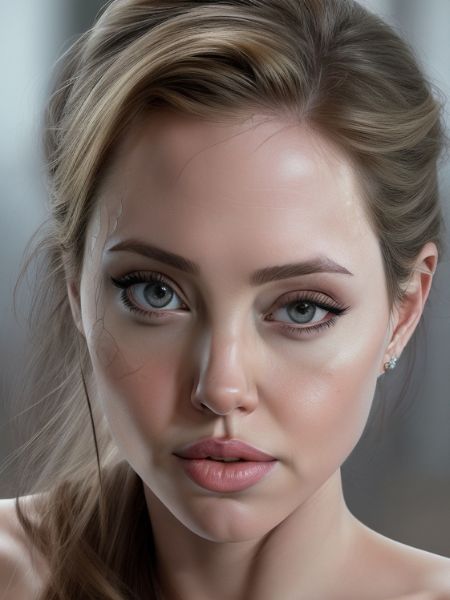
Here, you can see that Stable Diffusion uses these actresses’ faces and blends them to generate a new consistent face. The resulting outcomes also look the same.
You can also achieve the same result by using the above technique.
With some trial and error to fine-tune celebrity groupings, this technique reliably improves face generation and opens up many possibilities!
To avoid any type of error you may also use stable diffusion image prompt.
Otherwise, you may use face-swapping techniques in stable diffusion.
But before leaving know about…
Stable Diffusion Prompt Length
If you are a pro-stable diffusion user, you know that, unlike simple word counting, Stable Diffusion uses tokens to measure prompt length.
Tokens are essentially the building blocks the model understands.
The number of tokens you can use depends on the specific Stable Diffusion version and interface you’re working with.
Here’s a breakdown:
- Original Stable Diffusion v1: This version has a stricter limit of 75 tokens.
- Newer Versions and Interfaces: Some interfaces like AUTOMATIC1111 offer more flexibility, but it’s still wise to be mindful of prompt conciseness.
So, try to use the latest stable diffusion models and updated WebUI.
Now let’s…
Find the Sweet Spot: While there’s no one-size-fits-all answer, here are some general guidelines for effective Stable Diffusion prompt lengths:
- Minimum: Aim for at least 3-4 words.
- Maximum: Strive for a balance between detail and conciseness. Ideally, keep it under 60 words or 350-380 characters (which roughly translates to 75 tokens).
If somehow you get errors while using a detailed prompt, fix them by using ADetailer.
Why Does Length Matter?
Prompt length can influence Stable Diffusion’s output in a couple of ways:
Clarity and Control: We all need detailed descriptions to imagine a scene properly. Similarly detailed prompts with specific keywords provide the AI with a clearer picture of what you envision.
This helps generate more accurate and refined images according to your desire.
Conciseness and Efficiency: Overly long prompts can overwhelm the model. It might struggle to interpret the information effectively, leading to nonsensical outputs.
Now,
If You Exceed the Limit:
If your prompt surpasses the token limit, fret not! Here are a couple of solutions:
- Split and Conquer: Break down your prompt into smaller, more manageable chunks.
- Refine and Revise: See if you can condense your wording while retaining the core details.
In conclusion, remember: ‘Practice makes perfect!’
So, try out different prompt lengths, elements, and structures to find what works best for you and your artistic vision with Stable Diffusion.
If you have any additional insights that I haven’t mentioned here, please share them in the comments below.
We always value our readers’ input and strive to keep you updated.

Hi there! I’m Zaro, the passionate mind behind aienthusiastic.com. With a background in Electronics Science, I’ve had the privilege of delving deep into AI and ML. And this blog is my platform to share my enthusiasm with you.
