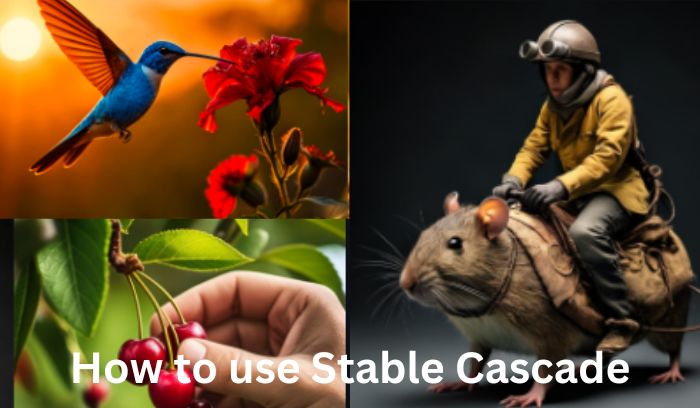
If you are looking for a reliable diffusion model that prioritizes efficiency, Stable Cascade is your solution.
Its focus on efficiency shines through its architecture and compact latent space.
Plus, it excels at generating lifelike people, readable text, and various art styles with great image composition.
So, before diving in let’s know a little bit about the latest model.
What is the Stable Cascade?

Stable cascade is the latest and super cool image generation model created by Stability AI.
Instead of just one model doing all the work, Stable Cascade has three models working together in a pipeline: Stages A, B, and C.
This setup helps efficiently compress images, making the most out of a small amount of data.
What’s even more awesome is that this three-stage setup not only improves the quality of the generated images but also makes the whole process faster and more flexible.
Now, let’s see some sample images generated by Stable Cascade and what makes it better than other models.
Sample images from Stable Cascade
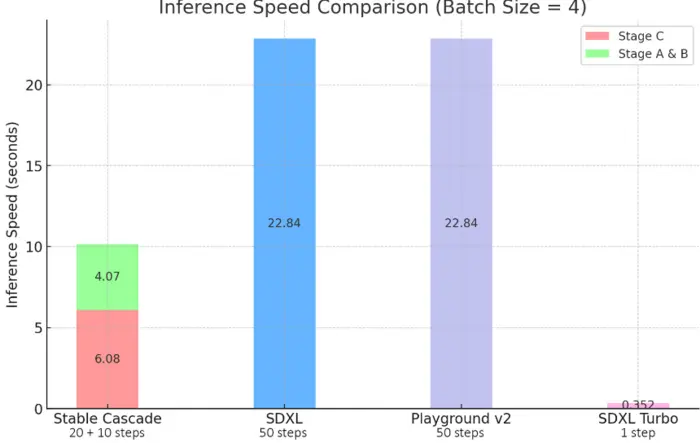
Stability AI states that Stable Cascade outperforms other models in matching prompts well and creating visually appealing results across various comparisons.
So, let’s check out some images generated by Stable Cascade, version 1.5, and SDXL models using the same prompts.
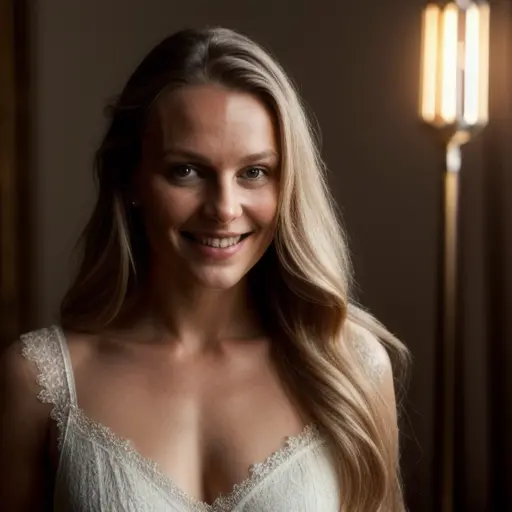
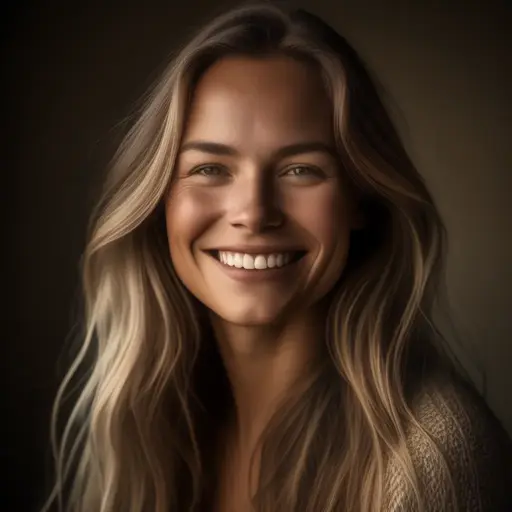
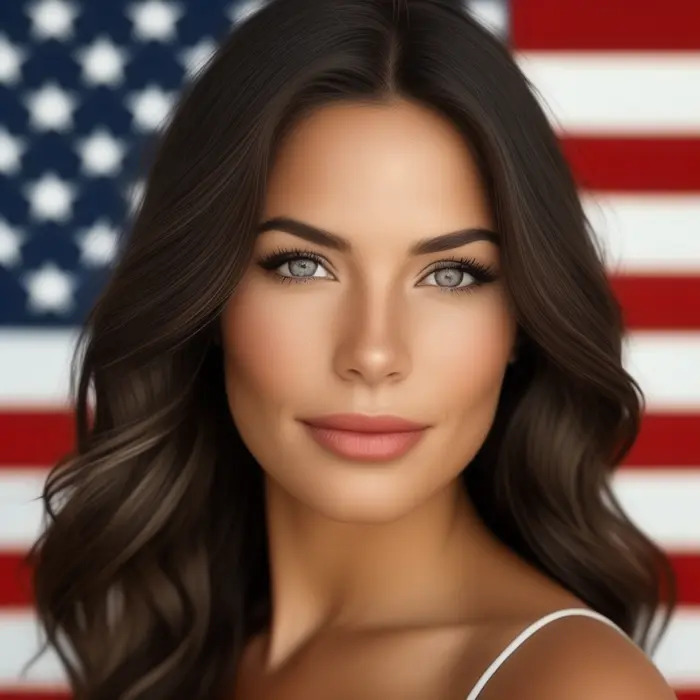
Realistic Images:
Model for sd v1.5: RealisticVision5.1.
Prompt:
A beautiful Swedish woman, Masterpiece, best quality, cinematic lighting, 8k, long hair, smile, realistic backgroundNegative Prompt:
Blurry, low quality, cartoon, anime, bad color, UnrealisticAll parameters are kept the same for comparison and the image size is 512*512.
Anime Style:
Prompt:
Upper body shot, fashion photography of cute, intense long hair, (Asuka Langley), dressing high detailed Evangelion red suit in dynamic pose, bokeh, light passing through hair.Negative prompt:
Low quality, negative_hand-neg, moles, mole, tears, piercing, freckles, cutoffs, shiny skin, lucid skin, pendant, bad-hands-5, scars on face.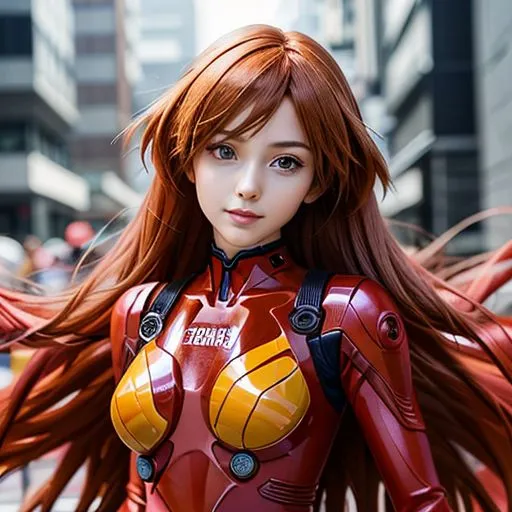
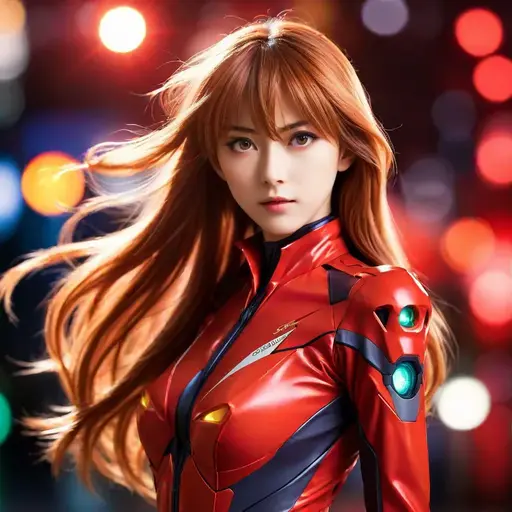
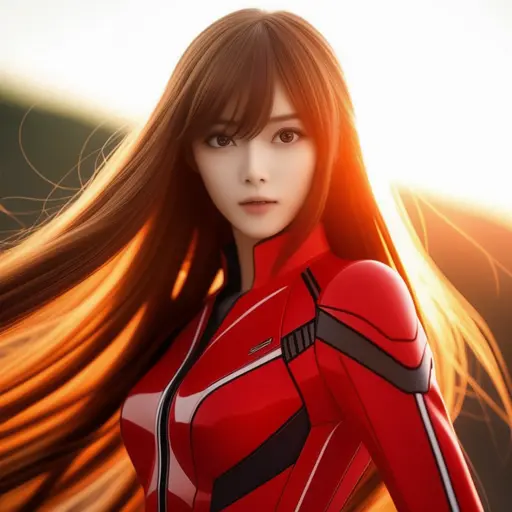
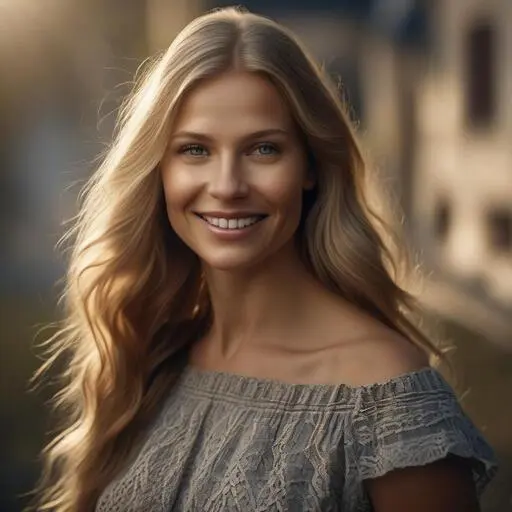
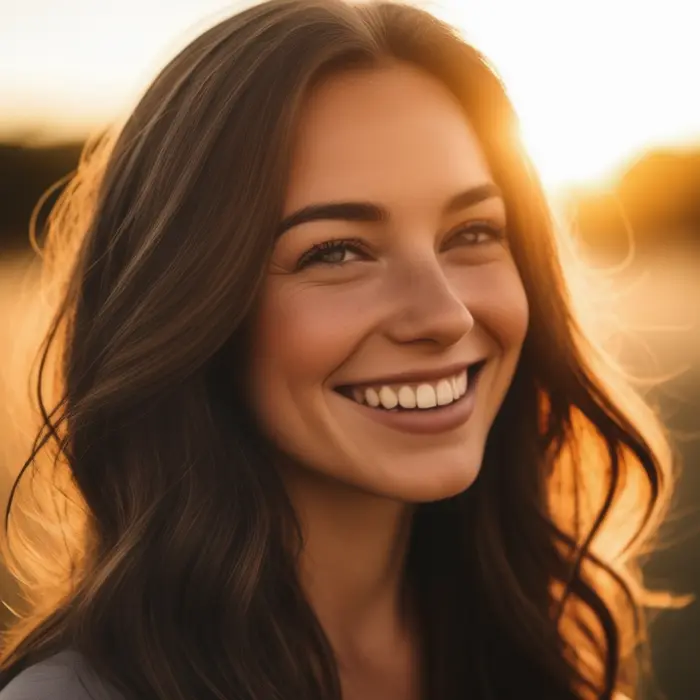
You can see to generate realistic and anime images, the stable diffusion v1.5 model is best, though the SDXL and Stable Cascade are more fine-tuning and improved models.
Why is this happening?
Because of two reasons.
First, the prompt. Not every prompt suits all models. My prompts suit the v1.5 model but not SDXL and Cascade.
Don’t worry, I will guide you on how to use proper prompts for Cascade in this guide.
But for SDXL, you can read our post on SDXL prompt guide.
Second is the image size.
As SD v1.5 models work best for 512*512 size, it gives the best result for the above cases. But SDXL and Stable Cascade default image size is 1024*1024.
We will also discuss it later in this post.
But, to get a detailed guide, refer to our post on the best image size for stable diffusion.
Okay, as we test a lot of images with different prompts, now let’s see the improvements made in Stable Cascade compared to SDXL and other v1.5 Stable Diffusion models:
The improvements:
| Feature | SDXL | v1.5 Models | Stable Cascade |
|---|---|---|---|
| Image Quality | Good | Improved | Excellent |
| Prompt Understanding | Improved | Moderate | Excellent |
| Inference Speed | Slow | Moderate | Fast |
| Training Cost | High | Moderate | Low |
| Compression Rate | N/A | N/A | 42x |
| Architecture | U-Net | U-Net | Cascade (3 Stages) |
| Stage Breakdown | Single Stage | Single Stage | Stage A/B: VAE-like, Stage C: Text-to-Image |
Now, if you are really getting interested let’s see how we can use the mode.
How to Install Stable Cascade in Automatic1111
You can use Stable Cascade in various ways by installing the models locally and on Google Colab.
But in our testing and experience, the easiest way to run Stable Cascade is to use it as an extension in Automatic1111.
This extension allows you to generate images with all its features and parameters with Stable Cascade in an independent tab.
So, let’s install the Stable diffusion cascade in A1111.
Installing Stable Cascade as an Extension
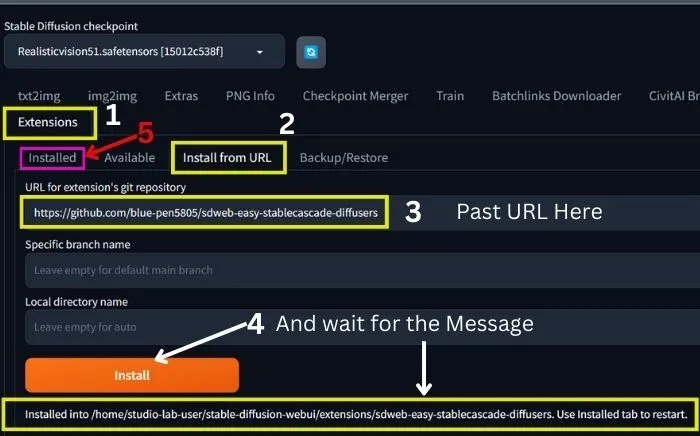
1. After opening Automatic1111, go to Extensions and click on ‘Install from URL’.
2. Then paste the URL(https://github.com/blue-pen5805/sdweb-easy-stablecascade-diffusers) as shown in the image above and click on ‘Install’.
3. Now, wait for the confirmation message to determine whether it has been installed or not.
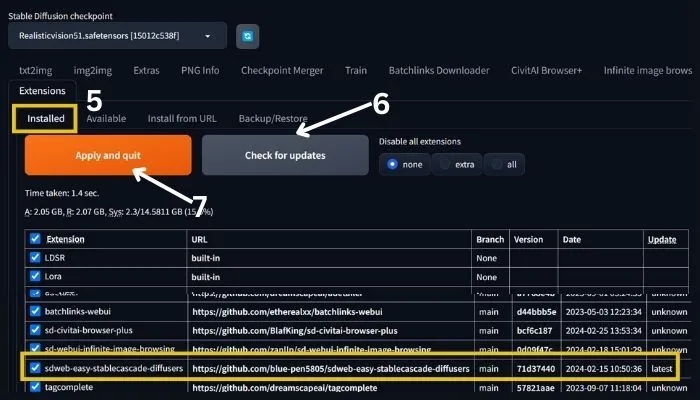
4. Next, go to ‘Installed’ and click on ‘Check for updates’ as shown in the image below.
Here, you can see the stable cascade as a new extension.
5. Finally, click on ‘Apply and restart’.
That’s it, your stable cascade will be installed in Automatic1111.
Now, let’s move forward to use it.
How to Use Stable Cascade: Tips and Tricks
After installation when you click on the StableCascade from the upper menu bar, you can see the following parameters and settings.
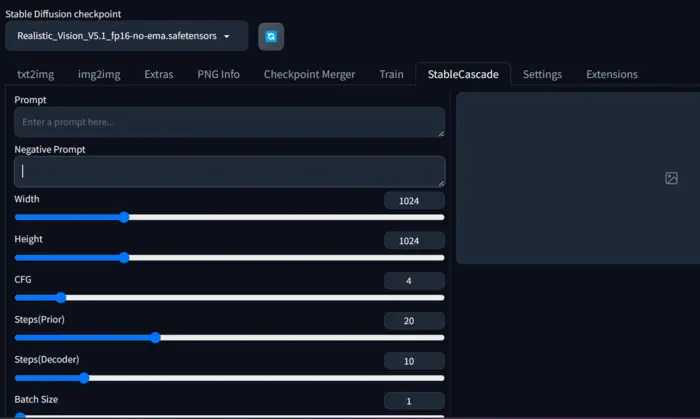
Now, let’s discuss all of these so that we can use stable cascade effectively.
Prompt:
We all know a prompt is the words that describe our AI-generated image as we want, but here we discuss what type of prompt we should use.
I don’t just tell you what you should do but also demonstrate how Stable Cascade understands prompts.
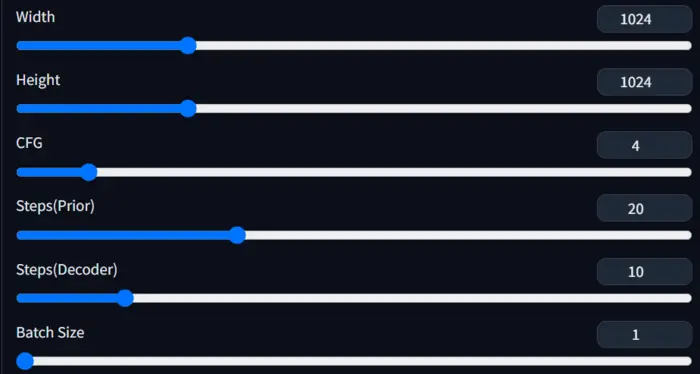
To test this, I will keep the default parameters as shown below.
But, to reduce my website load, I have compressed pixels of the generated images to 700*700 without sacrificing the quality of the images.
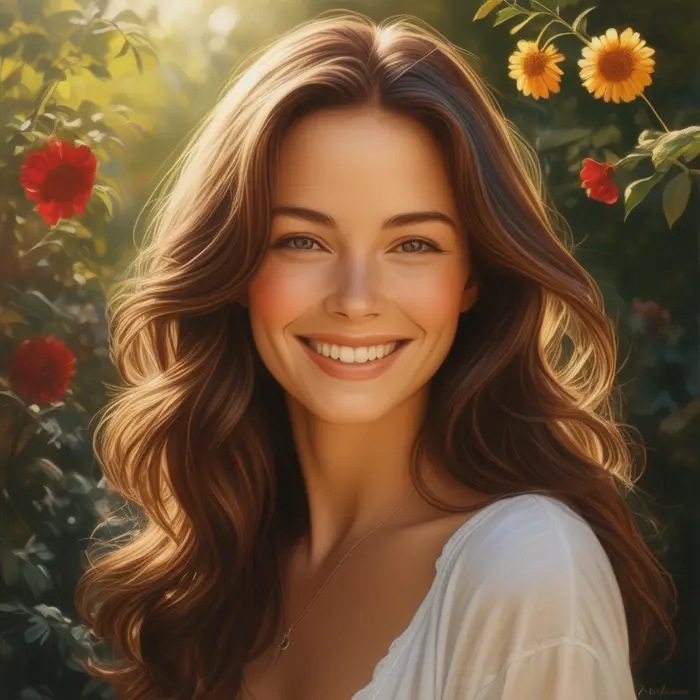
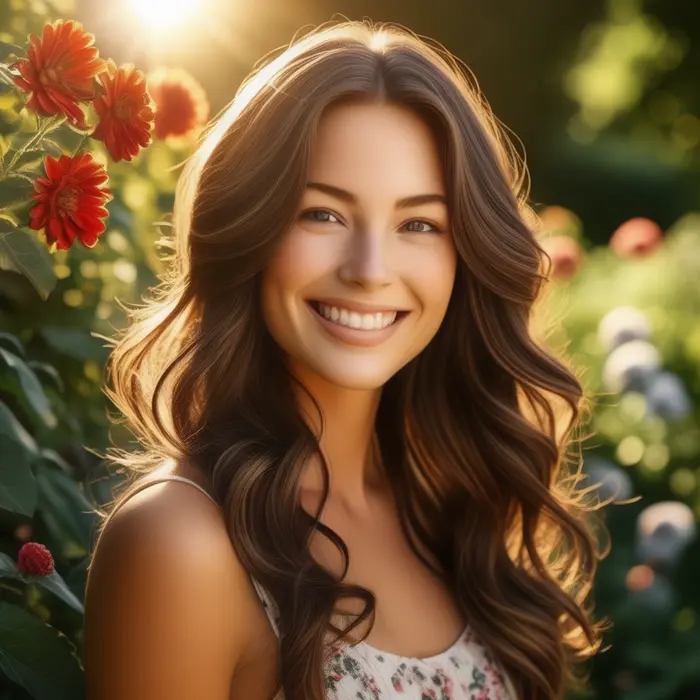
So, let’s start with a short prompt: “A Beautiful American Woman.”
The image is cropped right!
I will try to fix it, so keep reading.
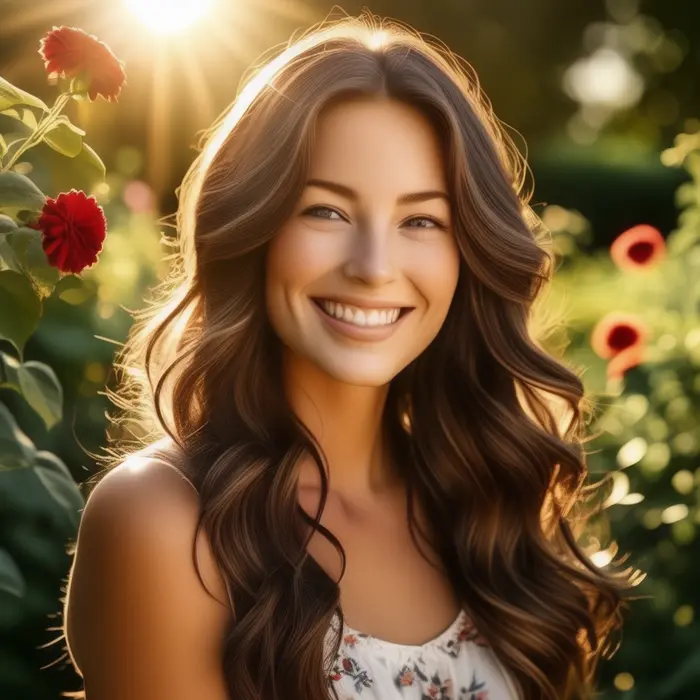
Okay, now, adding lighting effects and color composition, so the prompt will be: “A Beautiful American Woman, sunlight on her hair, smile, brown hair.”
You can still see that the image is cropped, and the lighting effect is not good enough.
If you need proper lighting control, you can read the guide on stable diffusion lighting.
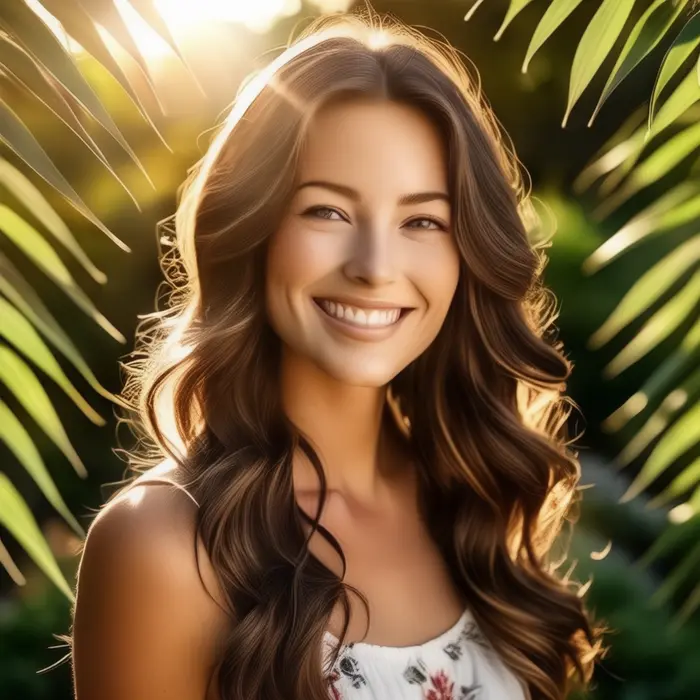
Okay, now let’s add background and other refining keywords that we generally use to enhance image quality:
"A Beautiful American Woman, sunlight on her hair, smile, brown hair, in a garden, in frame, masterpiece, high quality, realistic"
Wow! Now the image is quite good and it is in frame. But the background and color composition are not as good as I want.
So, till now it is evident that the stable cascade needs a proper detailed prompt to generate a good image.
You may read our post to learn more details about stable diffusion prompt grammar, syntax, and weight.
Negative prompt:
Unlike a prompt, we all know a negative prompt consists of the words that we don’t want in our image.
So, let’s see how Stable Cascade responds to negative prompts and whether it’s necessary.
Adding a simple negative prompt with the last prompt: ” Blurry, low quality, cropped, out of frame”
The image still hasn’t really improved with this simple negative prompt. Right!
Adding a detailed negative prompt:
"Blurry, low quality, cropped, out of frame, unrealistic, painting, drawing, improper face, bad anatomy, bad color composition, bad background color."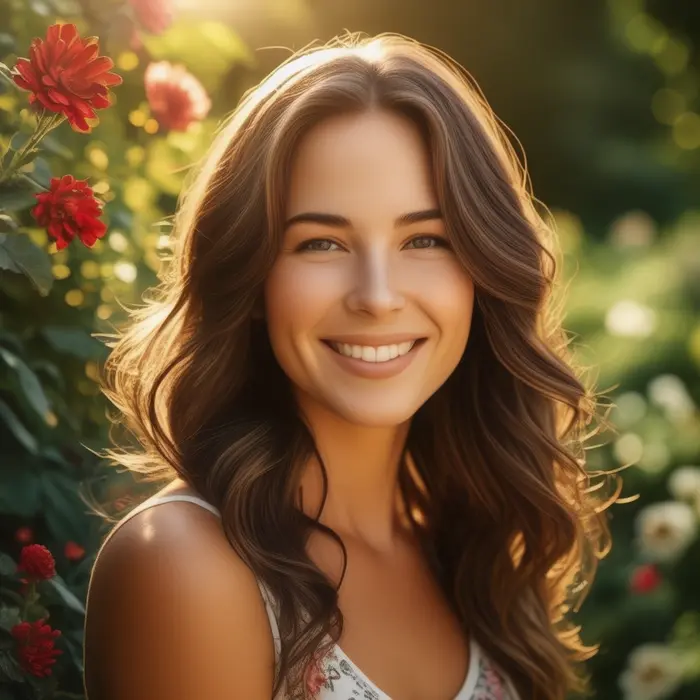
The image is now looking good, but still, the realism is missing. I think we should really explore the other settings.
Image size:
In training Stable Cascade, a compression factor of 42 reduces a 1024×1024 image to 24×24 while keeping it clear.
This is different from Stable Diffusion, which compresses to 128×128.
Even though 24×24 is good for making and showing images, our experience shows that 1024×1024 is better for detailed pictures.
For your ease, we’ve made a 1536×1536 image using the same prompt and negative prompt as before.
I use also the same seed ‘1258897335’ and after generation compressed the image to 700×700 to reduce my site storage.
So, it’s clear that while 24×24 is okay, 1024×1024 or higher pixels are better for detailed images.
If you’re still unsure which size to use, check out our post about the best image size for Stable Diffusion.
CFG Scale:
The CFG scale, Classifier-Free Guidance scale, enables you to control the balance between image fidelity and creativity when generating images from text prompts.
In short, it determines how closely the generated image adheres to your input prompt.
Now, to check this with stable cascade we have:
- Prompt: “A Beautiful American Woman, sunlight on her hair, smile, brown hair, in a garden, in frame, masterpiece, high quality, realistic”
- Negative prompt: “Blurry, low quality, cropped, out of frame, unrealistic, painting, drawing, improper face, bad anatomy, bad color composition, bad background color.”
- Seed: 1258897335
- Image size: 1024×1024
You can increase your CFG scale value up to 32, but I only show up to 20 here because you can see that after 20, the model starts to ignore my prompts.
In our opinion, the best CFG scale range is from 6 to 13 for Stable Cascade. I hope you also agree with me after seeing the results above.
Prior Inference Steps:
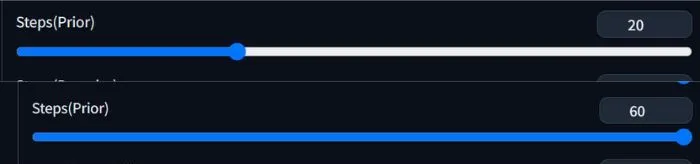
In Stable Cascade, Prior Inference Steps refer to the initial stage of the image generation process responsible for establishing a preliminary representation based on the text prompt.
Actually, these steps determine the initial direction and broad features of the generated image.
Stable Cascade typically uses fewer Prior Inference steps by default (around 20).
This is due to its smaller latent space (the compressed representation of the image), allowing for faster and more efficient processing.
You can increase it up to 60.
If you want to test higher value try to use Xformers to speed up your image generation process.
Decoder Inference Steps:
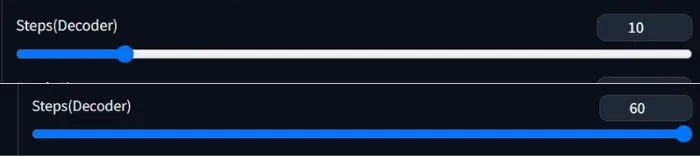
Decoder Inference Steps represent a crucial stage within the image generation process responsible for refining and adding details to the initial image representation based on the text prompt.
The default value is often around 10, but it can be adjusted up to 60 depending on your desired image quality and processing time.
Relationship with Prior Inference Steps: The output from the Prior Inference Steps acts as the starting point for the Decoder Inference Steps.
Each step in the decoder takes the current image representation and refines it based on the prompt and the internal model parameters.
Batch Size:
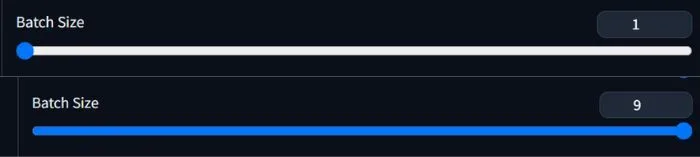
It is a parameter that determines the number of images processed simultaneously during the generation process.
It can affect both the speed and memory usage when generating images.
But it will give you more options to choose from and go ahead for further improvements.
Now, before leaving let’s get clear the below questions:
Frequently Asked Questions
Yes, you can use Stable Cascade on a Mac. As per the details, StabilityAI provides a simple installer for Stable Cascade on both Windows and Mac through the Pinokio app.
If you’re keen on giving Stable Cascade a try, you can find installation guidelines and resources on the Stability GitHub page.
Yes, you can use ControlNet with Stable Cascade models.
Stability AI mentioned they were releasing scripts for fine-tuning, ControlNet, and LoRA training alongside the model’s introduction.
This shows that ControlNet integration is supported within the Stable Cascade framework.
Stable Cascade models are great for creating images at different resolutions, especially with a smaller latent space compared to SDXL.
However, based on our experience, the ideal size is 1024×1024.
While Stable Cascade responds well to brief prompts, it’s not as effective as SDXL in this regard.
So, to make the most of this model, you’ll need to provide highly detailed prompts with correct prompt syntax and weight.
Final Verdict:
In summary, I’d like to say, practice and discover your optimal settings.
However, to quickly begin your journey with the stable diffusion model, you can follow the guide and tips I have discussed above.
If there’s anything I overlooked, please let me know by leaving a comment below.
Reference: GitHub Repository.

Hi there! I’m Zaro, the passionate mind behind aienthusiastic.com. With a background in Electronics Science, I’ve had the privilege of delving deep into AI and ML. And this blog is my platform to share my enthusiasm with you.