Photographers use pose ideas for guided shoots, and fitness enthusiasts for safe workouts.
But, now in this AI era, we can create any poses with the help of the ControlNet Openpose model and Openpose editor in stable diffusion.
The fun part is you can do this work without being nerdy.
So, grab a comfy seat and join us on this journey to learn:
- First, How to Use OpenPose and ControlNet,
- 2nd, How to Use OpenPose Editor,
- Finally, Should we need OpenPose?
What is ControlNet OpenPose?
OpenPose is like a super-fast detective for finding key points on a person in a picture, such as where their head and legs are.
When paired with the popular AI art platform, Stable Diffusion, using the ControlNet extension, it becomes a fantastic model or tool for character animation.
Here’s the scoop: OpenPose spots these key points in an image and saves them in a kind of map.
This map tells Stable Diffusion where these points are.
Then, with a little help from a text prompt, Stable Diffusion creates images based on these key points.
This way, you can smoothly switch poses between different characters.
First: Install OpenPose in Stable diffusion
First, install the Controlnet extension and then download the Controlnet openpose model in the stable diffusion WebUI Automatic1111.
This is necessary because OpenPose is one of the models of ControlNet and won’t function without it.
Installing ControlNet:
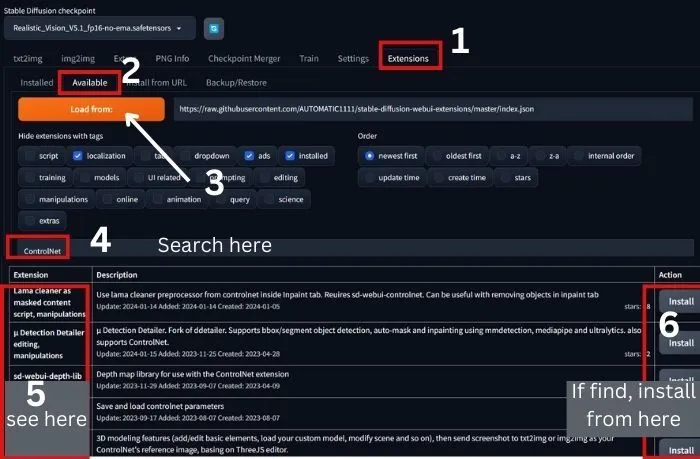
1. First things first, launch Automatic1111 on your computer.
2. Navigate to the Extensions Tab > Available tab, and hit “Load From.”
3. In the search bar, type “controlnet.”
4. Click “Install” on the right side.
5. Now, head over to the “Installed” tab, hit Apply, and restart UI.
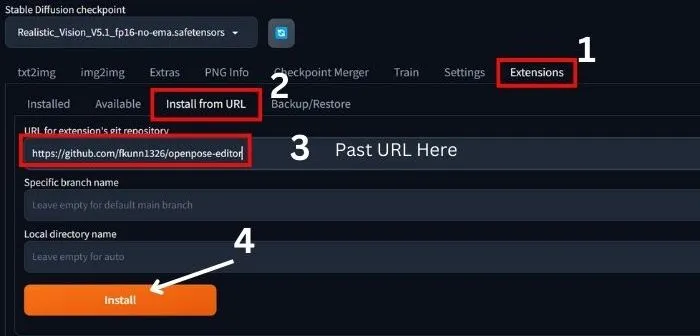
If you do not find ControlNet in the “Load From” section follow the below steps:
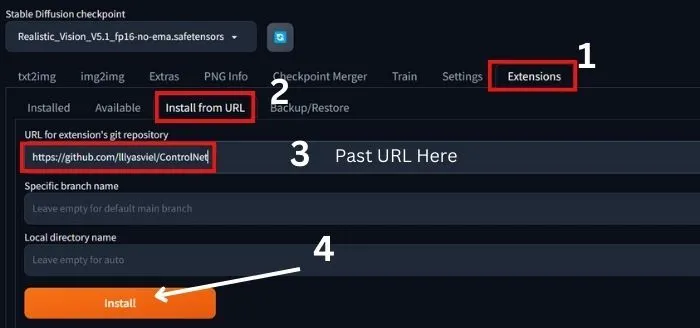
1. Go to Extensions and click on Insert from URL.
2. Past the URL in the box as shown in the above image.
3. After pasting the URL, click on Apply Settings and wait for the confirmation notice.
4. Now, reload the UI and you are ready to go.
Now,
Download Openpose Model:
1. Visit the Hugging Face model page for the OpenPose model developed by Lvmin Zhang and Maneesh Agrawala.
2. Download the model checkpoint that is compatible with your Stable Diffusion version.
But our recommendation is to use Safetensors model for better security and safety.
3. Drop all the files into the Stable Diffusion Automatic1111 installation folder: Extensions > sd-webui-controlnet > models.
If you run into any hiccups, don’t fret!
Let me first complete the tutorial, I will discuss the issues later in this post.
Okay, now we explore the openpose model with ControlNet and then will see how the openpose editor works.
How to Use OpenPose in Stable Diffusion
But, before diving into the use case, let’s familiarize ourselves with the settings and parameters:
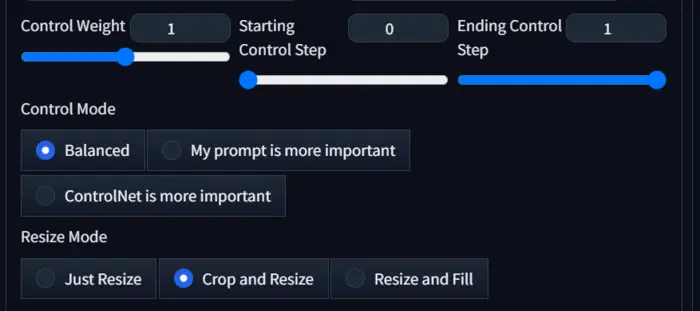
Control Weight: It defines how you are giving control to the Controlnet and its model. Its starting value is 0 and the final value is 1 which is full value.
For this parameter, you can go with the default value.
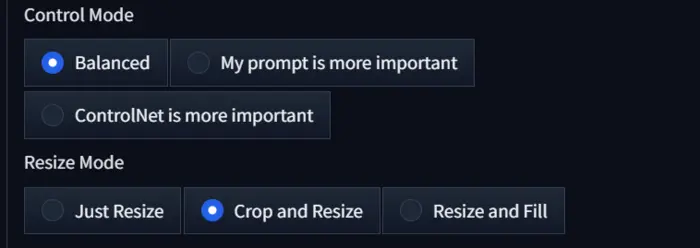
Control Mode: Here you have 3 options to go.
- Balanced: If you select it, the AI tries to balance between your prompt and upload the model’s pose.
- My prompt is more important: If you go with it, your prompt plays a better role than controlled.
- CotrolNet is more important: It gives the freedom to controlnet to control the whole thing.
Resize Mode: Here you also get 3 options, it depends on your image frame and how the image covers the frame.
But the best option is ‘resize and fill’.
Now, to use OpenPose with ControlNet:
1. First, generate an image using a prompt(Describe image composition and color in the prompt.)
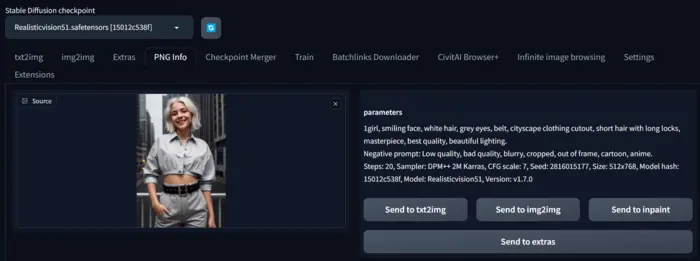
You can also use a previously generated image by PNG ifo tab and send it to txt2img.
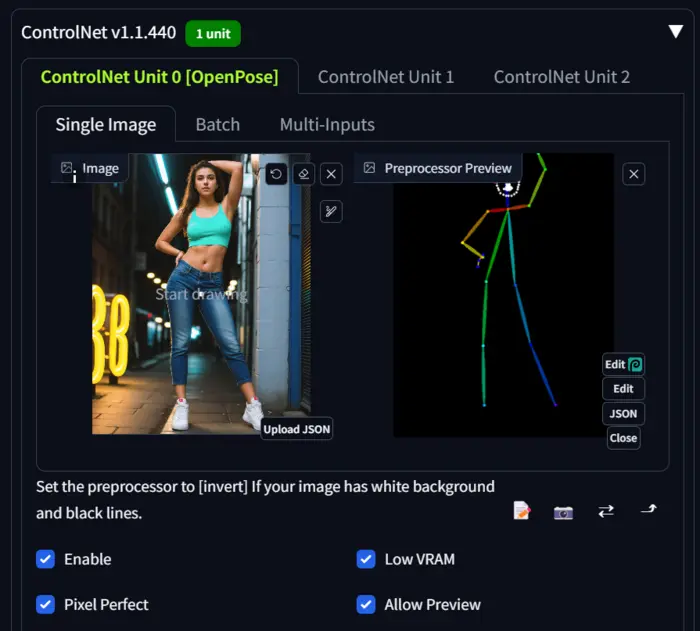
2. Next, enable the controlnet and select openpose model.
3. After this, upload the image whose pose you want to, in the ControlNet canvas, and hit the generate button.
In my case, I am using the following prompt and parameters.
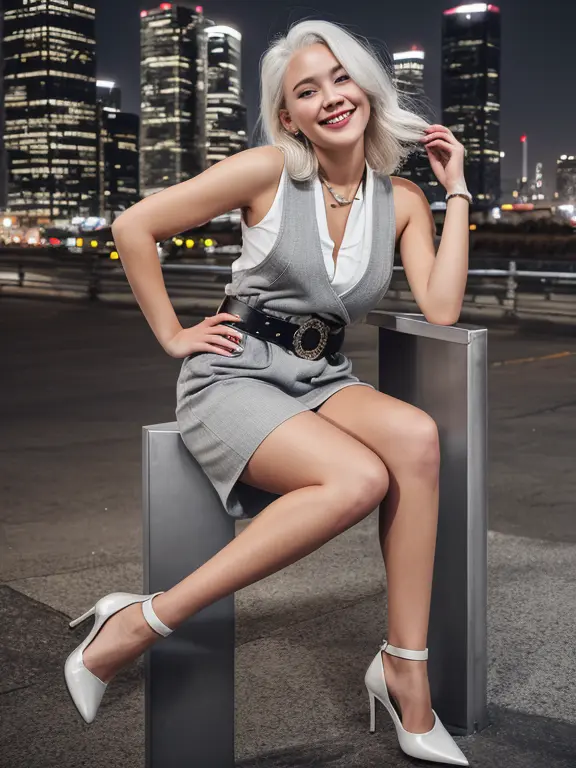
Prompt: 1 girl, smiling face, white hair, grey eyes, belt, well dressed, cityscape clothing cutout, short hair with long locks, masterpiece, best quality, beautiful lighting.
Negative prompt: Low quality, bad quality, blurry, cropped, out of frame, cartoon, anime, blurry face, shaded face, extra fingers, error in fingers, bad hands.
Model: RealisticVision51
Sampler Method: DPM++ 2M Karras
Steps: 20
Size: 576*768
Seed: 2816015177
So, the generated image is:
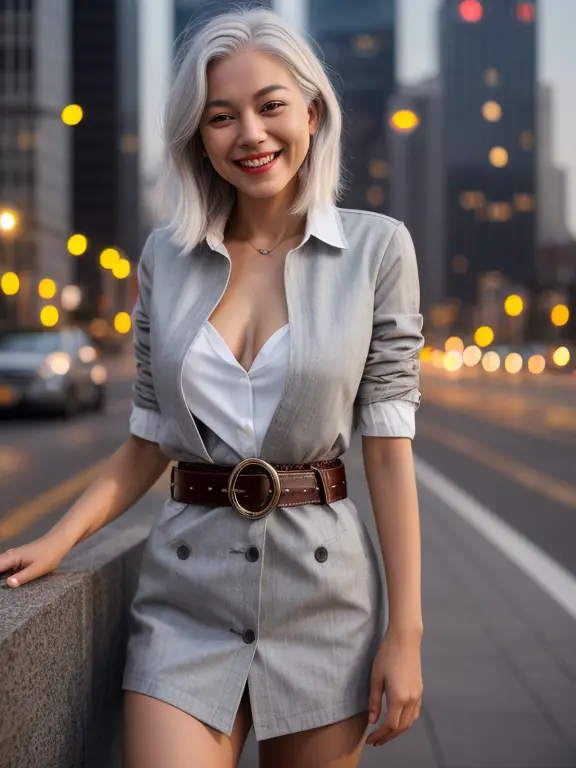
My uploaded image in Controlnet Canvas is:

Firstly, I am going to with the following settings and parameters(the image size: 576*768).
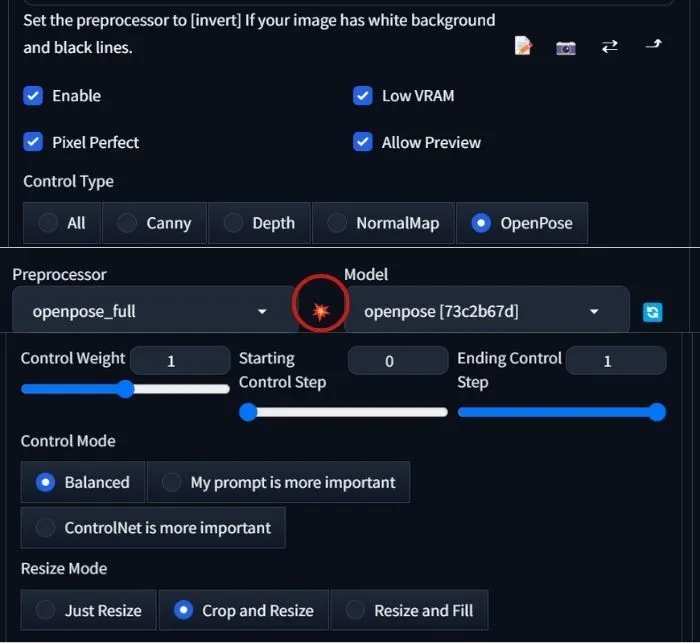
You can see the preview by clicking the fire icon.
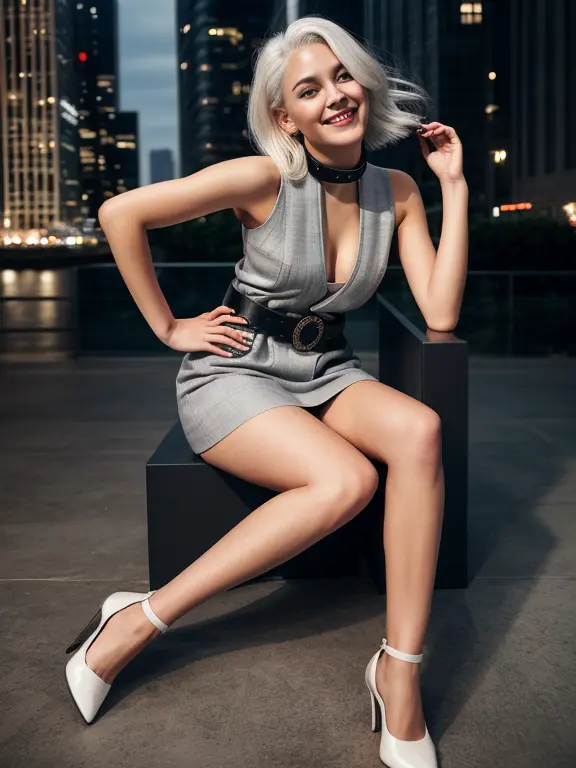
Now, let’s see how openpose controls the pose:
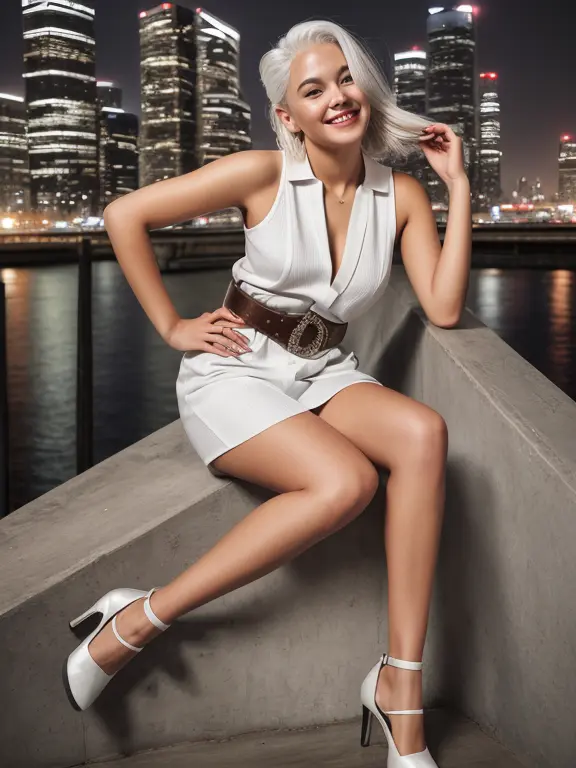
Wow! The model controls the pose.
If you close notice you can see the face and fingers are not okay.
If you also face this.
To, fix these issues you can edit your prompt and and negative prompt.
But, in my case, I am testing the other settings:
You can see when I choose ‘My Prompt is More Important’, the fingers and face improved but with ‘ControlNet is More Important’ there is an error in the fingers.
So, if you have good prompts you can go with ‘My Prompt is More Important’ for better quality, otherwise, you can go with ‘ControlNet is More Important’ or ‘Balanced’.
Now, let’s try to add or edit an object of the image.
In my case, I want to add a stone as a seat of the character.
For this, I edit the prompt to: “1girl, white hair, grey eyes, sitting on a stone, belt, cityscape clothing cutout, short hair with long locks, masterpiece, best quality, beautiful lighting.”
The results are:
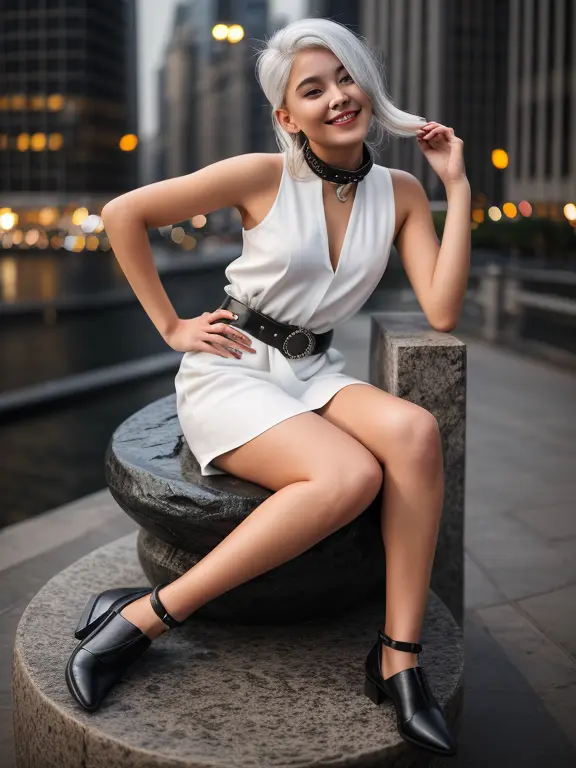
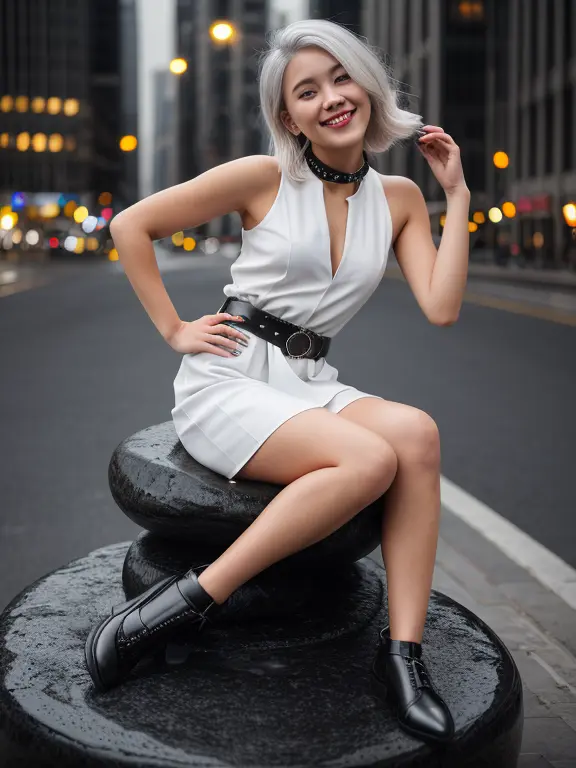
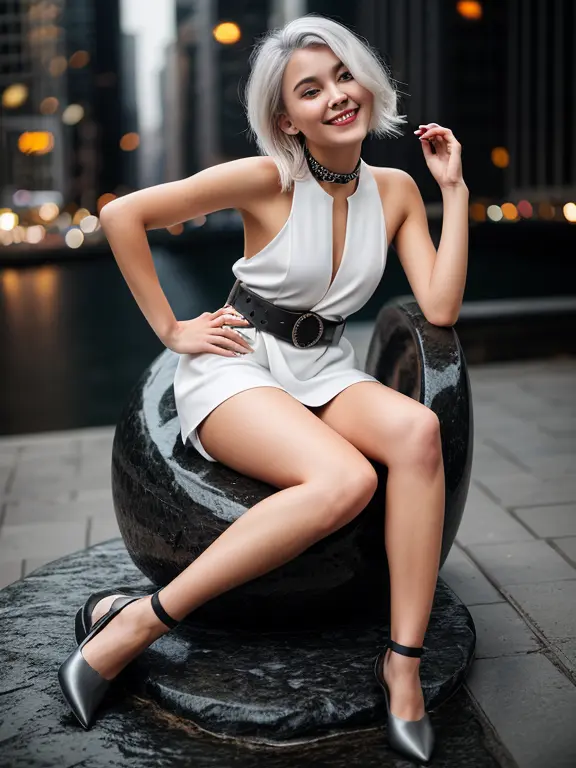
I am really impressed by the model’s capability, it literally understands its ‘Control mode’ and generates as I desired.
I hope, you now understand what model you should choose and when.
Now, if you want more control over poses and want to create poses as you desire.
And this transferring poses from one character to another seems a little complex to you and you’re looking for a simpler yet powerful solution.
The OpenPose Editor might just be the game-changer you’ve been waiting for.
How to Use OpenPose Editor in Automatic1111
So, let’s explore how this innovative tool allows you to effortlessly edit and pose stick figures, all within a user-friendly interface.
OpenPose Editor Installation:
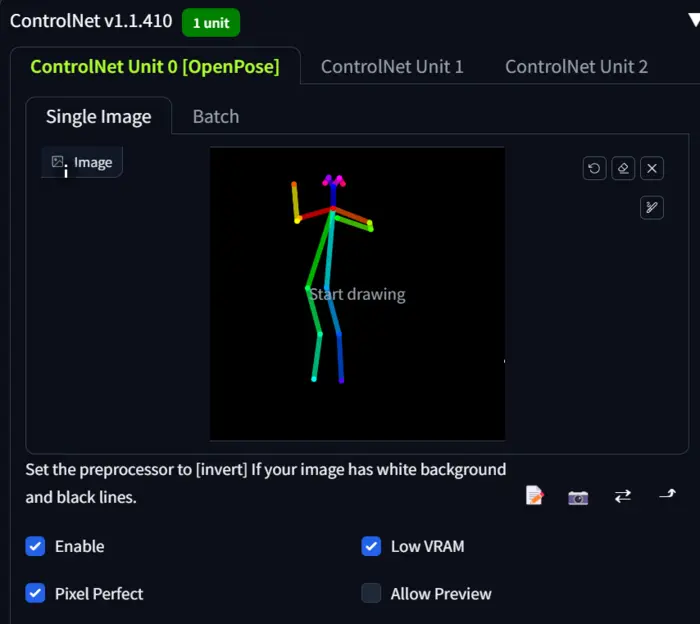
To kickstart your journey with the OpenPose Editor, the first step is installation.
1. In your Automatic1111 webUI head over to the extensions menu and select “Install from URL.”
2. Now, paste the URL in, and click on the ‘install’ button.
3. Now check whether it is installed or not by clicking Installed.
4. After checking, hit the Apply settings and wait for the confirmation notice.
5. Now, Reload the UI, and that’s all to set the stage for the creative adventure that lies ahead.
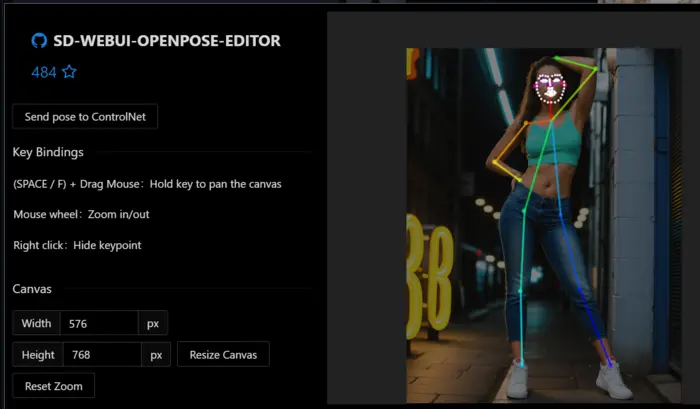
How to Use OpenPose Editor:
Once installed, you’ll find yourself facing a brand new extension that goes by the name ‘OpenPose Editor’ on the top bar menu.
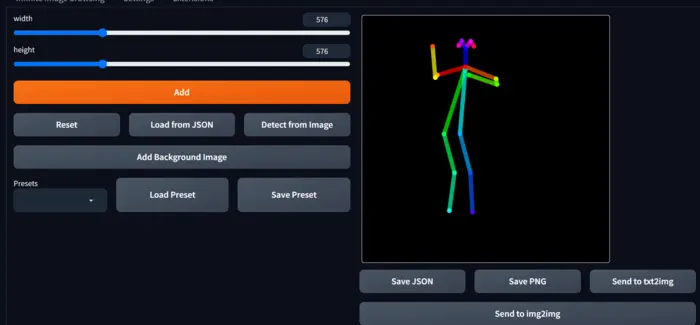
1: So, to use it, open the installed OpenPose Editor to begin creating and editing poses manually.
2: Familiarize Yourself with the Interface: Take a moment to explore the compact interface of OpenPose Editor.
It is designed to mirror the OpenPose model, ensuring an intuitive and straightforward editing process.
3: Edit Stick Figure Pose: Use the editing tools provided in the interface to effortlessly adjust the position of the stick figure.
Experiment with shapes and colors to bring your vision to life.
4: Save Your Creation: Once satisfied with your pose, the OpenPose Editor provides options for saving your creation.
Choose to save it as a PNG file for local storage.
6: Explore Advanced Options: If you want to take your creation further, explore the option to send your pose directly to Control Net.
7: Finalize: Now, adjust the parameters like image size and prompt and hit the generate button.
In my case, I want to generate a character with the following pose:
For this, I send it to ControlNet canvas and past the following prompt and negative prompt.
Prompt: “A beautiful woman, masterpiece, best quality, beautiful lighting.”
Negative prompt: Low quality, bad quality, blurry, cropped, out of frame, cartoon, anime, two girls.
Now, hit the generate button, and below is the result:

Wow! The openpose editor is working very well.
But the image is cropped, to avoid this type of error you can use ‘Resize and Fill’ instead of ‘Crop and resize’.
In this way, you can use OpenPose Editor to manually edit and pose a stick figure without error.
Now, let’s see how we can modify the poses for multiple characters.
Multi-Character Mastery: A Few Clicks Away
The OpenPose Editor doesn’t limit you to a single character; you can effortlessly add more to your scene.
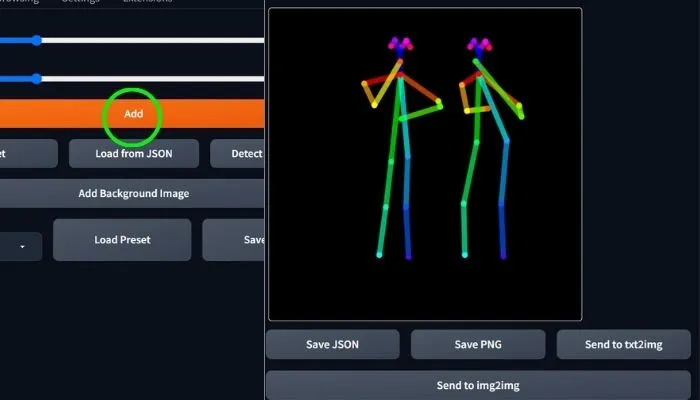
1. You can add multiple Characters to Your Scene by clicking the Add button.
2. After adding the characters, edit Each Character’s Pose.
To do this click on each added skeleton to edit its pose individually and customize their positions to fit seamlessly into your scene.
3. Now, send it to the control net.
4. Here choose the OpenPose model and your desired processor.
5. Now, Describe your characters by prompts and eliminate unwanted objects by negative prompts.
In my case,
Prompt: 2 girls, masterpiece, best quality, beautiful lighting.
Negative prompt: Blurry, low quality, bad quality, anime, cartoon.
6. After doing all of these, hit the generate button.
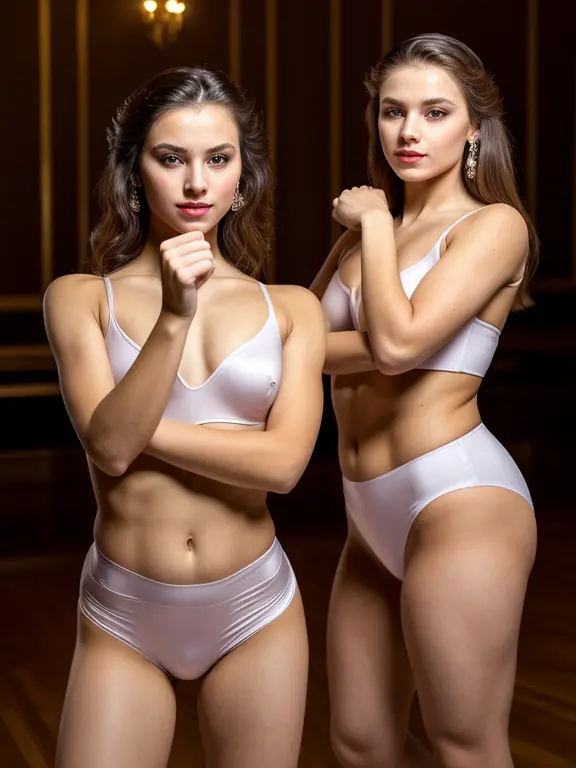
You can see I don’t mention any pose in the prompt, just draw the poses on the openpose editor’s canvas and the model does its work.
Thrust me, this extension stands out for its ability to let you edit poses with ease, all while mirroring the shapes and colors of the OpenPose model.
So, it’s your time to unleash creativity in the world of pose customization.
But, still, you are confused and have the following question:
Should We Need OpenPose?
First, let’s test Stable Diffusion with a prompt that effectively describes the character’s pose, but without using the openpose model.
Next, we’ll run a straightforward prompt that doesn’t provide details about the character’s pose.
Finally, we’ll compare the results of these two tests.
So, let’s start,
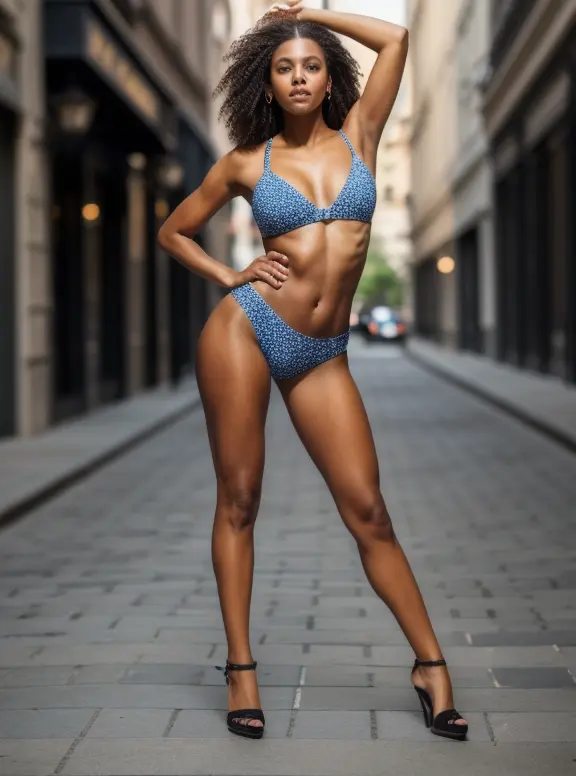
Prompt: A woman standing on a sidewalk. Right hand on the back and left hand on the head. Very stylish pose, full body, blue jeans, and half shorts. Masterpiece, best quality.
Negative prompt: Low quality, blurry, bad quality, poor quality, cartoon, cropped, anime.
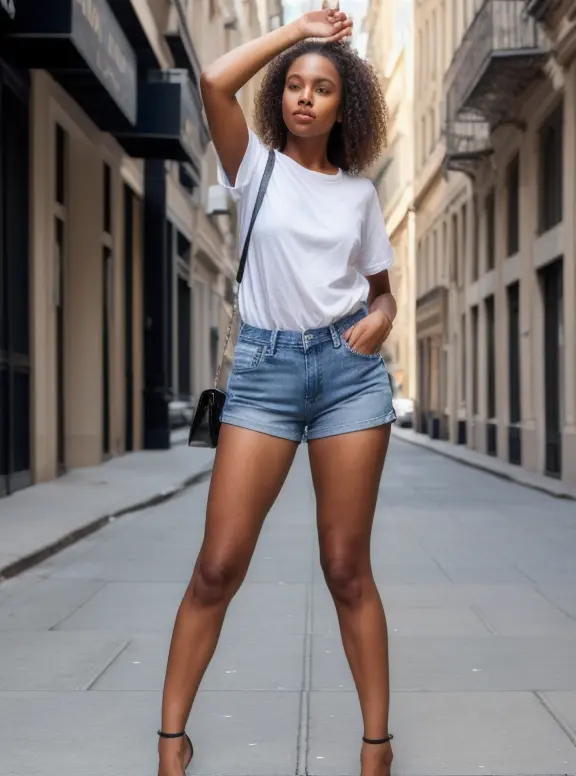
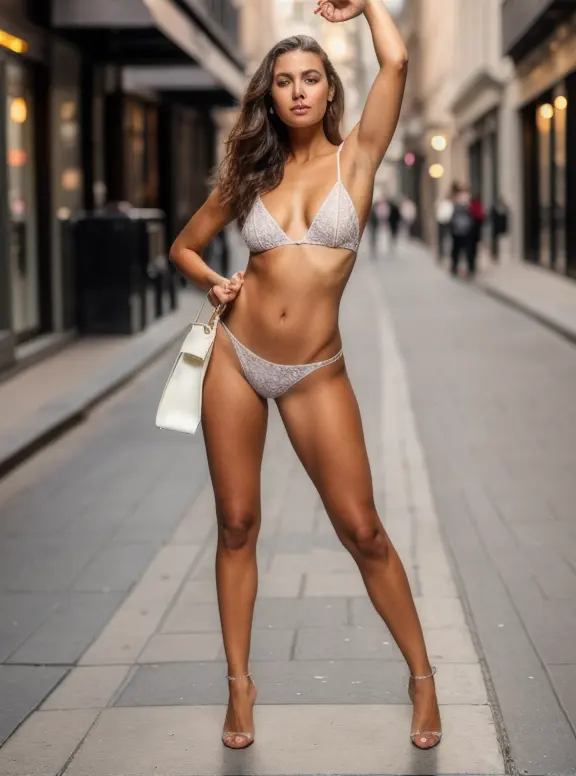
I have used the prompt “A woman standing on a sidewalk” and uploaded the following image in the ControlNet canvas to generate the 2nd image.
You can observe that the AI does not properly understand my prompt if you closely examine the directions of the hands in the first image.
However, the pose is acceptable.
In the second image, the directions of the hands are correct based on my uploaded image, but there is an error in the pose of the hands.
So, at this point, it appears that using OpenPose may not be necessary.
However, this is not the end.
You can address all of these issues.
Fix: Stable Diffusion OpenPose not Working
First, identify the issues:
1. If the poses are not properly drawn in the preview section. To address this, click on the Edit button on the Preview canvas and set it as desired, as shown below.
After setting the pose, send it to the ControlNet canvas and give it a try.
2. If errors occur in faces or hands, change the openpose model for faces or hands by clicking on the model.
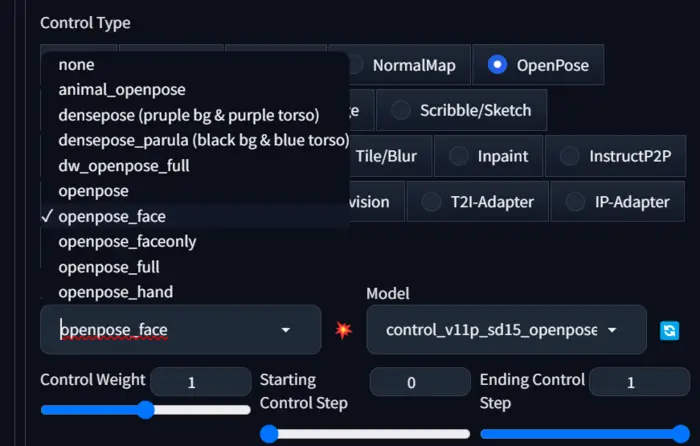
These models are designed to fix all issues related to a particular part.
As in my image, there is an issue with the pose and face I select the ‘openpose_face’ model and adjust the pose as shown in the above image.
Now let’s see the image:
You can see the pose is okay but the face is improved at a certain level.
In this scenario, you can try the best models for realistic faces, because models impact a lot in the generated image.
In conclusion, I want to say there are a lot of options to do in the SD-WEBUI-OPENPOSE EDITOR, so try all of the options individually and create a perfect pose without error.

Hi there! I’m Zaro, the passionate mind behind aienthusiastic.com. With a background in Electronics Science, I’ve had the privilege of delving deep into AI and ML. And this blog is my platform to share my enthusiasm with you.