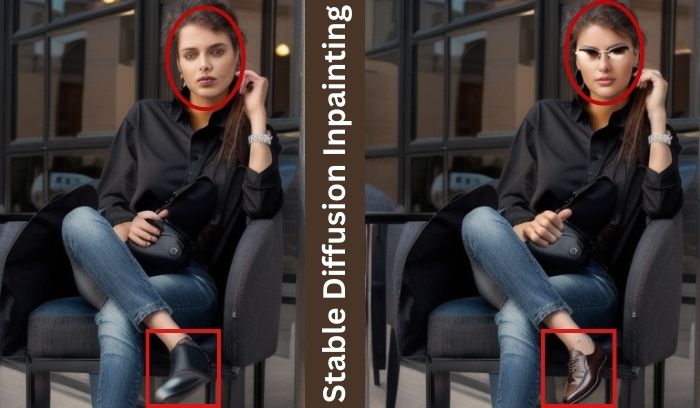
If you have ever stumbled upon an image with breathtaking potential marred by unwanted elements or missing pieces…
From my experience of using Stable Diffusion, Inpainting can be a game-changing tool to fix almost all of the issues related to an AI-generated image.
So, this guide is your gateway to mastering this powerful inpainting technique, whether you’re an experienced editor or a beginner.
But, before diving in, let me clarify what I am using for this and what you need.
Software and Model for Inpainting
In this entire guide, I will use the Automatic1111 stable diffusion WebUI, but you can use any other WebUIs.
Don’t worry if you are using another WebUI; you can confidently apply the techniques because here we focus on inpainting, not on WebUI.
To test all the inpainting techniques, I will use the Realistic Vision Inpainting model.
But you can use Sd-v1-5 inpainting ckpt or any other inpainting models that are specially made for this work from CIVITAI.
But, always try to use safetensors files for your model for better safety.
If you are confused about why I am using an inpainting model instead of any checkpoint models, please be patient; I will discuss it later in this post.
Now, if you want to zoom out and in on your canvas for clear inpainting, you should use the richrobber2/canvas-zoom extension.
To use the extension:
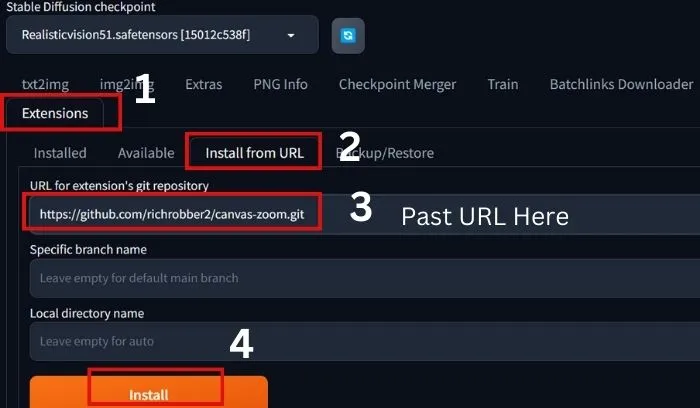
- First, go to the extension of your A1111 WebUI and click on Extension
- Then click on Install from the URL.
- Past the URL(https://github.com/richrobber2/canvas-zoom.git) and click on Install.
- After installation Restart the UI.
That’s it.
Okay, now let’s see how to use Inpaint.
How to Use Inpainting in Stable Diffusion
If you are in a hurry, see the steps below and start your inpainting.
However, we always recommend reading the entire explanation to avoid errors and achieve the desired result.
So, in short, to use Inpaint in Stable diffusion:
1. First, either generate an image or collect an image for inpainting.
2. Then, go to img2img of your WebUI and click on ‘Inpaint.’
3. Now, upload the image into the ‘Inpaint’ canvas.
4. Mask the area you want to edit and paste your desired words in the prompt section.
Also past the words that you do not want in the image in the negative prompt section.
5. Next, scroll down the UI and select ‘Only masked’ from the ‘Inpaint area’.
6. Now, select a batch count for the number of images and adjust the image size, then hit the generate button.
That’s all, the model will do the rest according to your prompt and masking area.
This is a brief note on using Inpaint, but to have full control over Inpainting, you should familiarize yourself with all settings and parameters.
Inpainting Settings and Parameters: Explained
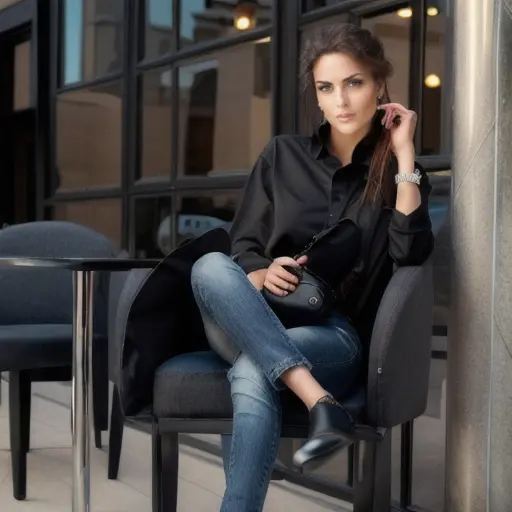
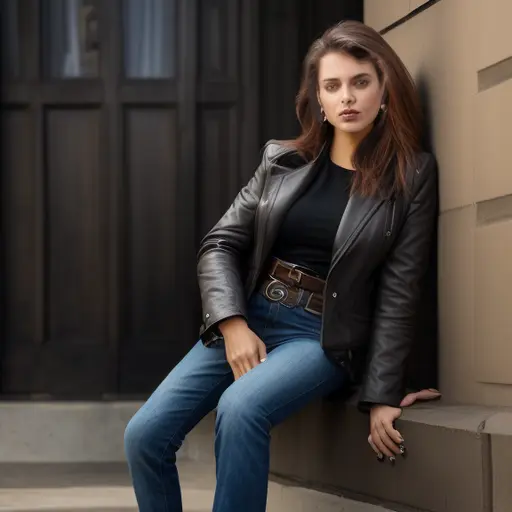
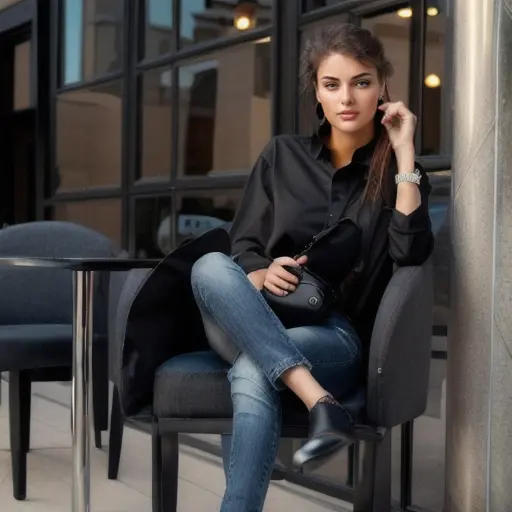
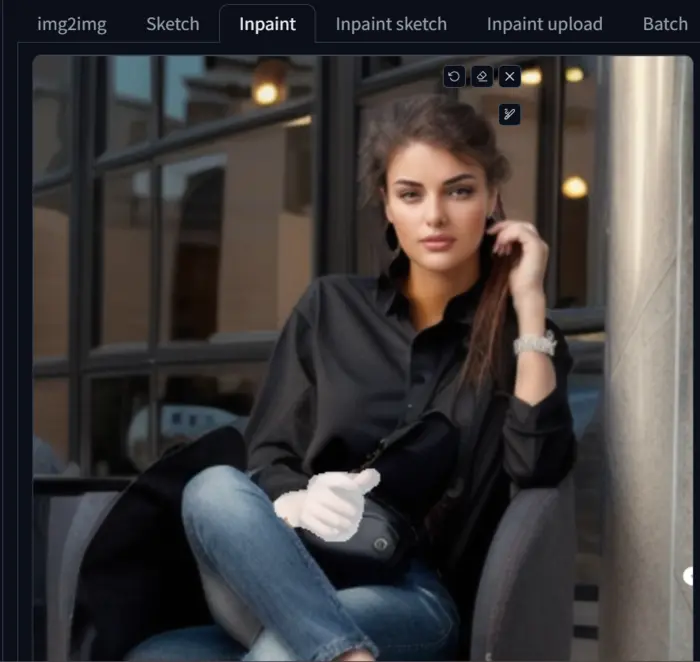
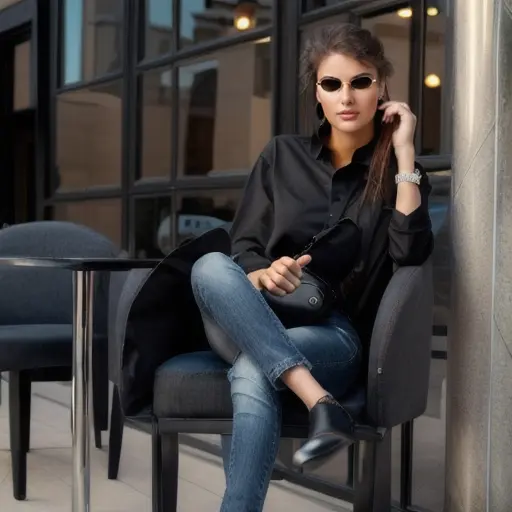
To explain all of the settings and parameters, I have generated the image below and uploaded it to the Inpaint canvas.

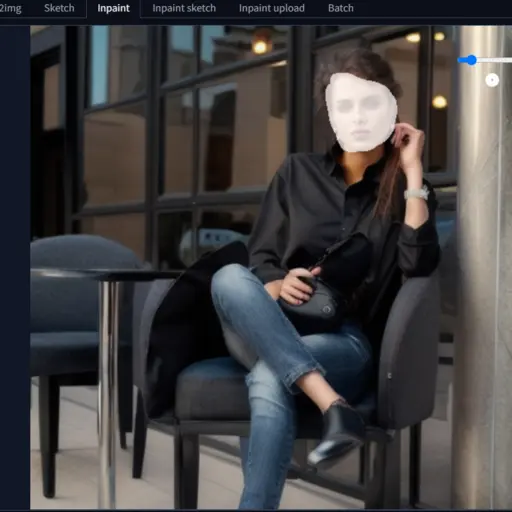
After uploading the image, I masked the face as you can see in the image.
Then, I adjusted the image size to 576*576 and selected only the mask option before hitting the generate button.
Since I selected a batch count of 2, I obtained two images.


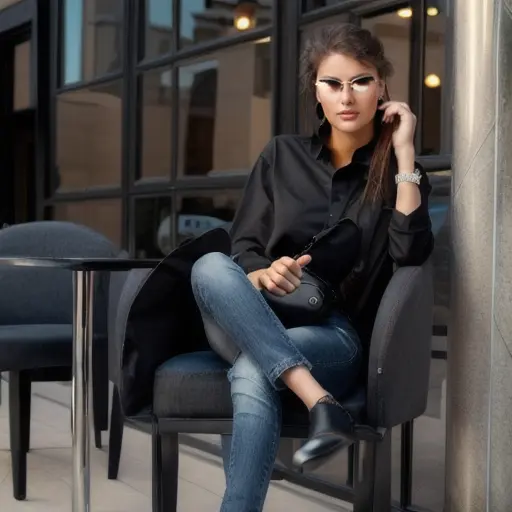
You can see the face is improved.
But you can notice that there is a contrast between the color of the neck’s skin and its face.
Don’t worry; we will learn all of the techniques to fix all the issues step by step.
If you feel that your generated image is not good, then try to restore the face with CodeFormer.
Prompt and Negative Prompt:
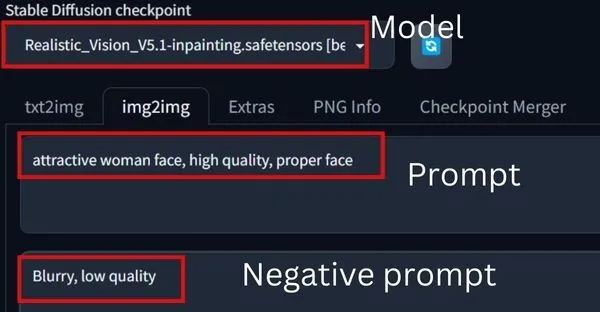
The prompt consists of words describing what you want in the masking area in Inpainting.
Similarly, the negative prompt includes what you don’t want.
For the two images that I generated, the prompt:
"attractive woman face, high quality, proper face," while the negative prompt:
"Blurry, low quality."Tools on Inpaint Canvas:
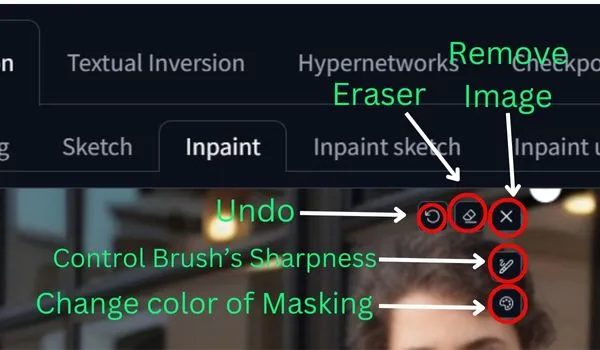
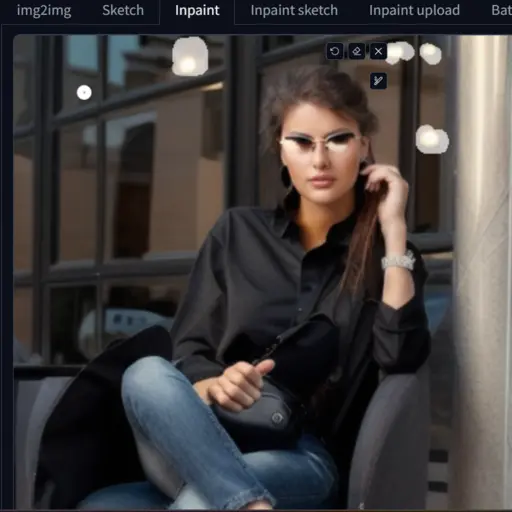
After uploading the image in the Inpaint canvas you can see the above options.
All the tools’ functionalities are described in the image so use them whenever needed.
Batch count:
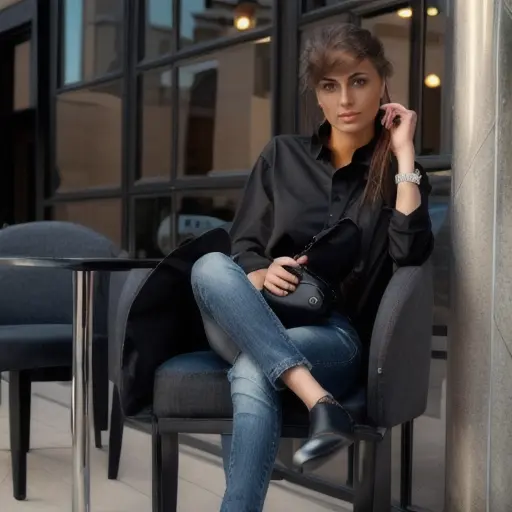
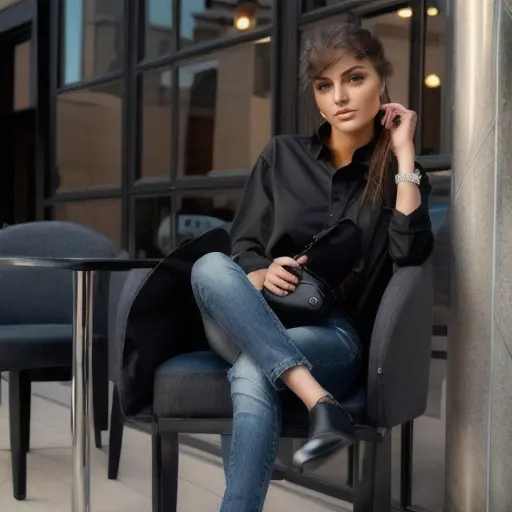
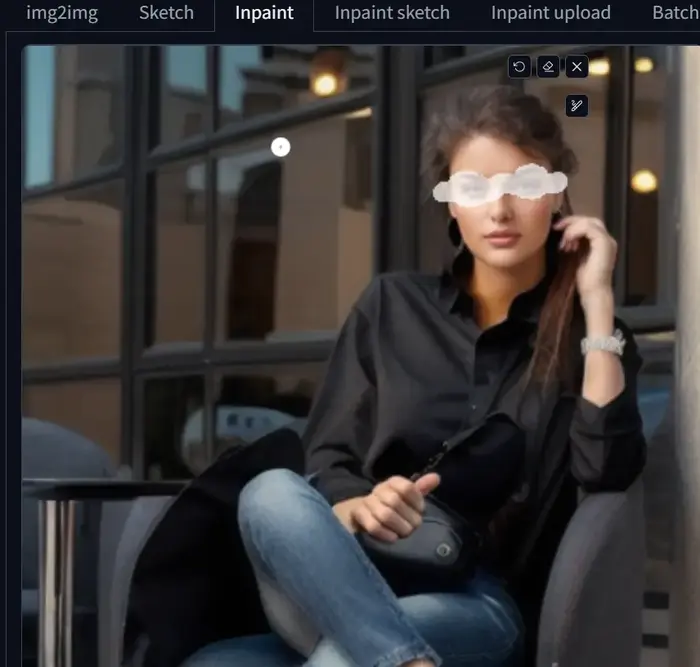
It defines how many images you want to generate. As I told you earlier, there is a contrast of color in the neck and face.
So, now I mask the face and neck as well, and after setting the batch count to 2, hit the generate button.

You can see that the neck of the second image has a slight error, and at this point, the batch count comes into play.
So, now I can select the first image as it is better.
But the faces are not as good as the previous one, so at this point, we learn that we should go with a small masking area.
Otherwise, you may need to use ADetailer to fix faces and hands as well.
Resize Mode:

It basically defines how you want to resize your image.
If your uploaded image is big and you do not want the whole image in your generated image, then go with ‘cropped and resized’; otherwise, ‘Resize and fill’ is the best option for all cases.
Musk blur:
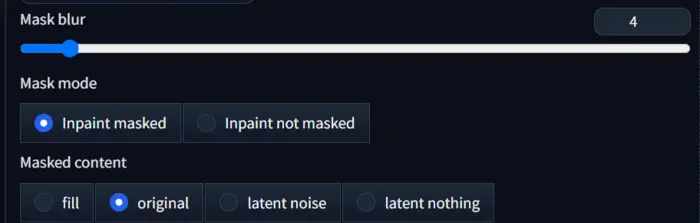
After masking the area, how you want to view the area in your generated image is determined by ‘Mask blur’.
Its value ranges from 0 to 64. That’s why I have run up to 10 values and showcased them below.


You can see that increasing the ‘Mask blur’ decreases the quality of the masked area, and if we use a very high value, the uploaded image is repeated.
Therefore, the best ‘Mask blur’ value is between 0 and 5. For further testing, I am going to use 1.
Mask Mode:
Mask mode gives the signal to the AI indicating which area you want to retain from the uploaded images.
All of the previously generated images were selected using the ‘Inpaint masked’ option, which instructs the AI to only modify the face that I masked and keep the remaining portion the same.
However, if I choose the ‘Inpaint not masked’ option, the AI will retain the same face as in my uploaded image and change other portions according to our prompt.
Below are two images generated using ‘Inpaint not masked’.
So, for this tutorial, our preferred option is ‘Inpaint masked’ as we aim to improve our images by inpainting.
Mask Content:
Masked content in Stable Diffusion inpainting refers to what the model uses as a starting point for generating content within the masked area of your image.
It’s like deciding what kind of “clay” gets placed there before the AI sculpts it according to your text prompt.
Here are the different options and their effects(Masking the face):
Original: This keeps the original content under the mask and refines it based on your prompt. Useful for subtle changes or preserving specific details.

Fill: Starts with a blurry version of the original content, blending smoothly with the surrounding areas for more seamless inpainting.
Latent Noise: Initializes the masked area with random noise, giving the AI more freedom to create something completely new and different.

Latent Nothing: Similar to latent noise, but without any additional noise added. Like starting with a blank canvas within the mask, allowing for highly unique and creative results.
So, choosing the right masked content option depends on your goal, and for clarification read the below part:
Maintain details: Use “Original” for subtle changes or keeping specific elements.
Seamless blends: Opt for “Fill” for smooth transitions between existing and new content.
Something completely new: Choose “Latent Noise” or “Latent Nothing” for maximum creative freedom and unexpected results.
Inpaint Area:
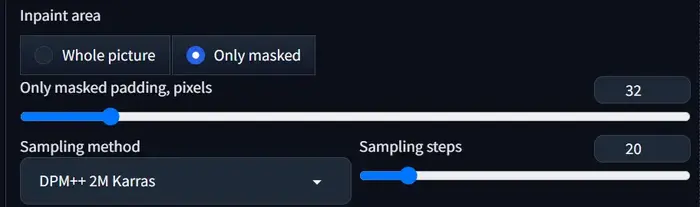
Here you can give an extra signal to AI about your masking. If you mask the whole image then select ‘Whole picture’ otherwise go with ‘only masked’.
It’s like giving the AI a smaller block of clay to work with, instead of the whole image.
This can be useful for increasing the resolution of specific details or making precise changes within a defined area.
Only masked padding, pixels:
It controls the extra information used during the “Only Masked” inpainting mode.
This setting determines how many extra pixels around the masked area are included when upscaling.
For example, if you set it to 32, the AI will consider a 32-pixel border around the mask along with the masked area itself when generating new content.
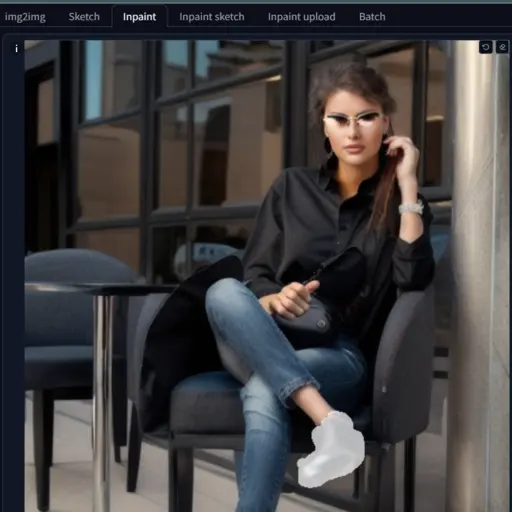
To test it I mask the left hand of the character with the prompt: “Proper hand, proper fingers, proper finger arrangements.”

Below are the images for different values:


Please observe the left hands of the images and I hope you also agree with me that the hand at 32 value is the best.
So, let’s see…
When to use it:
Use a small padding value (0-16 pixels) if you want fast results and only need minor adjustments within the masked area.
Use a larger padding value (16-32 pixels) if you need high accuracy and detail, especially for complex inpainting tasks.
Be cautious with very large values (above 32 pixels) as they can cause artifacts and slow down the process significantly.
But remember, the ideal setting depends on your specific needs and the complexity of your inpainting task.
So, start with a small value and experiment to find the sweet spot!
Samling steps:
Like the number of strokes you take with your sculpting tool.
More steps (typically 50-200) give finer details, but fewer steps (20-30) can yield more abstract, artistic results.
If you want to go with 50+ steps, you should use a high GPU system; otherwise, the process will take a long time.
However, if you use Xformers, it may decrease the time and speed up your system.
CFG Scale:
This adjusts the “weight” given to the text prompt, like how strongly you press your tool based on the image you have in mind.
Higher values (5-10) emphasize the prompt details, while lower values (1-3) allow the model more freedom for creative interpretations.
The best value is from 5 to 9 from our experience.
Denoising Strenght:
Think of this as smoothing out rough edges. Higher values (0.5-1) create cleaner, photorealistic images, but may lose some artistic texture.
Lower values (0.1-0.3) can introduce noise and imperfections, giving a more painterly or dreamlike feel.
To test it I mask the right hand of the character:
Now, I run all the values and showcase only 3 of them below:


I hope you also agree with me that the best denoising strength is between 0.5 to 0.8 after observing the above images.
Seed:
Like a secret code that determines the starting point for the image generation.
Each unique seed creates a different output, even with the same prompt and other settings.
This lets you explore variations of your idea or “rewind” to try different paths.
So, if you want a different composition in every image set it at -1 otherwise fix it at a value.
Now, let’s see how we can add or remove objects by Inpainting.
Adding New Objects with Inpainting
To add any object via Inpainting is quite simple; just follow these steps:
1. Upload the image to the inpaint area and mask the area where you want to add the object.
2. Write your desired words in the prompt box.
3. Adjust the parameters and settings as described above.
4. Hit the generate button.
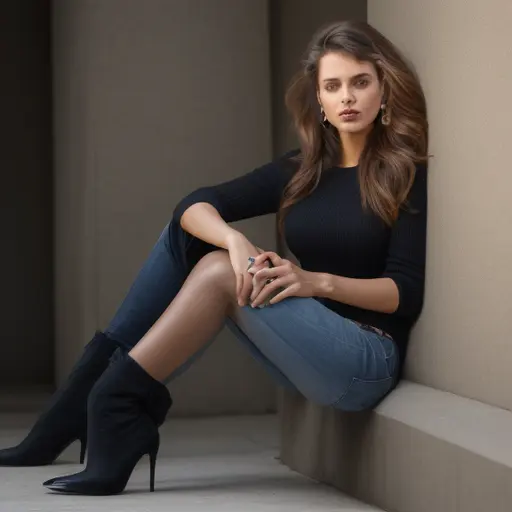
In my case, I am using the final image generated with Denoising strength set to 0.75 and the area masked as shown below.
Now, write the prompt “A woman sunglass”, adjust the settings and parameters, and then hit the generate button.
Wow! Both sunglasses are pretty cool and fit well on the eyes as well as the face.
However, for further work, I want to go with image 2.
Removing Unwanted Objects
Removing objects from an image follows the same process as described above.
In my case, I want to remove the bulbs from the image, so I mask the area and write the prompt “remove light”.
After adjusting the parameters and settings, hit the generate button.

Now, you can see there are no bulbs in the image.
Now, if you’re somehow concerned about the image lighting, no need to fret. You can easily control lighting in stable diffusion.
Changing the Color of Objects
Similarly, you can also change the color of any object using this method.
In my case, I want to change the color of the shoe, that’s why I mask it and write the prompt “Brown office shoes women”
After adjusting the parameters and settings, hit the generate button.

Now, you can see how the inpainting changes the color of the shoe to brown.
Now, as I promised…
Should We Use an Inpainting Model?
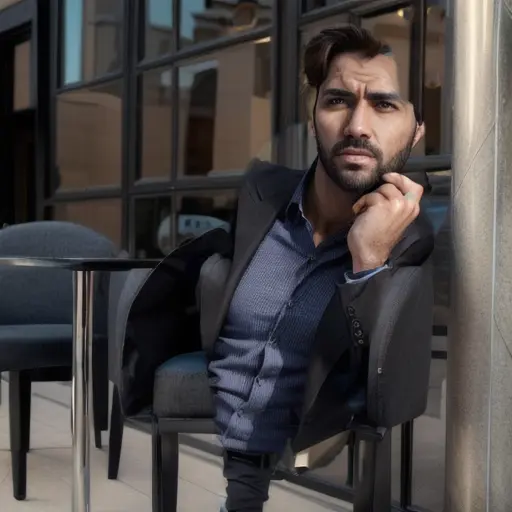
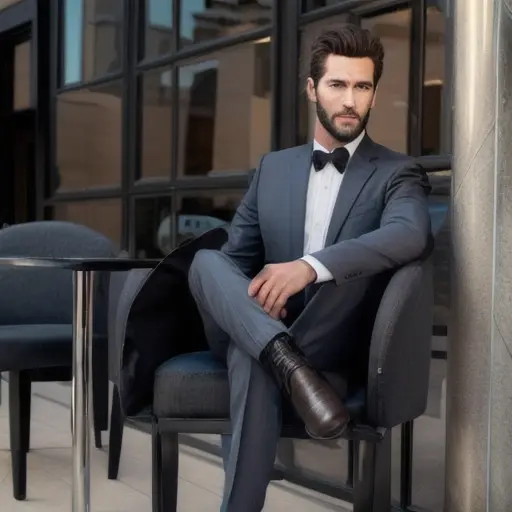
You have already seen the whole process of inpainting with the ‘Realistic Vision Inpainting’ model.
To compare it with a checkpoint model, I have run the entire process in the backend with the “Realistic Vision” model.
Now you can see the difference.
So, it is clear that any checkpoint model can perform inpainting, but for better and smoother results, you should go with the Inpainting model.
Okay, let’s do another test.
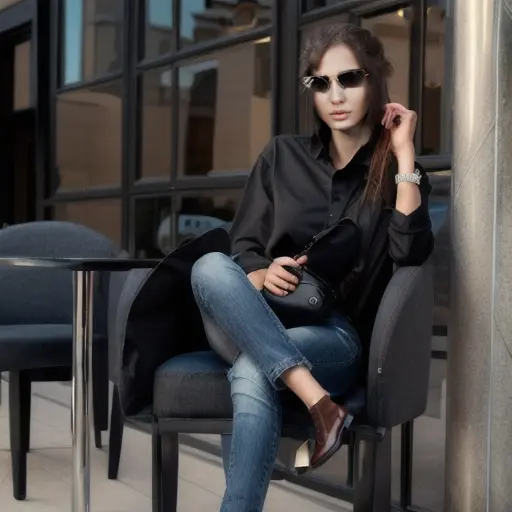
Now I have masked the entire image and written the prompt”A handsome man”, and you can see the results.
So, what do you think?
If you mask a small area, you can go with any checkpoint model, but if you want a different image by masking the entire image, we should use an inpainting model like ‘Realistic Vision Inpainting’.
But, we always recommend using precise masks.
Now, before leaving see what we learn:
Tips for Inpainting in Stable Diffusion
If you’re new to inpainting, begin with small, simple masks and work your way up to more complex areas, and follow the below steps.
Use precise masks: The cleaner your mask, the better the AI will understand what you want to change.
Use tools like the brush and eraser in your editing software to create accurate masks as I told you earlier.
Experiment with different mask shapes: Don’t just stick to rectangles and circles. Explore using freehand shapes or even textures to create interesting effects.
Try “Only Masked” mode: This focuses on the masked area only, giving you more control over the generated content in that specific region.
Settings Tips:
Start with moderate Sampling Steps (50-100): This gives you a good balance between detail and speed. Adjust based on your desired outcome.
Denoising Strength depends on your style: Higher values (0.7-1) create cleaner images, while lower values (0.2-0.4) introduce noise and texture for a more artistic look.
Adjust Masked Content: “Original” for subtle changes, “Fill” for smooth blends, “Latent Noise” or “Latent Nothing” for creative freedom.
In conclusion, try to use “Only masked padding, pixels” at small values (0-16) for speed, and larger values (16-32) for detail, but avoid very high values.

Hi there! I’m Zaro, the passionate mind behind aienthusiastic.com. With a background in Electronics Science, I’ve had the privilege of delving deep into AI and ML. And this blog is my platform to share my enthusiasm with you.