ControlNet v1.1 – the breakthrough companion for Stable Diffusion that grants you unparalleled control over AI-generated art.
In this walkthrough, you will get an easy setup process, even if you’re not tech-savvy.
Once integrated, ControlNet lets you effortlessly tweak depth, pose, and textures, elevating your art to new heights.
So, confidently join us in this exciting venture, where art meets precision, and your imagination is the only limit!
What is ControlNet?

ControlNet, an augmentation to Stable Diffusion, revolutionizes image generation through diffusion processes based on text prompts.
It has the potential to combine the prowess of diffusion processes with intricate control to elevate your creative expression.
It is compatible with Stable Diffusion v1, v2 models or SDXL, and seamlessly integrates trainable modules into the U-Net architecture without modifying the model’s weight.
Unlike default models of stable diffusion, ControlNet integrates task-specific conditions, allowing precise artistic control.
Now, if you are interested in cntrolnet’s potential let’s install it.
How to Install ControlNet in Stable Diffusion
Whether you are using Automatic111 stable diffusion WebUI in Mac, Windows, or Google Colab you can easily install it.
But before installation check the below requirements.
Requirements to Install ControlNet
Before diving into the installation process, ensure that your system meets the recommended requirements for a smooth ControlNet experience.
A dedicated graphics card with a minimum of 4GB VRAM is advisable for running ControlNet.
For Automatic1111 Stable Diffusion Web UI, aim for a system with at least 16GB of RAM and an NVIDIA GPU (GTX 7xx or newer) with at least 2GB VRAM.
Installing ControlNet in Automatic1111
Follow these general steps to seamlessly install ControlNet for Automatic1111 on Windows, Mac, or Google Collab:
1. Install Automatic1111 WebUI: If not already installed, download and install Automatic1111 WebUI from the official GitHub repository.
2. Check Version: Ensure you have the latest version of Automatic1111 WebUI (version 1.6 or higher).
3. Now, Open Automatic1111 WebUI in your browser
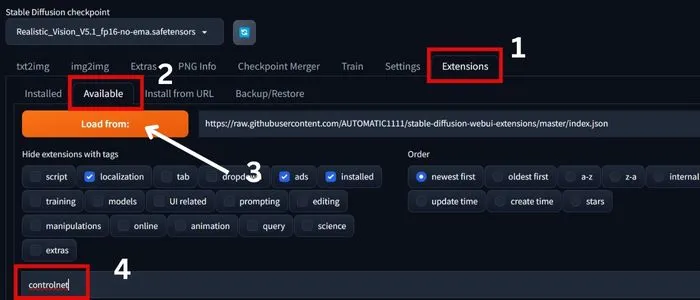
4. Next, go to the Extensions tab, and click on the “Available” sub-tab.
5. Click on the “Load from” button. And In the search bar, type “controller.”
6. Look for the Extension named “sd-webui-controlnet” and click “Install” in the Action column and Wait for Installation.
7. Next, go to the “Installed” tab and apply changes by clicking “Apply” and then “Restart UI.”
After restarting, ControlNet should be available in the drop-down menu as shown in the below image.
If you encounter issues, an alternative method using the GitHub repository URL is available for you.
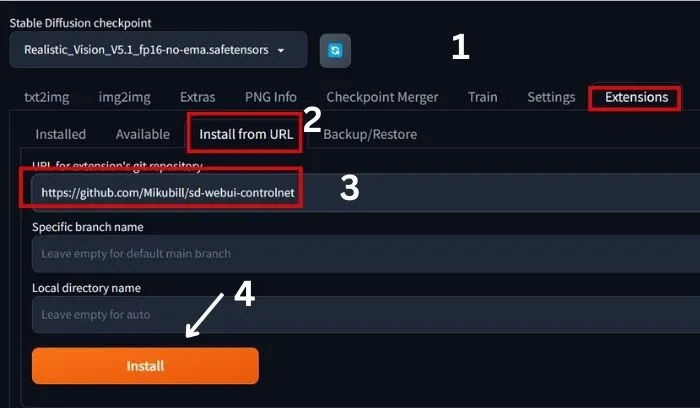
1. First, click on Extensins and then ‘install from URL’.
2. Now, past the URL “https://github.com/Mikubill/sd-webui-controlnet” as shown on the image.
3. Now, click on the install button and wait for installation.
4. After seeing a successful installation notice restart the webUI.
That’s it ContrlNet will be installed. But to use it you should download models for Controlnet.
Download ControlNet Models
So, let’s download the models for a seamless experience in accessing and utilizing ControlNet for your projects.
1. First, Navigate to the Hugging Face repository using the following link: (https://huggingface.co/lllyasviel/ControlNet-v1-1/tree/main).
Here, you’ll find the necessary files for downloading ControlNet models.
You can also download and use safetensors file from here(https://huggingface.co/kohya-ss/ControlNet-diff-modules/tree/main) for better safety.
Actually, I am using these files.
2. So, from the repositories, download both the .pth and .yml files or safetensors files associated with the ControlNet models.
If you want to test with CIVITAI models check out it here(https://civitai.com/models/9868/controlnet-pre-trained-difference-models).
3. Now, Locate the Stable Diffusion Automatic111 installation folder.
And Navigate to Extensions > sd-webui-controlnet > models.
4. Drop all the downloaded control_V11 .pth and .yml files into this folder.
Finally, Launch Automatic111, and you should see all the ControlNet models populate under the drop-down menu.
How to Use ControlNet in Stable Diffusion
There are many ways to use the controller.
So, in this section, I’ll show you how to use it with just a few clicks and then explain how you can become a ControlNet expert.
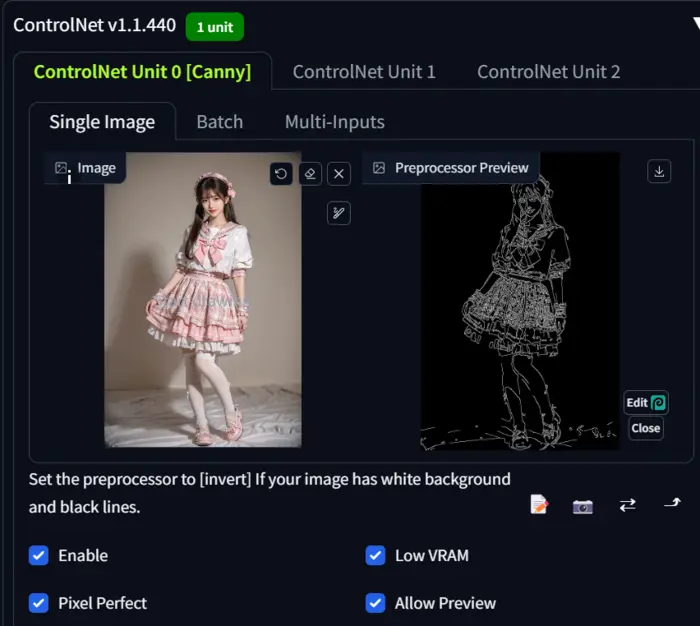
1. After launching the WebUI, go to the text2img section and past your prompt and negative prompt in the desired areas.
2. Now, enable the Controlnet and select a model that depends on your work.
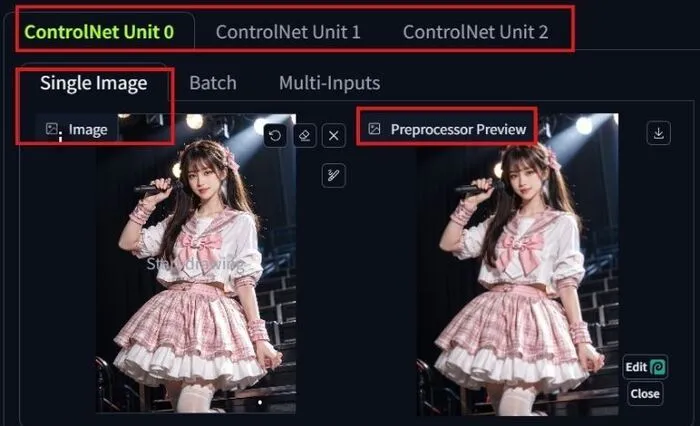
3. Upload the image whose composition will be merged with the generated image in the ‘ControlNet unit 0’ canvas.
4. Now, enable the basic settings like ‘allow preview’, ‘low VRAM’, and ‘pixel perfect’.
5. Select your image’s parameters like image size, and sampler method, and hit the generate button.
That’s it ControlNet will do the rest.
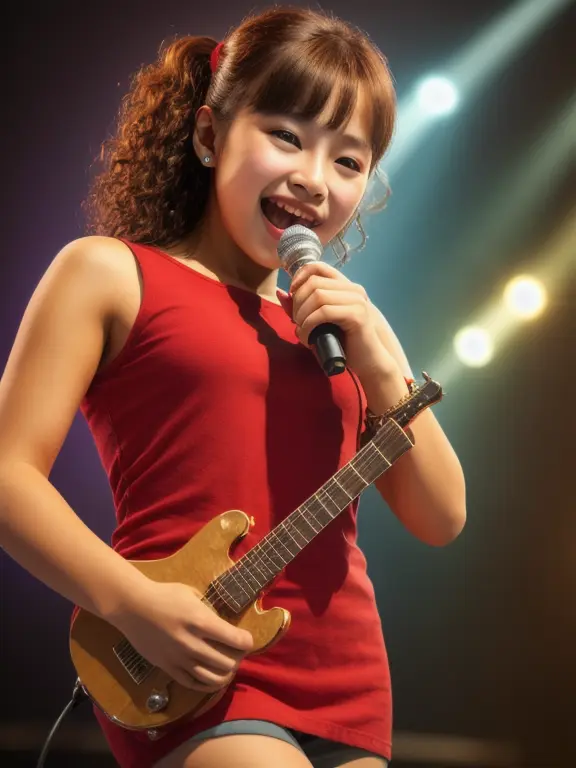
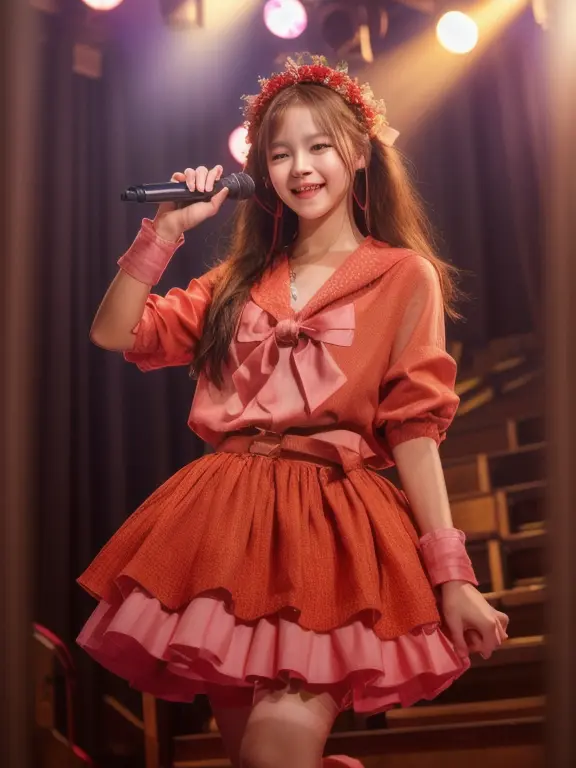
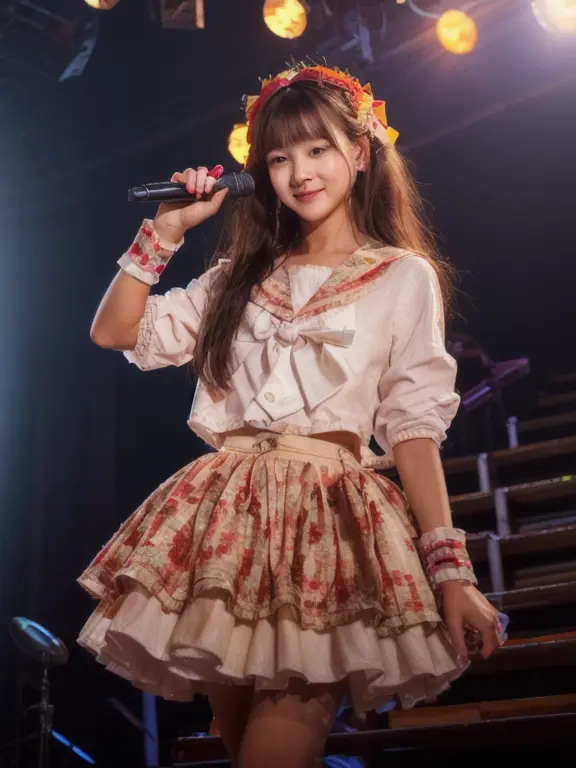
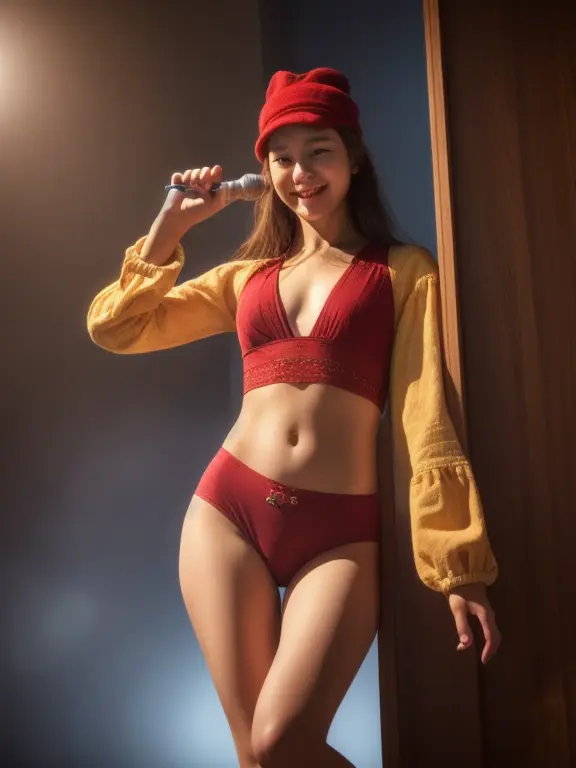
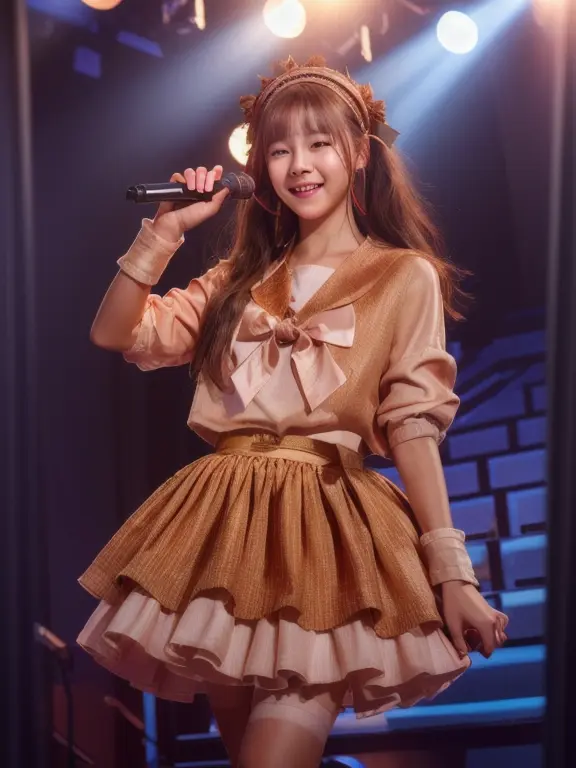
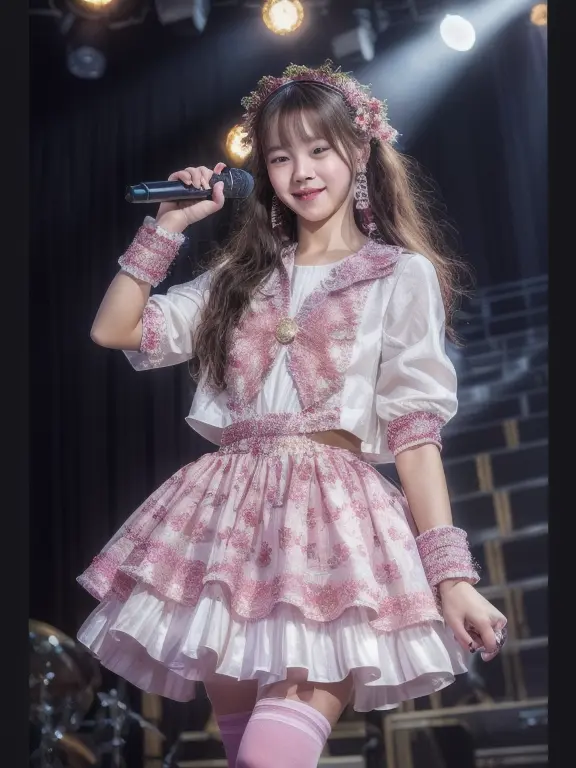
In my case, the following are my uploaded image and parameters:
Model: RealisticVision51
Prompt: “1girl, solo, looking at viewer, light smile, full body, standing, best quality, masterpiece, realistic, photorealistic.”
Negative Prompt: “Low quality, blurry, cartoon, anime, watermark, monochrome, bad hands, white background.”
Image size: 576*768
Seed: 1975612121
Sampling method: DPM++ 2M Karras
Sampling steps: 25
ControlNet Model: Canny
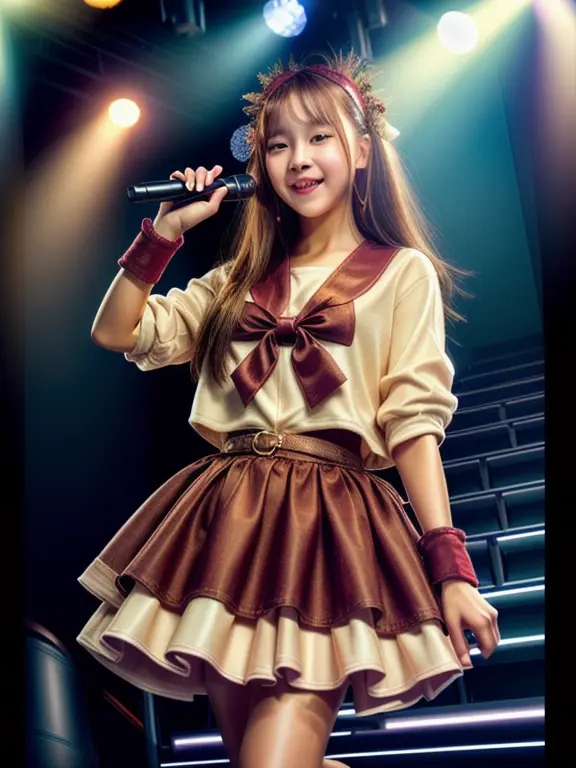
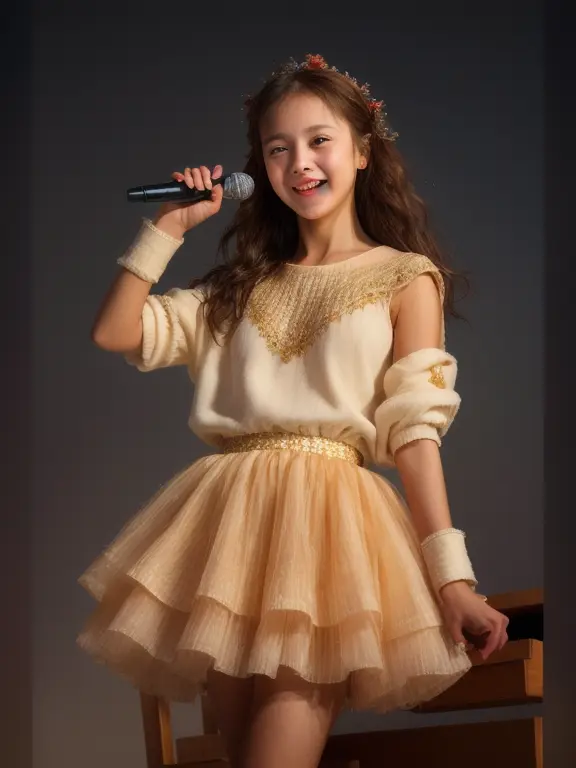
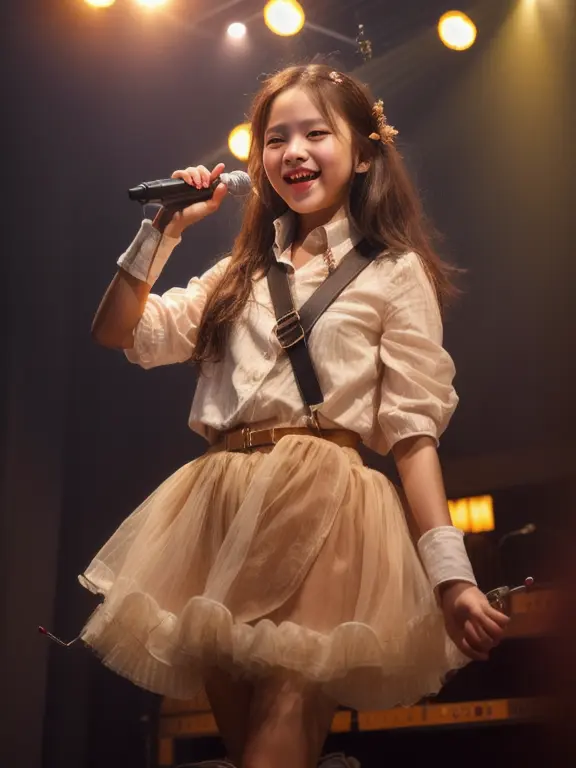
So, the generated image is:
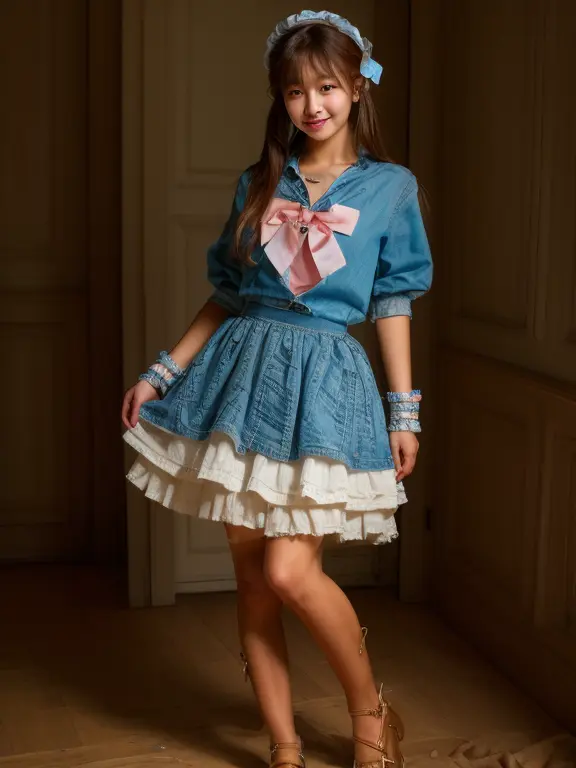
You can see how the ControlNet understands the uploaded image and sends it to Stable Diffusion, and the AI understands my prompt and generates the desired image.
Now, if you want to blend two or more images, you need to…
Use Multiple ControlNet Models
1. Past a proper prompt in the tax2img’s prompt area.
2. Now enable ControlNet, select one control type, and upload an image in the ControlNet unit 0.
3. Go to ControlNet unit 1, here upload another image, and select a new control type model.
4. Now, enable ‘allow preview’, ‘low VRAM’, and ‘pixel perfect’ as I stated earlier.
4. You can also add more images on the next ControlNet units.
5. After uploading images adjust the parameters like image size, sampling steps, etc, and hit the generate button.
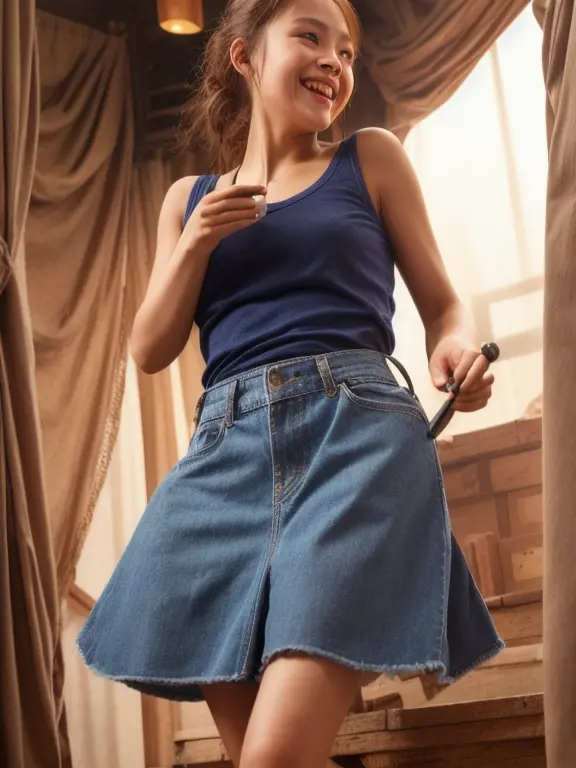
In my case, I am changing the prompt to “2 girls, looking at the viewer, light smile, full body, standing, best quality, masterpiece, realistic, photorealistic.”
As here I am bleeding two images the image size is 768*576 and keep all the settings the same.
Know more about the best image size in stable diffusion.
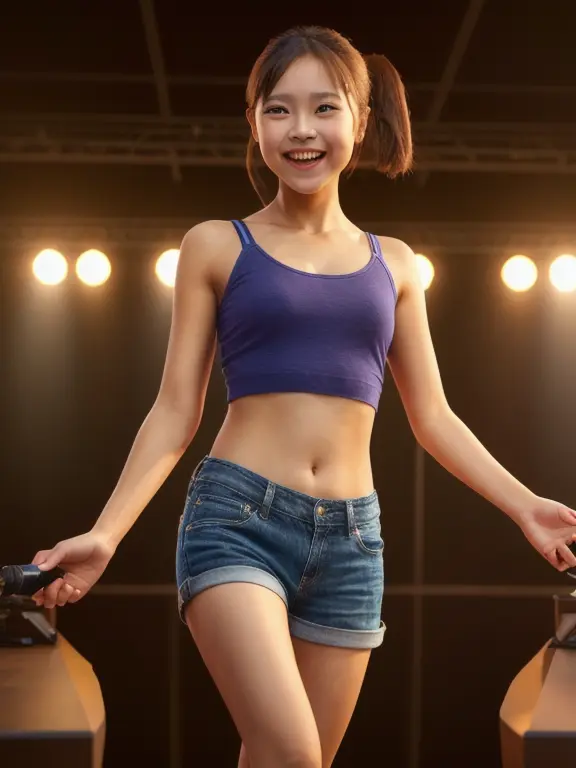
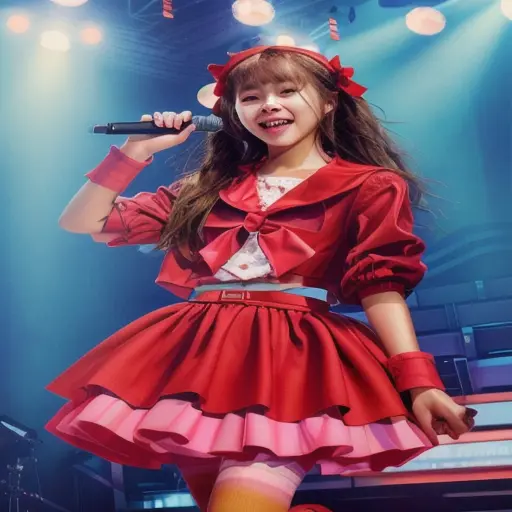
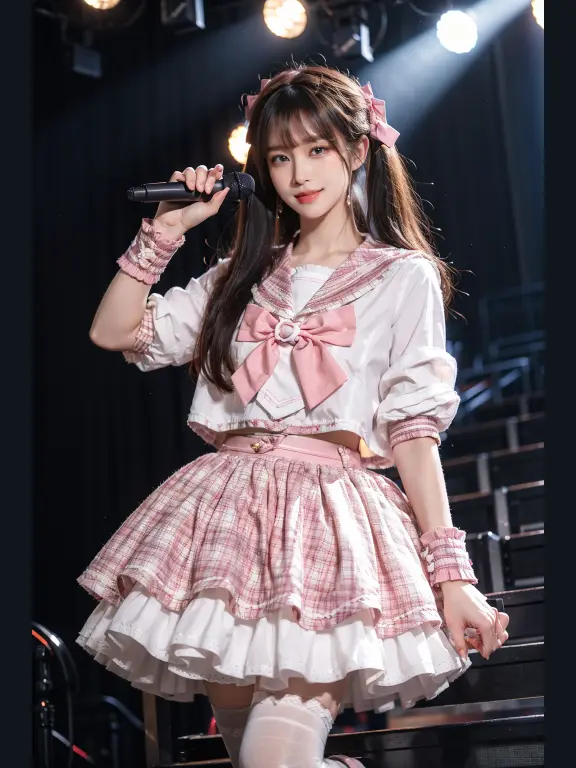
The image in ControlNet unit 0 is the previous one and in ControlNet unit 1 is below:
Now, I select the control type ‘depth’ and hit the generate button.
Wow! The controlnet is working very well.
But if you closely notice the faces these are not properly generated.
Don’t worry, I will show you how we can fix this using the inpainting control type in this post.
ControlNet Settings and Parameters: Become a Pro
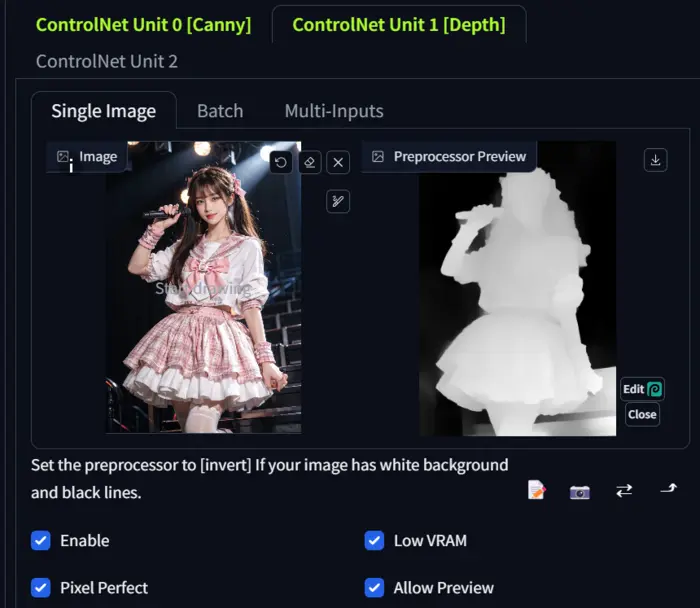
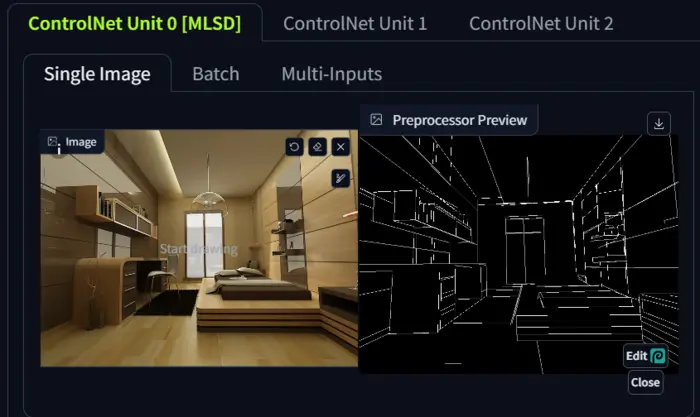
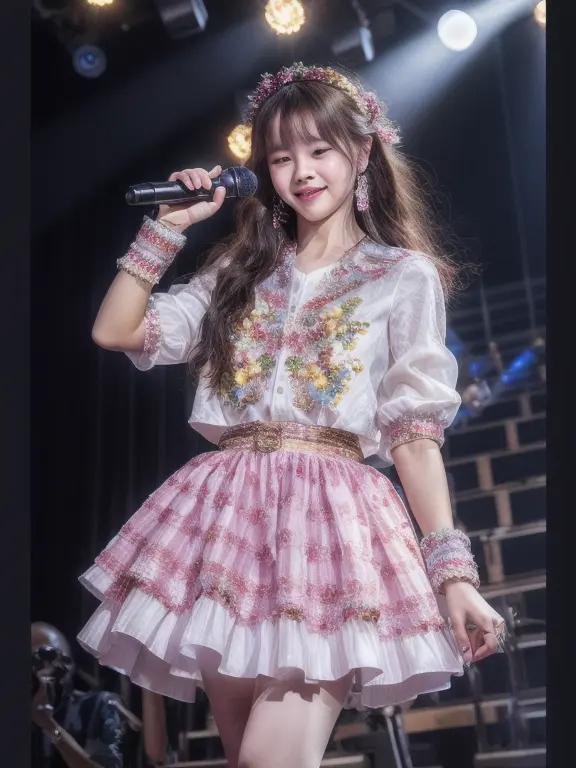
To explain all the settings and parameters I am using the below image as a demo.
Control Units: These are your canvases to upload images for ControlNet.
If you want to work with a single image, you should go with Control Unit 0, and for more, use Units 1 and 2.
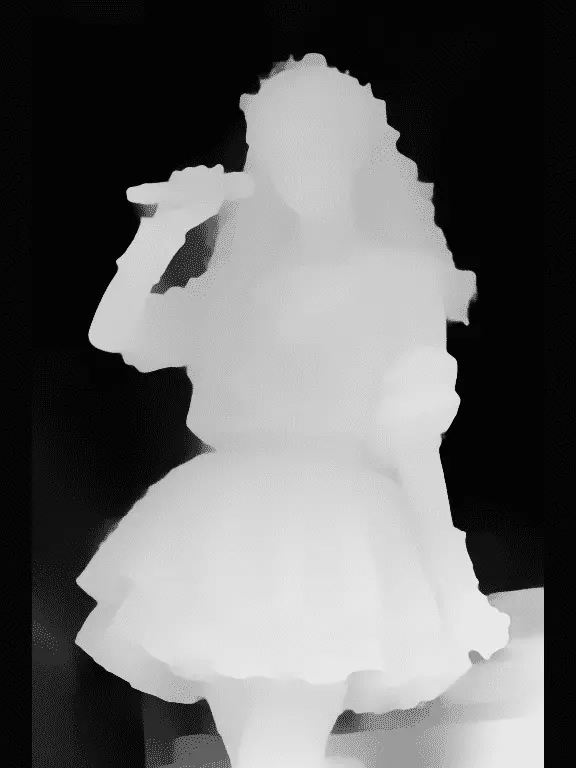
Processor Preview: It is the preview of your uploaded image, showing how ControlNet detects your image.
In the above image, I didn’t select any processor, which is why it detects the original image.
However, if I select a processor, for example, SoftEdge, ControlNet detects the map, and the preview will look like the one below.
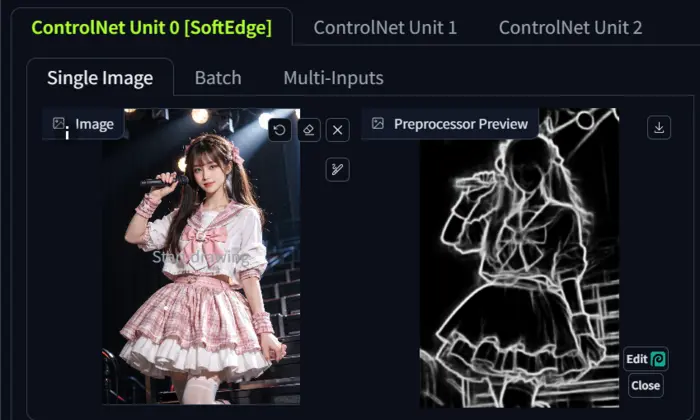
To see a preview of a processor, click on the fire icon just to the right of the processor.
Control Weight: It defines how much your generated image carries the composition of the uploaded image.
The value varies from 0 to 2, but the default and best value of control weight is 1.
Control Step: Here, two types of steps are available: starting and ending steps.
a) Starting steps tell the model from which point to start detecting the composition of the uploaded image. Its value varies from 0.1 to 1, but the optimal range is from 0.3 to 0.5.
b) Ending steps determine where you want the model to stop carrying the composition of the uploaded image. It should be 1 for better results.
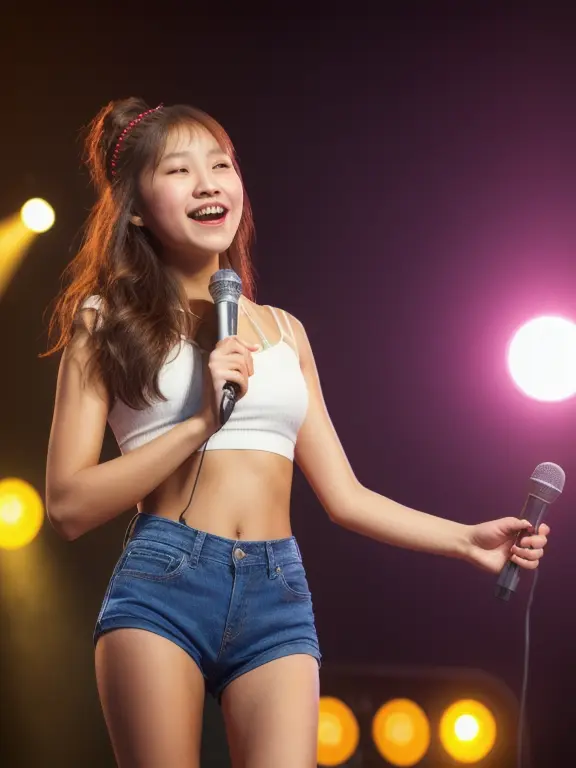
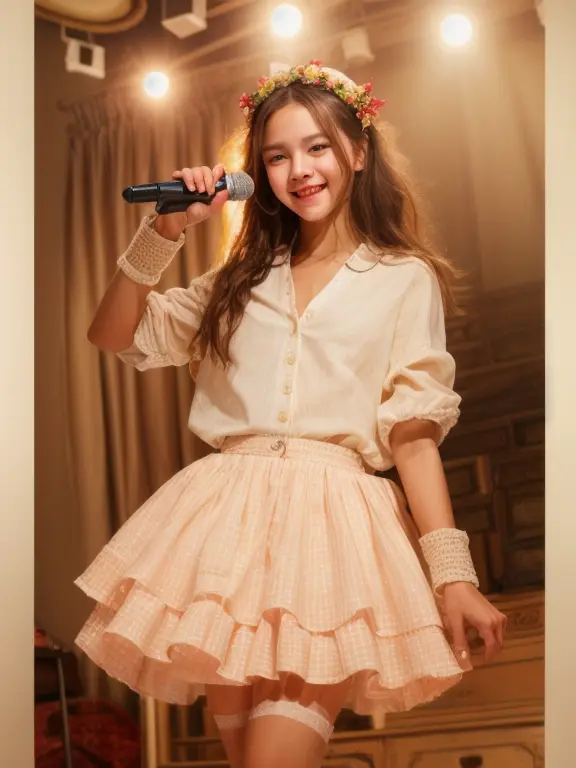
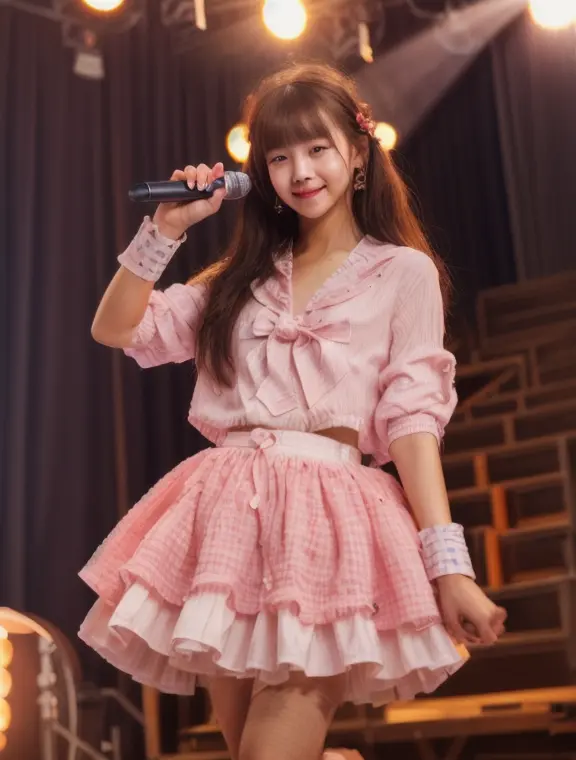
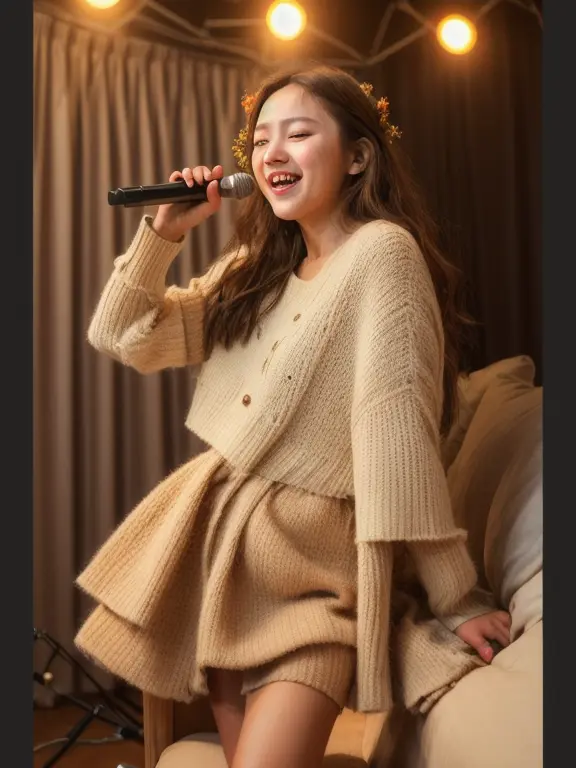
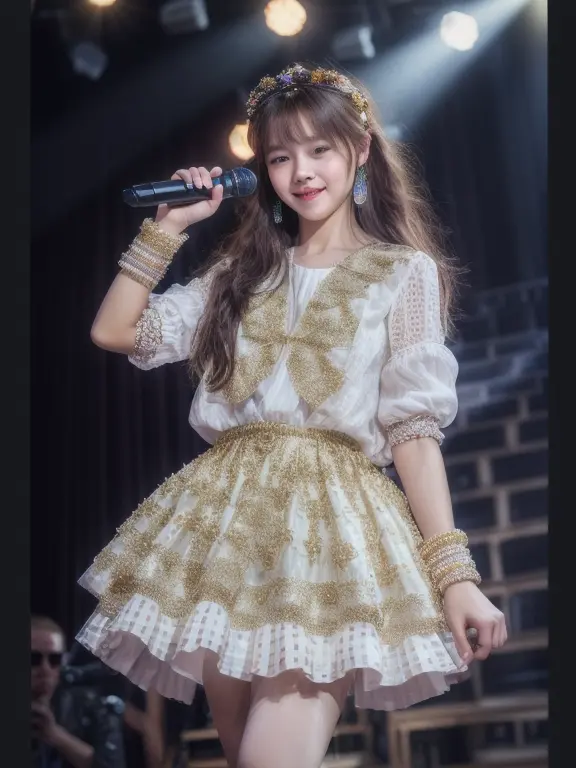
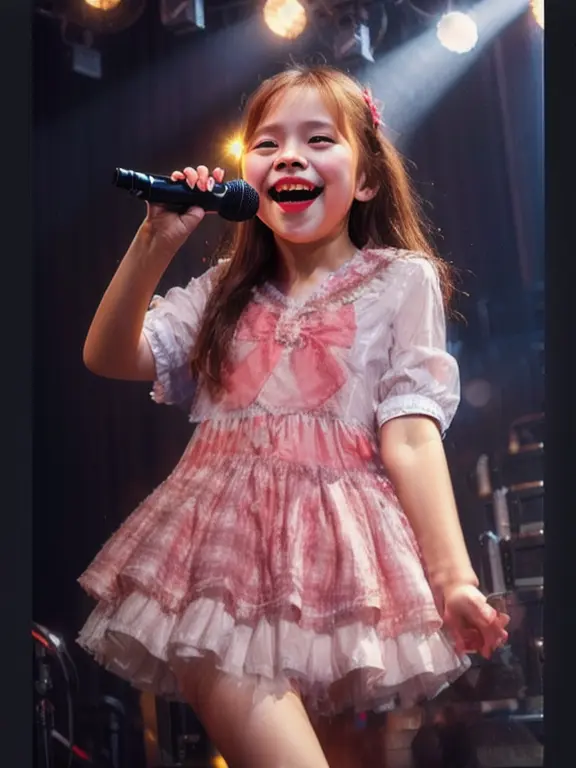
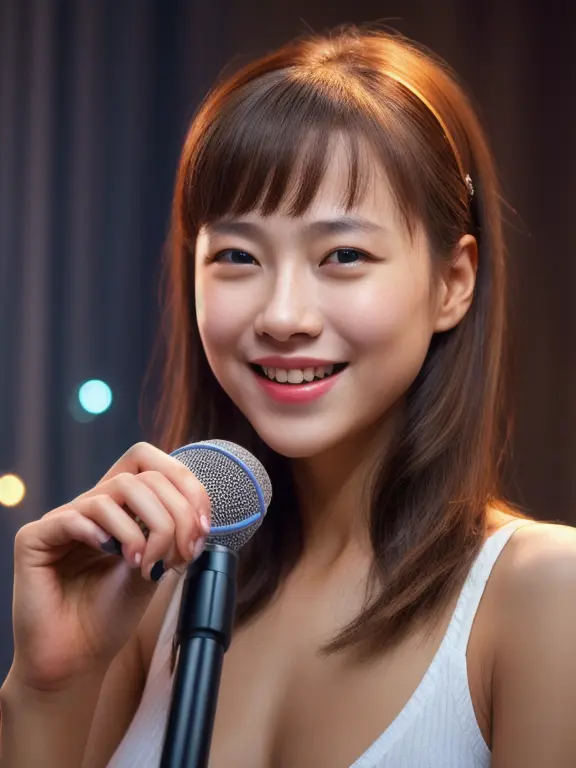
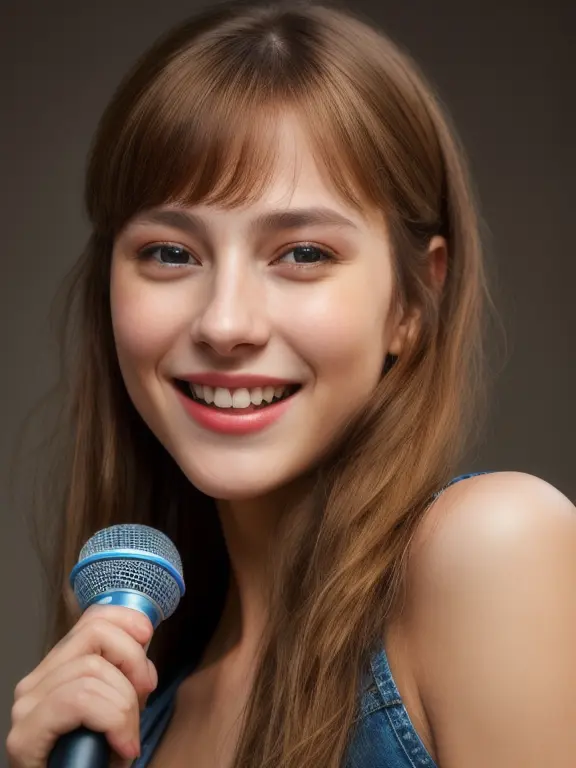
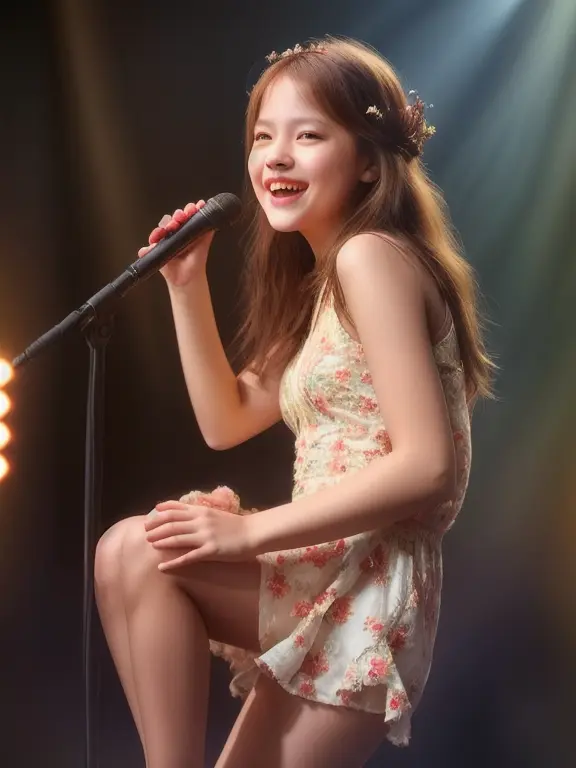
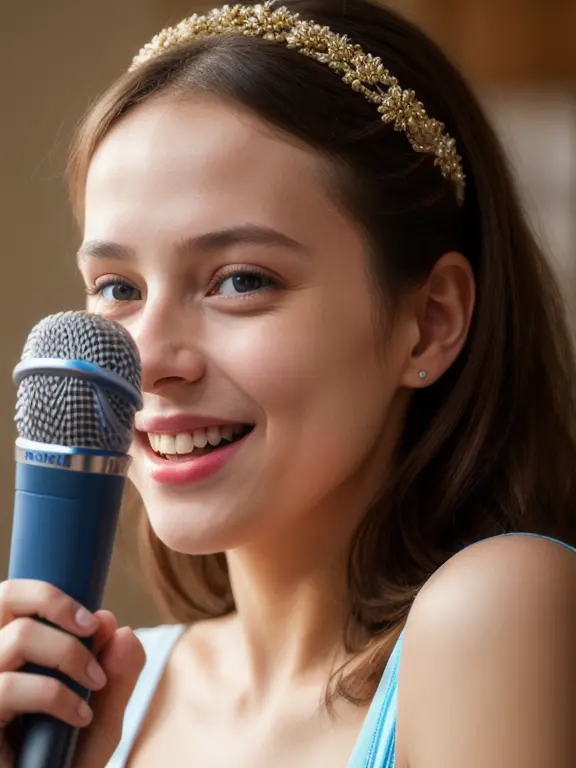
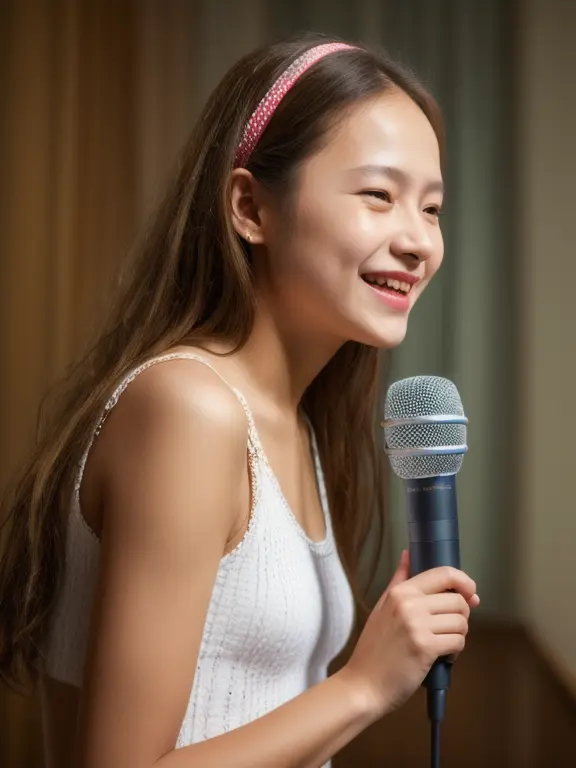
Note: To generate all the above images I don’t select the control mode model just use the prompt: “1girl, solo, looking at viewer, light smile, singing with microphone, best quality, masterpiece, realistic, photorealistic.”
Here my objective is to show you how the starting control step works with ending step 1 without a control mode model.
Threshold: When you select a processor, the option is displayed.
Here, you will find two types of thresholds: low threshold and high threshold.
Both range from 0 to 255, and for the low threshold, 100, and for the high threshold, 200, are the best values as they define the model’s capability.
If you choose a high value, your prompt may not work properly.

As I select the Canny model, it shows Canny Low Threshold and Canny High Threshold.
This option is not available for all control modes, from my experiment it is available on Canny and MLSD.
Control Mode: In ControlNet, there are 3 types of control modes.
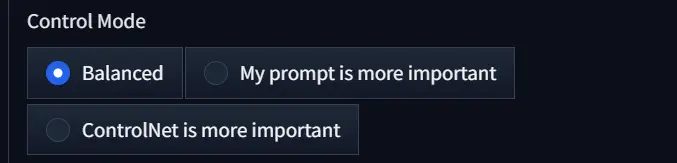
a) Balanced: When you select this option, the model tries to balance between your uploaded image and prompt.
b) My prompt is more important: If you choose this, the AI gives more importance to your prompt than to your uploaded image.
c) ControlNet is more important: It gives ControlNet more freedom to control the generated image.
Here are the images with all of the above modes:

Resize Mode: It depends on your uploaded image size. If you choose “Just Resize,” the model resizes the generated image to match your uploaded image.

But if you choose “Crop and Resize,” the model can crop the generated image, potentially cropping out parts of your image if they don’t fit the frame.
In our opinion, the best option is “Resize and Fill.” Below are examples of each of them.


To test the ‘Resize mode’ I choose the image size: 512*512.
You can ‘resize and fill’ is the best option to go, otherwise, you should determine the image size according to your uploaded image.
Now, let’s focus on the core of ControlNet.
That is processors that turn the uploaded images into a detectmap and ControlNet uses them to guide Stable Diffusion.
Control Types and Processors Explained
In ControlNet, processors are not physical processors like CPUs or GPUs, but rather neural network modules that operate within the software framework.
When you select the control type the WebUI automatically selects the related processor.
So, let’s see how all of these work with practical examples.
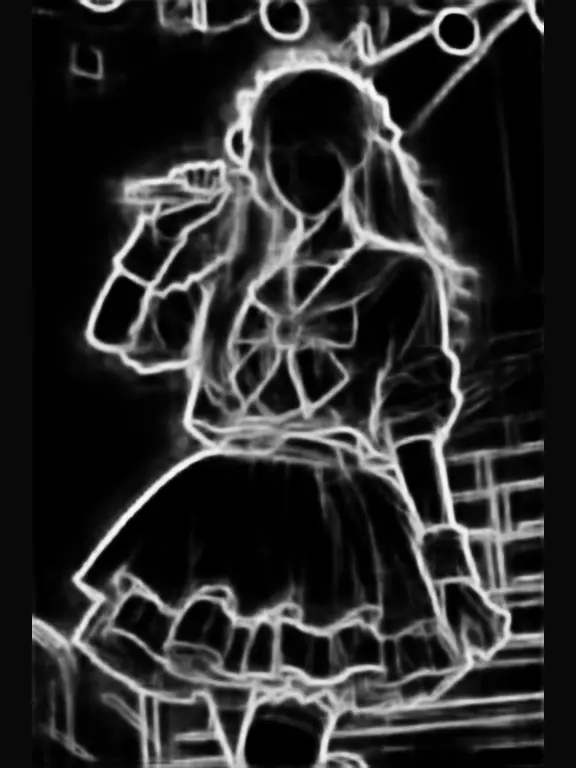
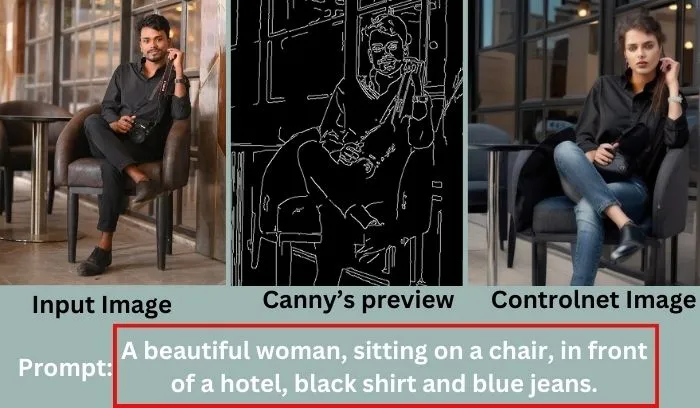
1. Canny:

The Canny processor finds edges and outlines in images using intensity thresholds as I mentioned earlier.
It helps to remove values below a low threshold and keeps those above a high threshold.
In canny thresholds are adjusted to control detail and Annotator resolution adjusts detectmap quality and VRAM usage.
2. Depth:
According to our experience, the depth processor is beneficial for positioning objects accurately in images, particularly for those that need to appear “near” or “far away.”
Lighter areas in the depth map represent proximity, while darker areas signify distance.
3. NormalMap:
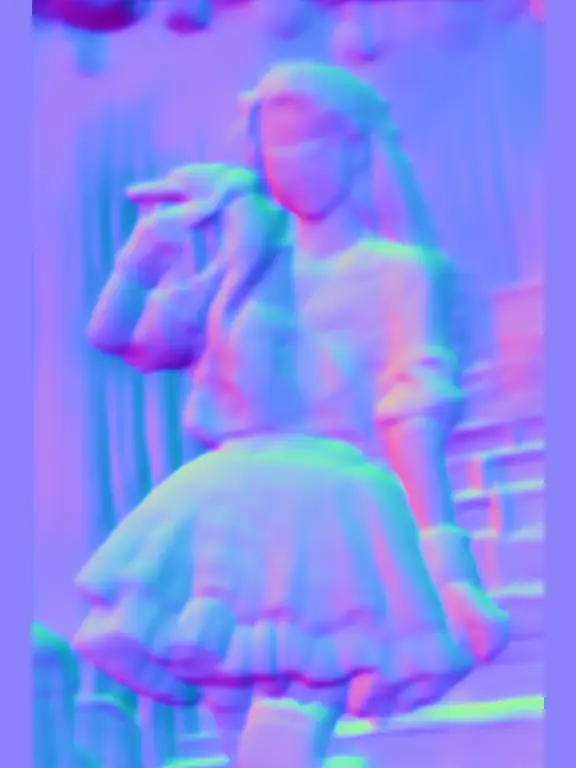
NormalMap is utilized in 3D modeling to define surface details such as bumps and creases without adding additional geometry.
It uses colors to determine the smoothness or bumpiness of an object’s surface in various directions.
Normal maps should be employed when intricate surface details are required, especially for positioning objects accurately within a scene.
They help enhance realism and reduce computational load compared to adding more geometry.
4. OpenPose:
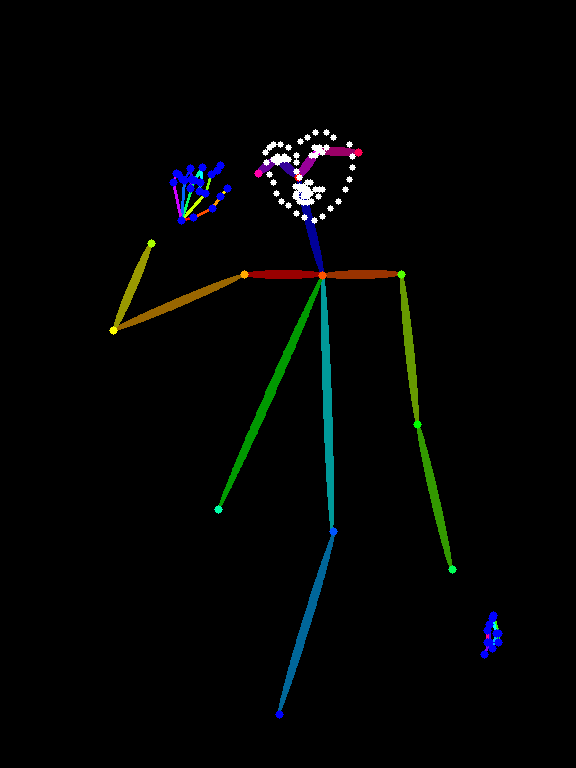
You can see it only generates a basic skeleton similar to the Pose for the image.
If you are struggling to fix poses of your generated character then openpose is your solution.
Know more about how to use OpenPose in stable diffusion to guide the AI in creating multiple consistent subjects.
5. MLSD:
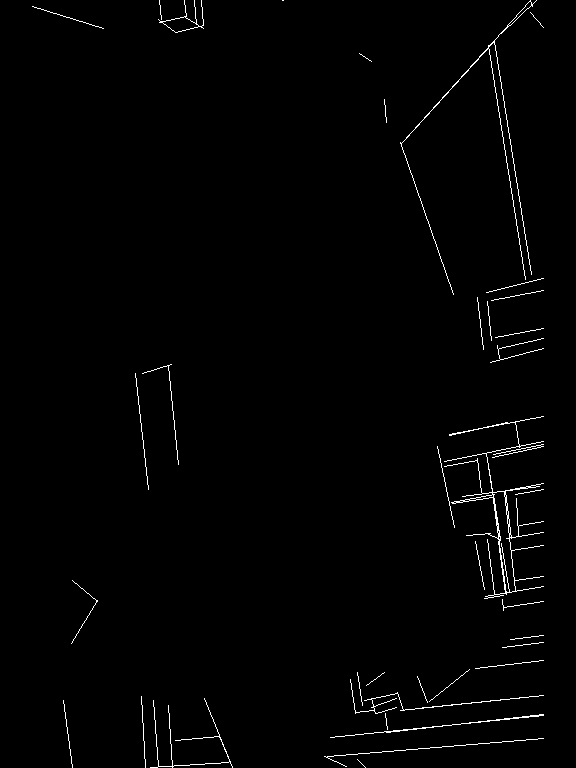
MLSD is good for finding straight lines and edges, that’s why you can see the processor is not following my prompt and uploaded image’s composition as my uploaded image is a girl.
So, it is clear that It is not very useful for organic shapes or soft smooth curves.
However, it’s great for architectural elements such as room interiors and isometric buildings.
Let’s look at a simple example with the following uploaded image.
Now, let’s create a simple prompt “An impressive interior design with all the furniture in the room, and various frames on walls.” and change the image size to 768*576.
If you want to know more about these landscape sizes read our post on Stable diffusion landscape prompts.
Okay, the result is:
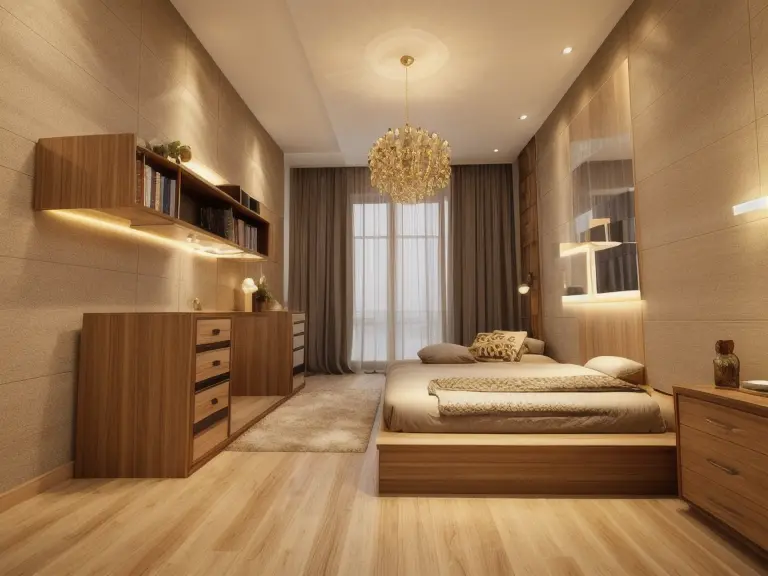
You can see how cool is the image, even the prompt is simple and does not properly describe the design.
Still, the processor has done its work.
So, it is clear that MLSD is best for architectural design.
6. LineArt:

Using ControlNet, especially with LineArt, to make artwork from basic doodles.
It helps simplify inputting a simple drawing and enables the AI to produce more intricate and artistic results similar to Canny.
7. SoftEdge:
SoftEdge is a preprocessor used for intricate details and outlines, such as those found in Canny and LineArt.
It provides softer, smoother outlines with minimal noise compared to Canny and LineArt.
Additionally, the processor is also known as Hed.
8. Scribble/Sketch:

Scribble is needed for processing simple black-and-white line drawings and sketches.
It allows us to upload images or create a blank canvas for manual sketching.
It also provides options for annotator resolution, which scales the image to create a detectmap, balancing VRAM usage and quality based on our preferences.
9. Segmentation:
Segmentation is needed to split an image into chunks of more or less related elements, a process known as “semantic segmentation.”
Actually, this technique is useful when you want to maintain consistent shapes of each chunk across different image generations.
Although fine detail and depth from the original image are lost, as seen on my image.
10. Tile/Blur:
The Tile processor detects the exact image as a detectmap, as you can see in the image.
You can use it in conjunction with SD upscale to help control artifacts.
When you enable the processor, you can see a new tool named ‘down sampling rate,’ as shown below, ranging from 0 to 8.

To assess its capability, I have conducted a test and found the results below.
Therefore, it is evident that a lower ‘down sampling rate’ means an exact composition, while a higher rate means it has more freedom to add extra composition.
11. InstructP2P:
InstructP2P is a processor that enables image rewriting based on given prompts.
In my experiments, when using this processor, ControlNet copies the uploaded image, which is why I don’t showcase it here.
The processor essentially operates based on your prompt.
For instance, if I mention ‘girl’ in my prompt, it processes the image accordingly.
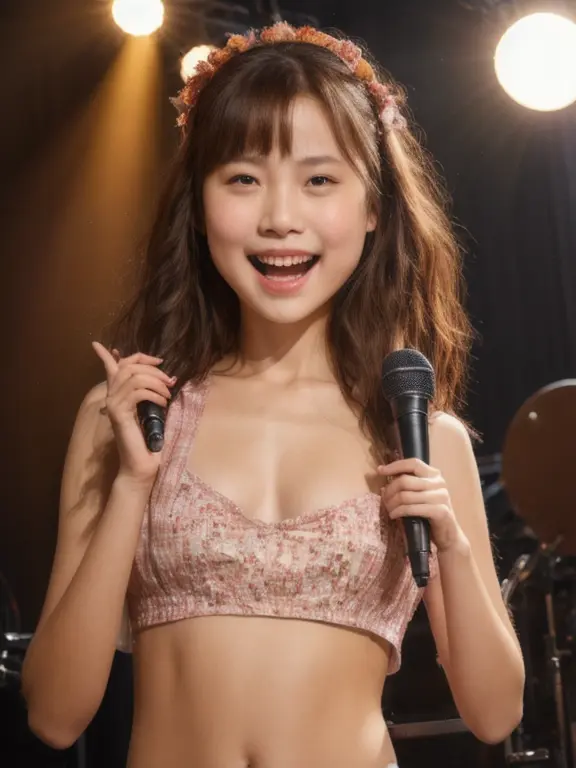
12. Reference:
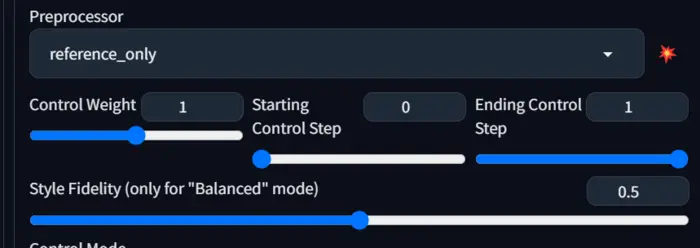
The processor uses your uploaded image as a reference to generate the next image.
When you enable it, a new tool called ‘style fidelity’ will activate automatically, ranging from 0.1 to 0.8, and it only works with Balanced mode.
It basically works according to our prompt, but a higher value of Style Fidelity gives the processor the freedom to control the generated image more closely based on the uploaded image.

13. Recolor:
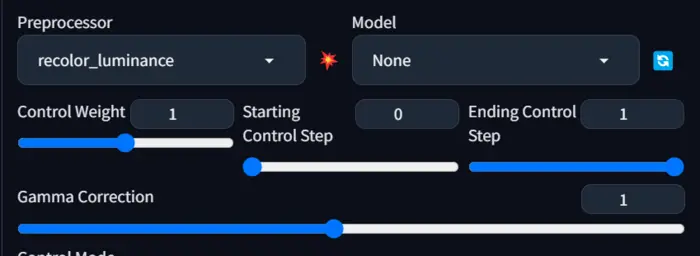
The recolor processor is your tool for upscaling the uploaded image reducing noise.
The crucial aspect is that it acts according to our prompt, so a properly described prompt may be a game-changer for this case.
When you enable it, a new option appears called ‘gamma correction,’ with values ranging from 0 to 2.
Now, let’s see how it works at different values.

So, it is clear that a lower value is closer to the uploaded image, while a higher value may result in a more resolute image but may deviate from the composition of the uploaded image.
14. Revision:
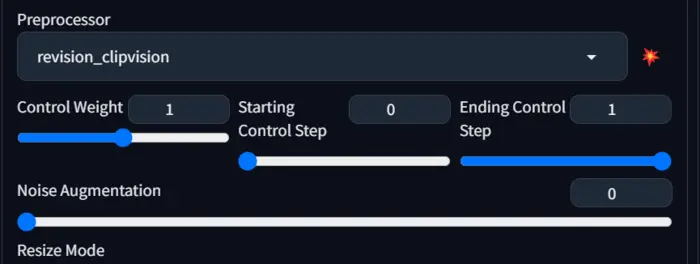
It has similar functionality to recolor, but in our opinion, it works better for upscaling and noise reduction.
The processor is controlled by Noise augmentation and it is automatically activated with the Revision processor.
Below are two results with two different values of noise augmentation.

I hope you also agree that it is better than Recolor.
In addition to the above 14 processors, we have seen 3 more processors: T2I-Adapter, IP-Adapter, and Instant_ID in our updated ControlNet.
In our experience, only IP-Adapter can help you to do image prompting in stable diffusion and to generate consistent faces.
But the remaining have not many use cases.
However, for your convenience, I have conducted a test and showcased their results below.
So, if you like the results, you can try them out on your end.
That’s all about processors for now.
If you want to update your controller and explore new features, follow the steps below.
Updating the ControlNet extension
There are two main ways to update the ControlNet extension in Automatic1111, depending on whether you have the “Unprompted” extension installed or not.
Here’s how to do it for both methods:
Method 1: Using the “Unprompted” extension (recommended):
1. Open the “Extensions” tab in Automatic1111.
2. Select the “Installed” tab.
3. Find the “Unprompted” extension and click on the “Check for updates” button.
4. If an update is available, click on “Apply and restart UI”.
5. Completely restart Automatic1111, including the terminal.
This ensures all changes take effect and your Controlnet will be updated.
Method 2: Manual update:
1. Download the latest version of the ControlNet extension from the GitHub repository.
2. Extract the downloaded file to your Automatic1111 extensions folder. This is usually located at `\stable-diffusion-webui\extensions`.
3. Overwrite any existing files with the same name.
4. Download the latest ControlNet model files you want to use from Hugging Face.
5. Place the downloaded model files in the `\stable-diffusion-webui\extensions\sd-webui-controlnet\models` folder.
6. Restart Automatic1111.
That’s all your controller is updated but if you encounter any issues during the update process, refer to the ControlNet extension’s documentation on GitHub for troubleshooting.
Now, if still confused about ControlNet’s functionality, just read the below section and make it clear.
How Does ControlNet Work?
Imagine ControlNet in Stable Diffusion as a skilled conductor leading an orchestra.
While Stable Diffusion sets the overall tone based on your text prompt, ControlNet steps in like a conductor, giving specific instructions to individual instruments for a harmonious performance.

Here are the steps of how the process works:
1. ControlNet Analysis: First, it extracts specific details from the control map like object poses.
2. Combined Information: Next, Stable Diffusion receives both the text prompt and the refined control map, blending the general theme with precise instructions.
3. Enhanced Control in Image Generation: Finally, Stable Diffusion uses this combined input to generate an image that follows your text prompt while incorporating detailed instructions from the control map.
You can see together, these elements craft an image reflecting your vision with superior precision and control, surpassing the results achievable using just a text prompt.
Now, let’s create a table on ControlNet stable diffusion vs stable diffusion without Controlnet.
Stable Diffusion: With ControlNet vs Without ControlNet
| Feature | Without ControlNet | With ControlNet |
|---|---|---|
| Image Quality | Good, but limited by diffusion process | Potentially higher, allows for more fine-grained control |
| Level of Control | Good, but limited by the diffusion process | High, allows for direct manipulation of image features |
| Editing Capabilities | Basic editing is possible with inpainting and outpainting | Advanced editing possible with semantic segmentation and style transfer |
| Memory Usage | Moderate, depending on image size and complexity | Higher, requires additional resources for ControlNet model. |
Now, if you are thinking about the speed of your WebUI, read our post on stable diffusion Xformers to make it faster.
That’s all for today.
If I missed something that should be covered here, please let me know by commenting below.

Hi there! I’m Zaro, the passionate mind behind aienthusiastic.com. With a background in Electronics Science, I’ve had the privilege of delving deep into AI and ML. And this blog is my platform to share my enthusiasm with you.